

Git Deploy
Git Deploy turns any Docker-enabled instance into a deployment target for source code in a Git repository. Connect your Git provider once, point an application at a repository and branch, and every push to that branch is built and deployed automatically. Pull requests can each get their own throw-away preview environment with a unique URL, posted back to the pull request as a comment.
Supported providers: GitHub, GitLab, Bitbucket and Gitea.
Concepts
Section titled “Concepts”- Git source: the connection to a provider account. One source can serve many applications.
- Git application: one deploy target: a repository, a branch and a target instance.
- Build pack: how source code becomes a running container.
NixpacksandRailpackauto-detect the language (no Dockerfile needed);Dockerfilebuilds the repo’s own Dockerfile;Composeuses its Docker Compose file;Staticserves the files with a static web server;Imageruns a prebuilt image. - Zero-downtime deploy: the new container starts, must pass its health check, and only then does traffic switch over. A failed build leaves the previous version untouched.
- Preview environment: a temporary deployment for one pull request, with its own URL, removed when the pull request closes or merges.
Before you begin
Section titled “Before you begin”- A running instance with Docker installed (tick Install Docker Engine & Docker Compose at create time, or install it later from the instance’s Docker section). See Docker Manager.
- The instance needs outbound internet access to pull build dependencies.
Where to find it
Section titled “Where to find it”In the user panel go to Deploy > Git sources for provider connections and Deploy > Git applications for deploy targets.
Connect a Git source
Section titled “Connect a Git source”-
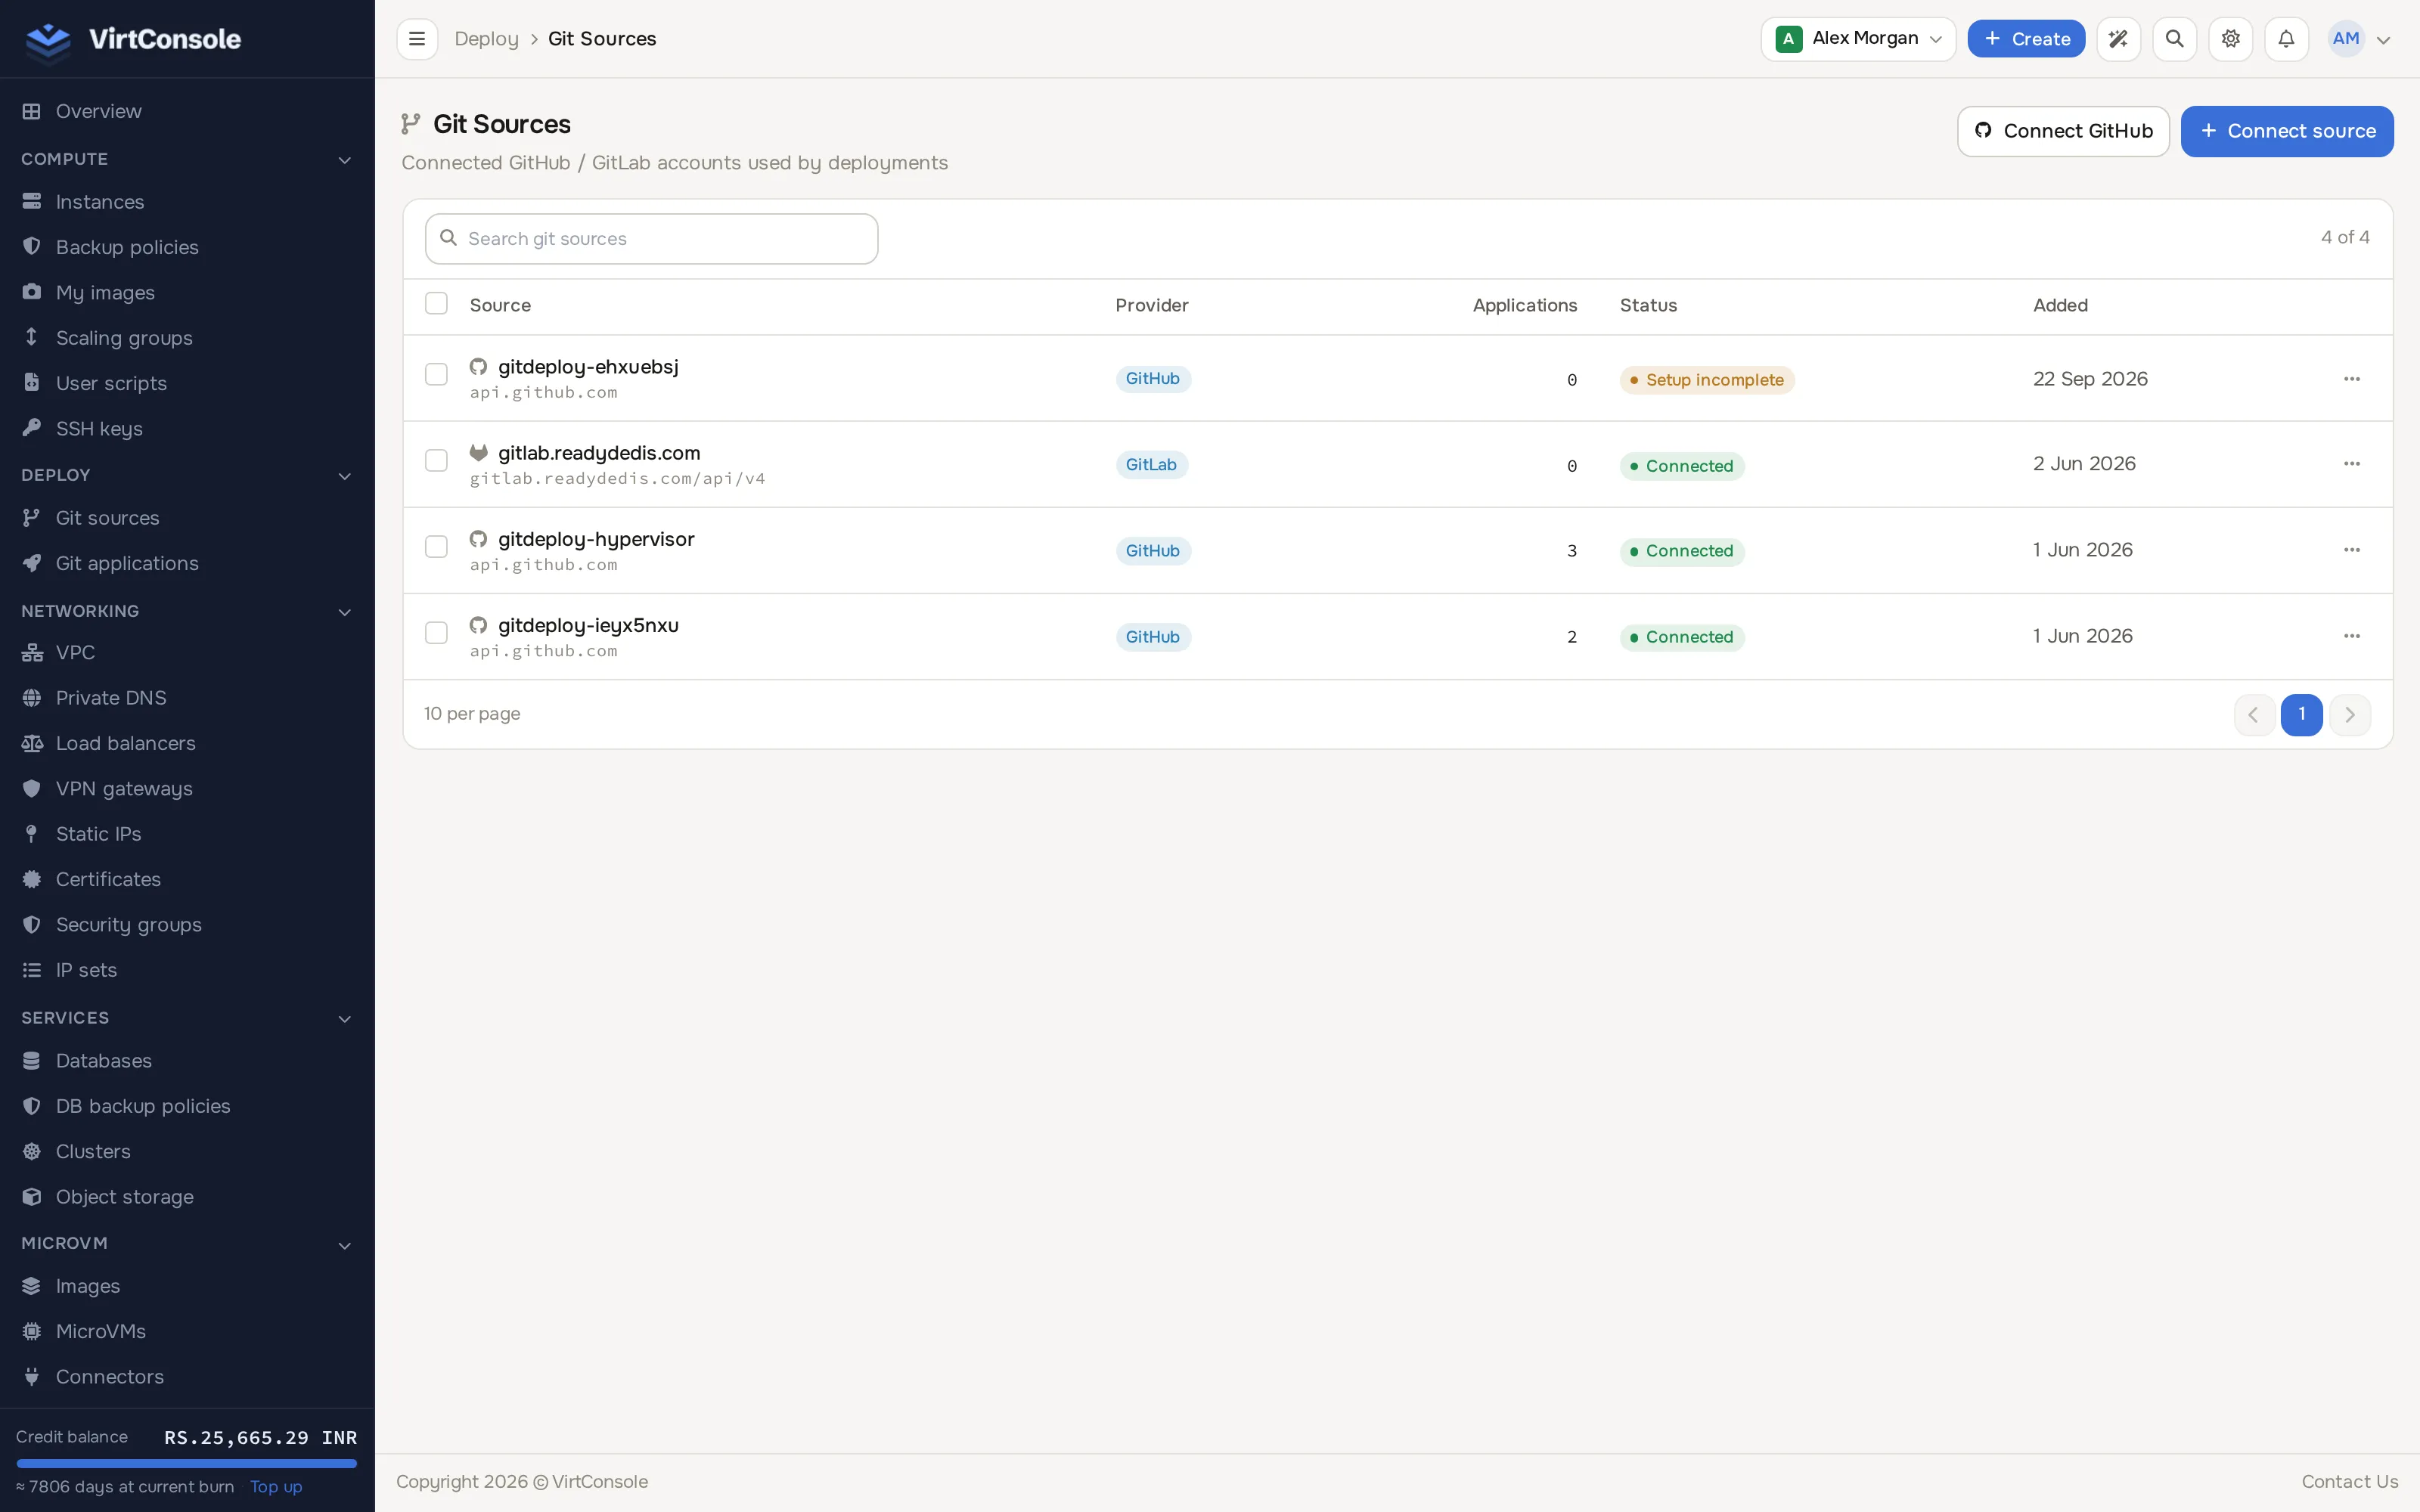
Go to Deploy > Git sources.
-
For GitHub, click Connect GitHub and walk through the GitHub App setup; push and pull-request webhooks register automatically. For GitLab, Bitbucket or Gitea, click Connect source. The Add Git Source dialog opens.
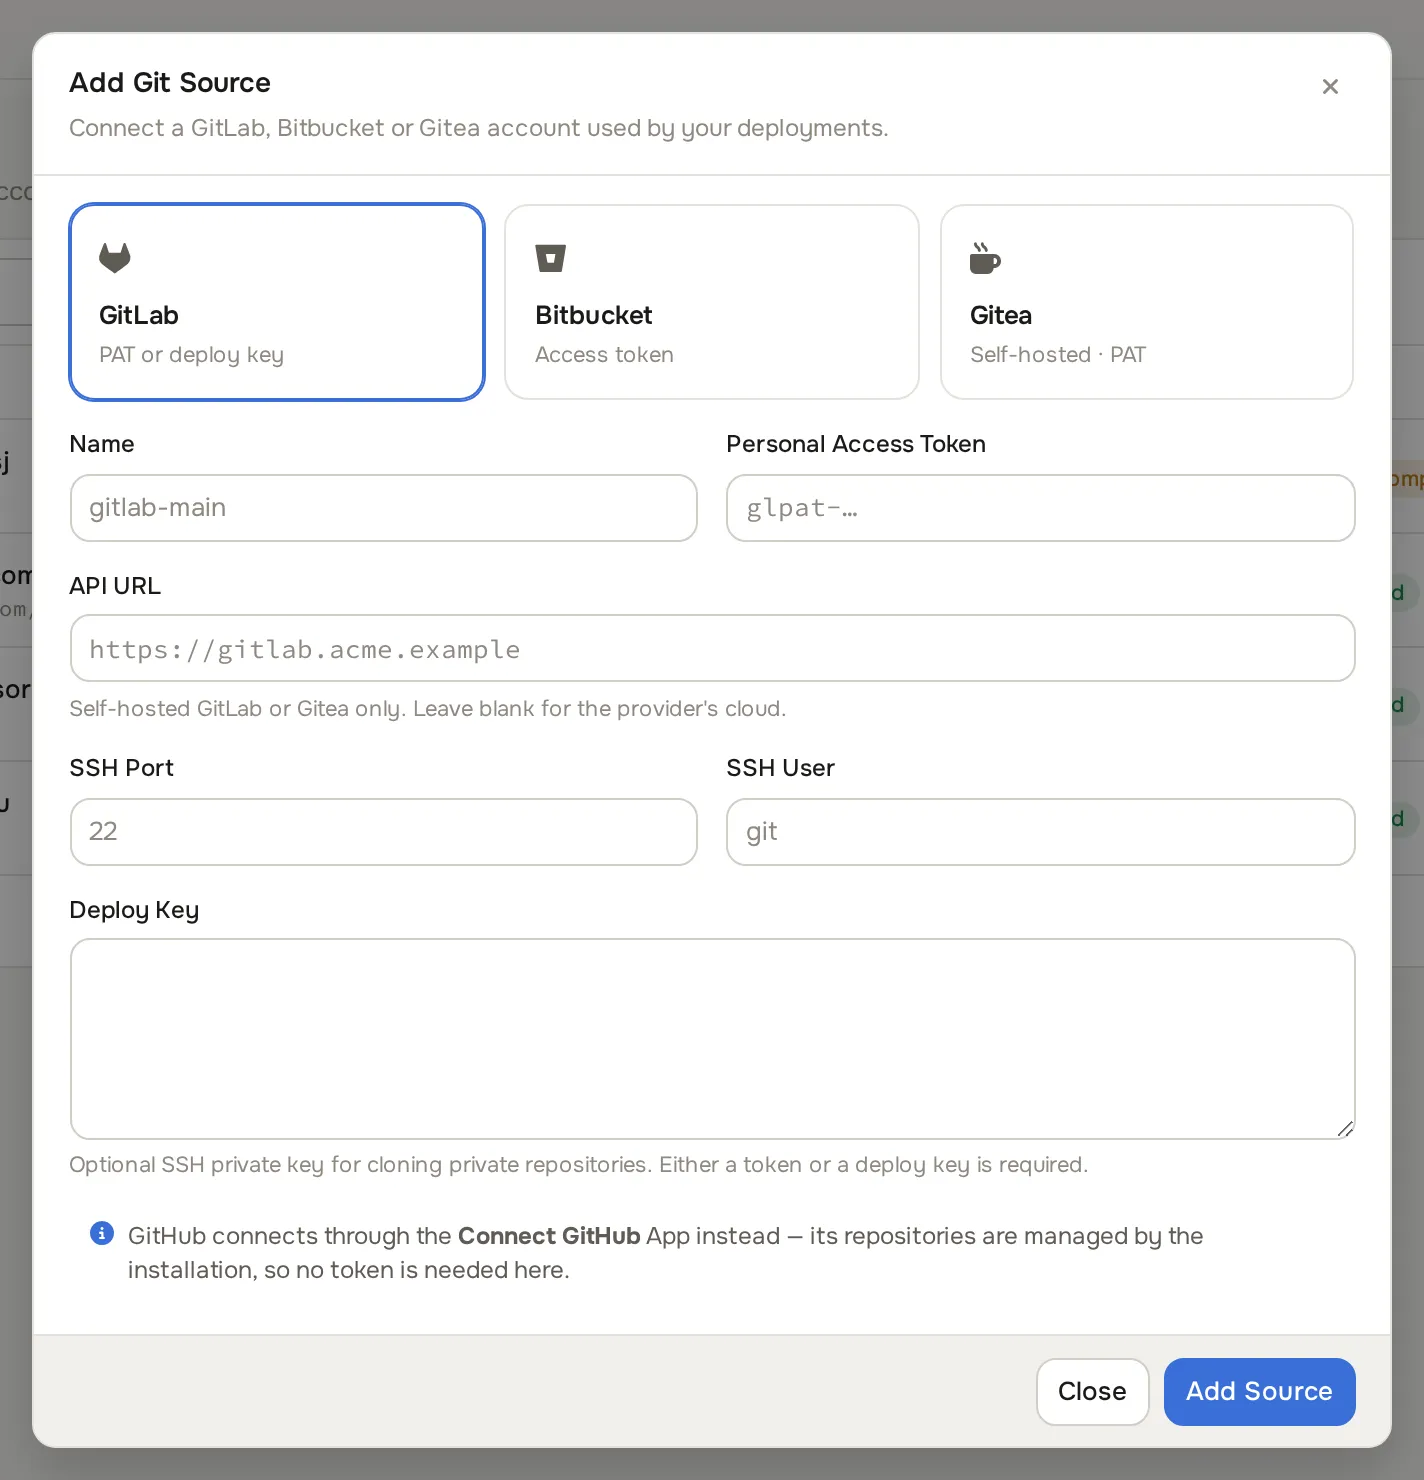
Paste a personal access token, plus optionally a deploy key for SSH clones.
-
For GitHub, grant the app access to repositories from the source’s Install / Repositories action if the repository dropdown is empty later.
Enable Git Deploy on the instance
Section titled “Enable Git Deploy on the instance”When you create your first application, the form checks whether the deploy key is installed on the target instance. If not, you get two options:
- Automatic: the key is pushed in via the instance’s guest agent and the connection is verified.
- Manual: copy the shown public key into
/root/.ssh/authorized_keyson the instance yourself, then click Test connection. If SSH runs on a non-standard port, set the VM SSH port field first.
Create an application
Section titled “Create an application”- Go to Deploy > Git applications and click New application. The Create Git Application dialog opens.
- Pick the target Instance and the Git source, then the repository and Branch.
- Pick the Build pack and fill in its options (for example base directory or Dockerfile location).
- Add Environment variables as key-value pairs. Values are write-only and never displayed back.
- Set the automation toggles: Auto deploy on push and Pull-request previews.
- Click Create Application.
The Git Applications list shows each application’s branch, build pack, last deploy, status and auto-deploy toggle, plus a Preview environments table below it.
Deploys
Section titled “Deploys”Three things trigger a deploy: clicking Deploy now, a push to the branch (with auto deploy on), or pull-request activity (with previews on). Only one deploy per application runs at a time. Build logs stream live on the application, with tokens and credentials automatically hidden. Including [skip ci] or [skip cd] in a commit message skips the auto-deploy.
The first deploy on an instance also sets up a small reverse proxy container; every app is routed through it and gets HTTPS automatically with a free certificate.
Preview environments
Section titled “Preview environments”With previews on, opening a pull request deploys the PR branch as a separate application with its own URL; new commits redeploy it; closing or merging the PR tears it down; reopening brings it back. A status comment with the preview URL is posted on the pull request. Previews run as separate containers alongside production on the same instance, so production traffic is unaffected.
Preview hostnames look like pr42-myapp.203-0-113-10.sslip.io (sslip.io resolves the IP embedded in the name, no DNS setup needed), or pr42.example.com when the application has a custom domain. The Preview environments table on the Git Applications page lists active previews; click Tear down to remove one manually.
For a one-off deploy from a public repository without creating an application, use Deploy from Source on the instance’s Docker section instead.
Common problems
Section titled “Common problems”- “The git-deploy key is not installed on this instance.” Enable Git Deploy on the instance from the application form’s build host panel, or from the instance’s Docker section.
- The automatic key install fails. The guest agent is unavailable. Use the manual path: paste the public key into
/root/.ssh/authorized_keys, then Test connection. - The repository dropdown says “not installed on any repositories”. The GitHub App has no repository access yet. Grant it from the source’s Install / Repositories action.
- Repository browsing is unavailable for GitLab/Bitbucket/Gitea. The personal access token is missing or invalid. Update it on the source.
- Bitbucket pushes never deploy. Bitbucket Cloud does not sign webhooks natively. Configure the webhook to send a signed
X-Hub-Signature: sha256=<hmac>header using the source’s webhook secret, or the event is rejected. - “A deployment is in progress.” One deploy per application at a time. Wait for it to finish.
- HTTPS certificates fail to issue, or builds fail at “pulling image”. The instance has no outbound internet access. Let it reach the internet on port 443 and retry.