

Mass mail
Mass mail sends one email to a filtered slice of your customers in a single run. It is the tool for “scheduled maintenance on Sunday” or “price change next month”, not a marketing automation system.
Before you begin
Section titled “Before you begin”- Outbound mail is configured and working; check the status dot for Mail on the admin dashboard.
Where to find it
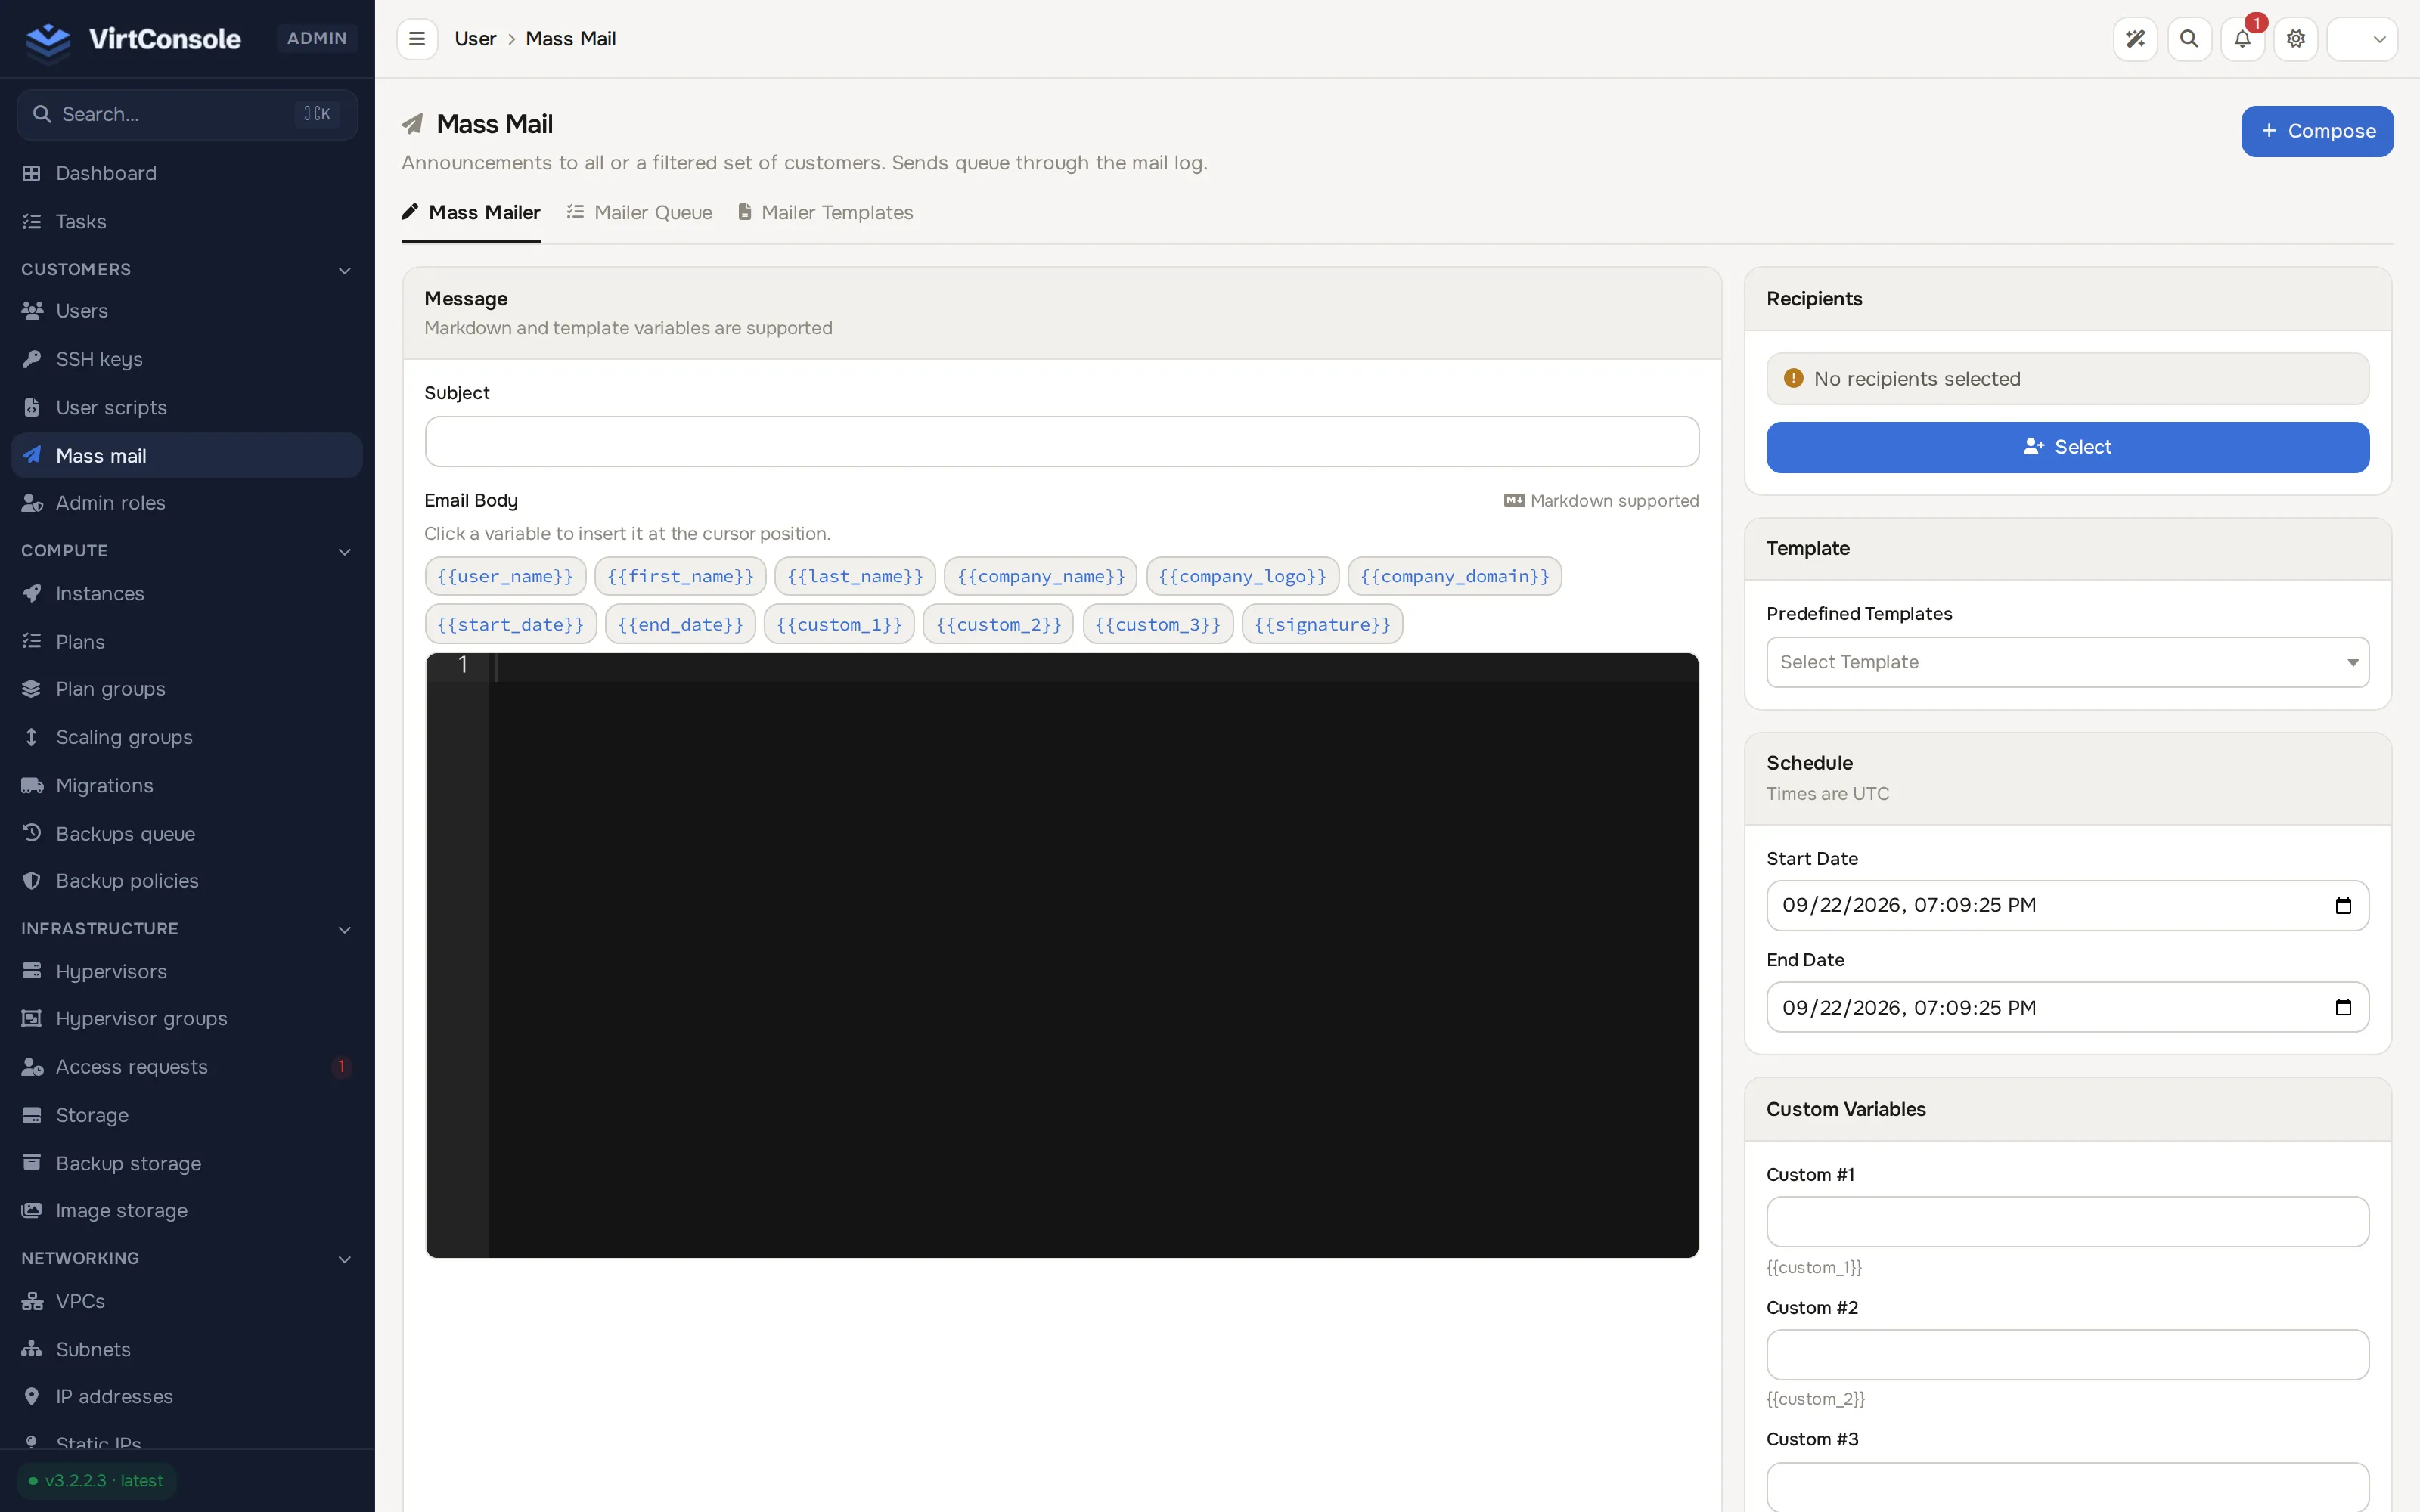
Section titled “Where to find it”In the admin panel go to Customers > Mass mail. The page opens on the Mailer Queue tab; the other two tabs are Mass Mailer (compose) and Mailer Templates (saved drafts). Click Compose in the top-right corner (or the Mass Mailer tab) to start a new campaign.
Send a campaign
Section titled “Send a campaign”-
Click Compose, then on the Mass Mailer tab enter a Subject.
-
Write the Email Body. Markdown is supported. Click a variable chip above the editor to insert it at the cursor; each recipient gets their own values. Available variables:
{{user_name}},{{first_name}},{{last_name}},{{company_name}},{{company_logo}},{{company_domain}},{{start_date}},{{end_date}},{{custom_1}},{{custom_2}},{{custom_3}}and{{signature}}. -
Click Select (or Modify, once an audience is already picked) under Recipients. The Select Recipients dialog opens with a tab per audience type:
- All Users: every account, with optional Exclude inactive users and Exclude admins switches.
- Selected Users: hand-pick accounts by name or email.
- Hypervisors: every user with an instance on the selected hypervisors.
- Hypervisor Groups: every user with an instance on the selected groups’ hypervisors.
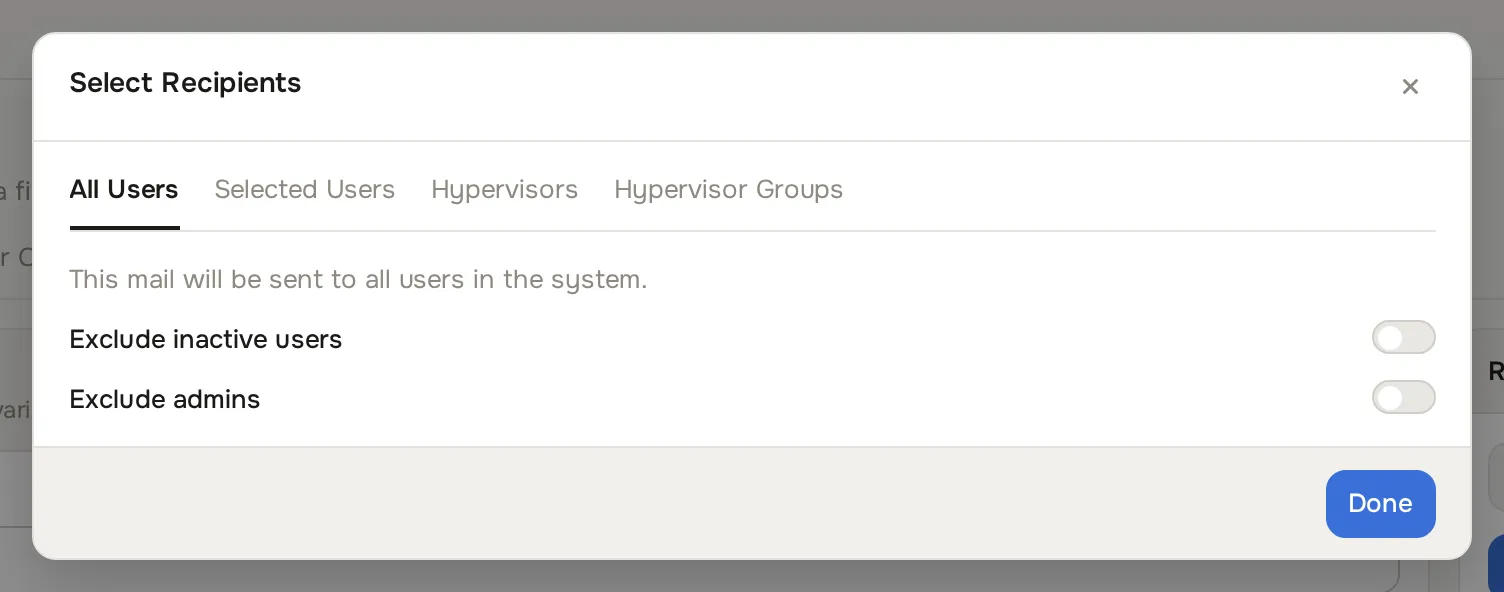
Click Done. The recipient summary above the button shows what you picked.
-
Optionally pick a saved draft from Predefined Templates to fill the subject and body.
-
Set the Schedule: Start Date and End Date in UTC. These fill the
{{start_date}}and{{end_date}}variables (handy for announcing a maintenance window); they do not delay sending. -
Fill Custom #1 to Custom #3 if your body uses the
{{custom_1}}to{{custom_3}}variables. -
Pick the Interval between emails, from
0 seconds (fastest)up to5 seconds. Use a slower interval when your mail provider rate-limits you. -
Click Create. The panel shows a success banner and queues the campaign.
The campaign appears on the Mailer Queue tab as Pending.
To reuse the message later, click Save as Template before or after creating, give it a Template Name, and save. Templates live on the Mailer Templates tab.
Watch and control the queue
Section titled “Watch and control the queue”The Mailer Queue tab lists every campaign with its Subject, Status, Recipients (sent / pending / failed counts), a live Progress bar and Scheduled time. Statuses: Pending, Processing, Completed, Failed, Paused.
- Click the play button on a Pending row to start sending.
- Click the pause button on a running campaign to pause it, and play again to resume.
- Completed and failed campaigns cannot be restarted.
What happens next
Section titled “What happens next”Once started, the panel works through the recipient list at the interval you set. Every sent message is recorded, and you can inspect delivery on Logs > Email log. Failed recipients stay counted on the queue row.
Common problems
Section titled “Common problems”- Create does nothing or errors. No audience is selected. Open Select under Recipients and pick at least one recipient source; the summary must not say “No recipients selected”.
- Many recipients show as failed. Your mail provider is throttling or rejecting. Pause the campaign, raise the interval, then resume. Check Logs > Email log for the exact error.
- A variable renders literally in the received mail. It was typed instead of inserted, or a custom variable field was left empty. Insert variables with the chips and fill Custom #1-3 when you use them.