

VPCs
A VPC (Virtual Private Cloud) is an isolated private network a customer defines in the panel. Instances in a VPC talk over private IPs even when they run on different hypervisors. The overlay uses VXLAN over a dedicated secondary NIC on each hypervisor.
Before you begin
Section titled “Before you begin”- A dedicated secondary NIC on every hypervisor in the group, connected to a shared VLAN or switch. All hypervisors in the group must sit on the same layer-2 segment.
- The NIC carries VXLAN traffic on UDP port 4789.
Enable VPC on a hypervisor group
Section titled “Enable VPC on a hypervisor group”- Go to Infrastructure > Hypervisor groups and open the group.
- Click the Networking tab.
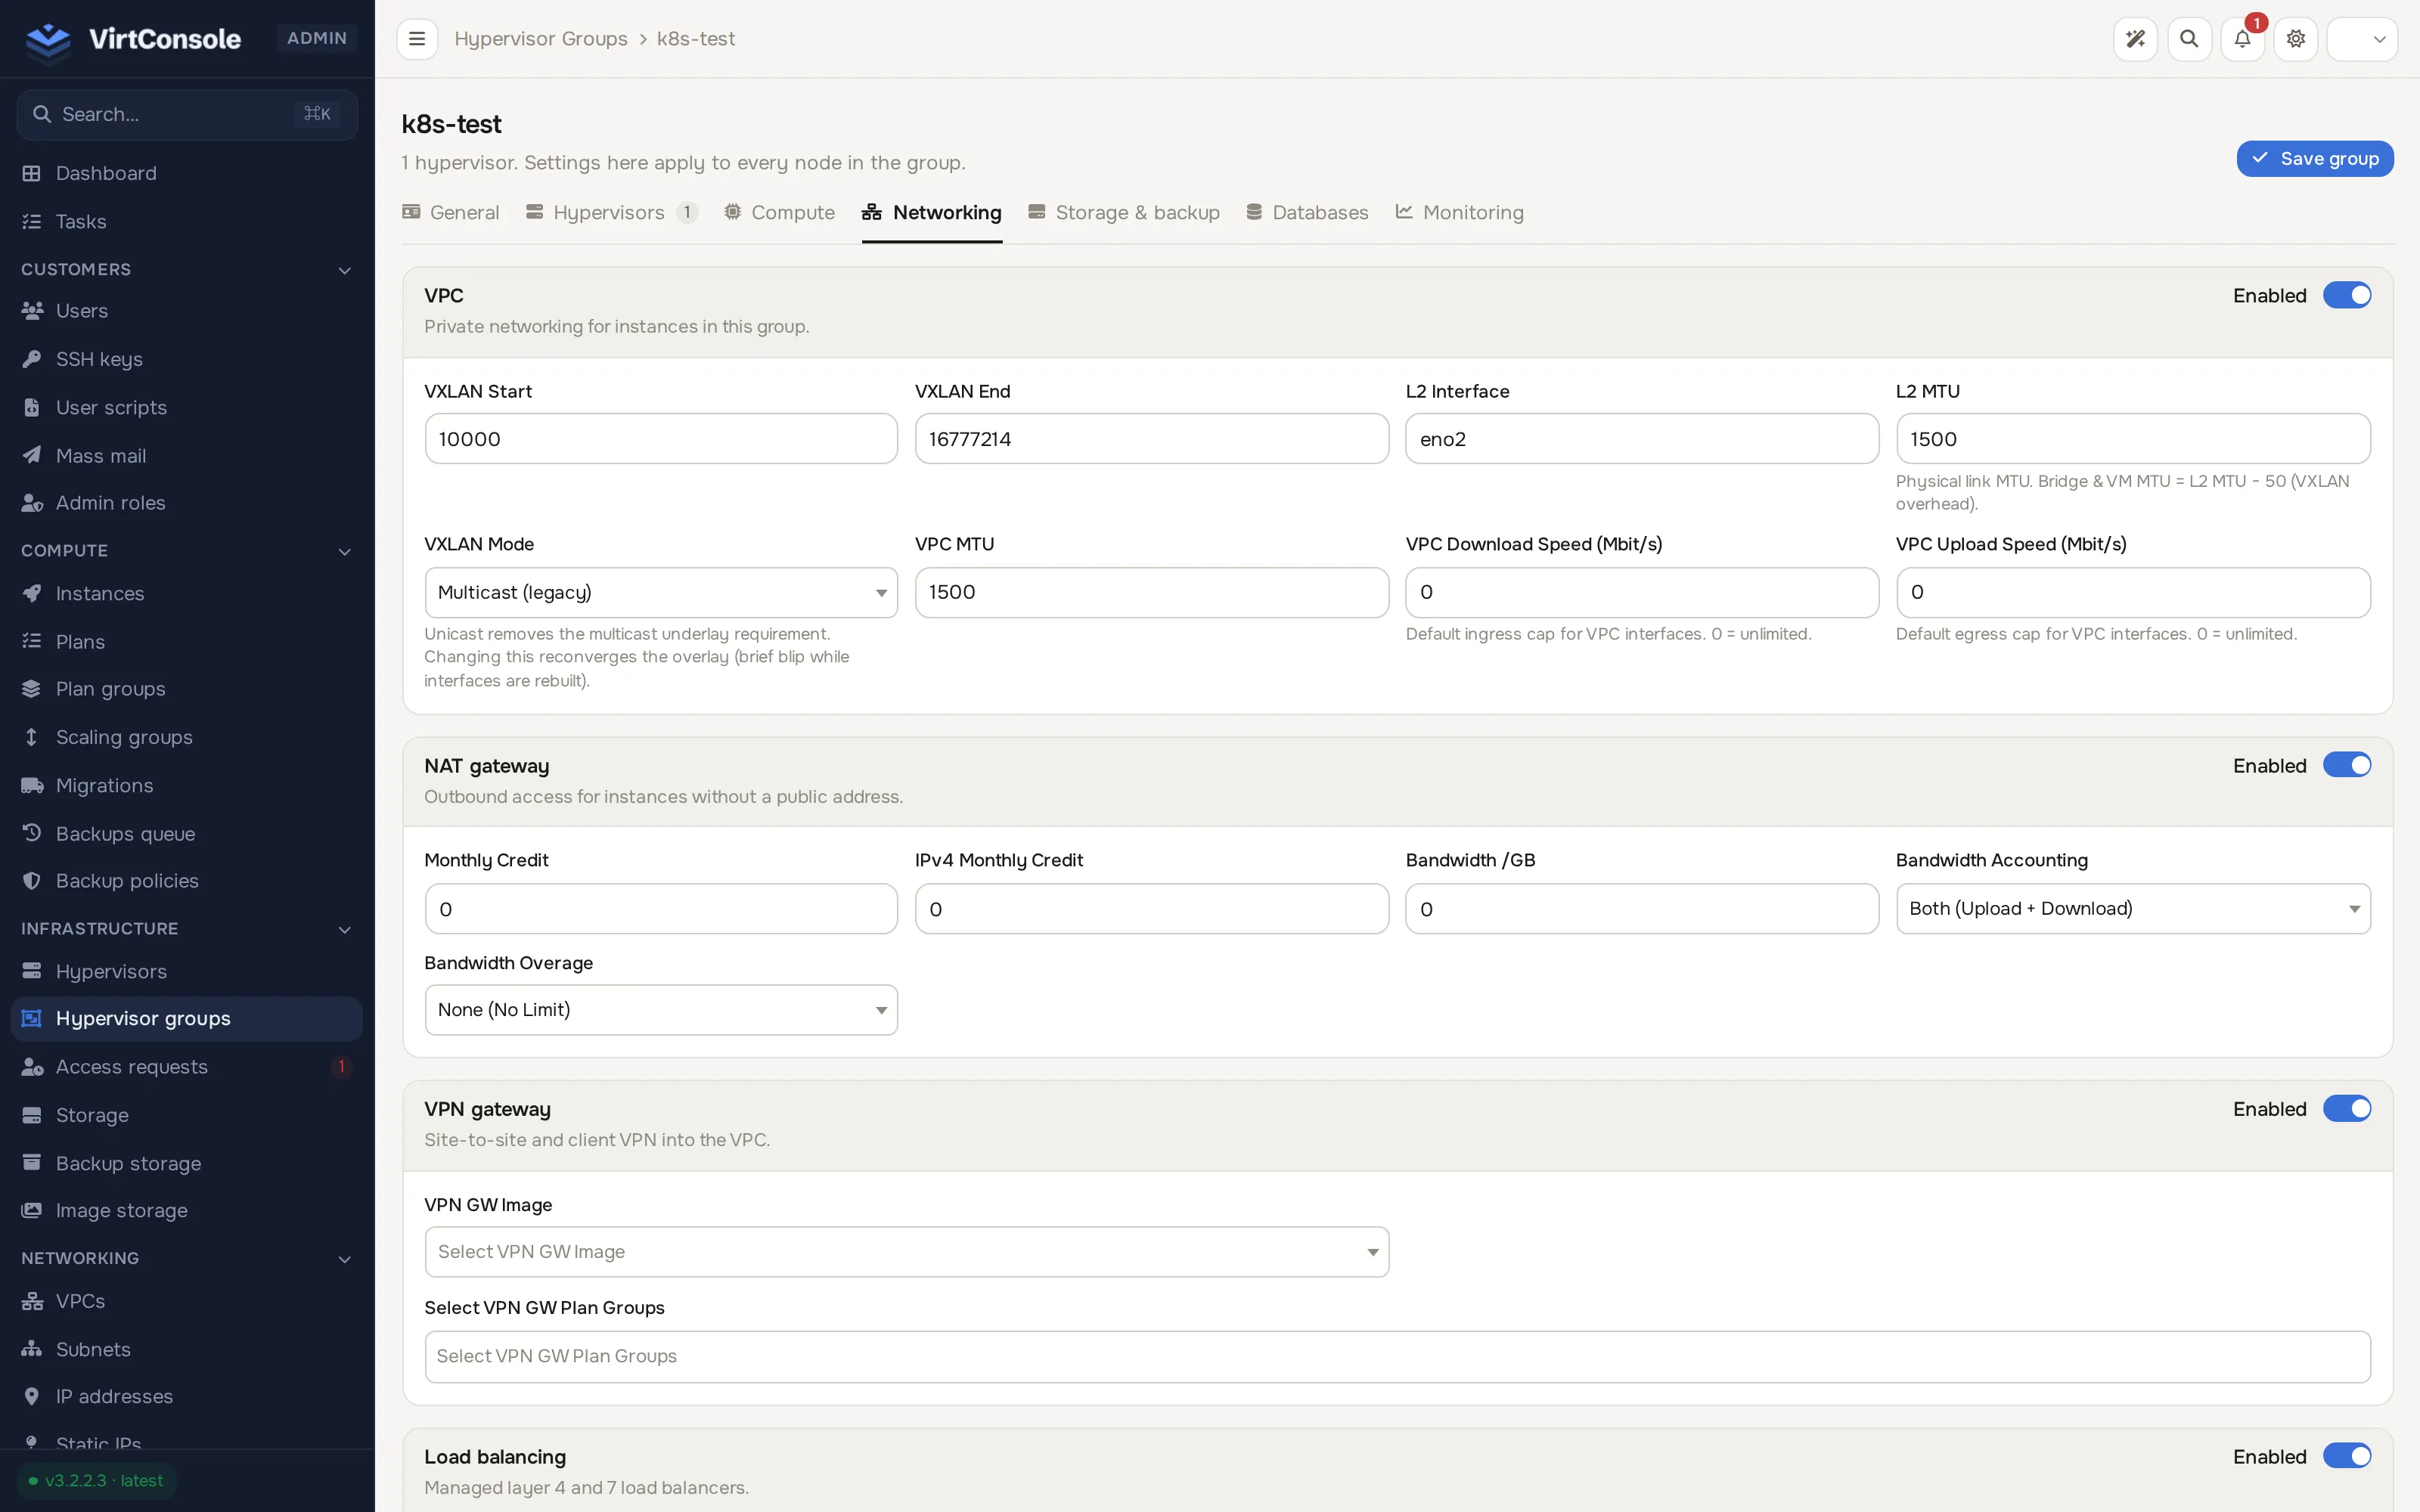
- In the VPC section, turn on its Enabled toggle.
- Fill in the overlay fields:
Fields
| Field | What to enter | Default |
|---|---|---|
| VXLAN Start / VXLAN End | The ID range VPCs draw from. Each VPC consumes one ID. | 10000 / 16777214 |
| L2 Interface | The secondary NIC that carries VXLAN traffic, for example eth1. |
none |
| L2 MTU | The physical link MTU. Bridge and VM MTU become this value minus 50 (VXLAN overhead). | 1500 |
| VXLAN Mode | Multicast (legacy) or Unicast (head-end replication). Unicast removes the multicast underlay requirement. Changing it reconverges the overlay with a brief blip while interfaces rebuild. | Multicast |
| VPC MTU | The MTU inside the VPC. | none |
| VPC Download Speed (Mbit/s) / VPC Upload Speed (Mbit/s) | Default caps for VPC interfaces. 0 = unlimited. |
0 |
- Click Save group.
After saving, the panel assigns each hypervisor a link-local IP (169.254.x.x) for the overlay control plane. It appears as the VPC Link-Local IP column on the group’s Hypervisors tab.
Enabling VPC also unlocks the NAT gateway, VPN gateway, and Load balancing sections further down the same tab; each has its own Enabled toggle. See NAT gateways and VPN gateways.
View and manage VPCs
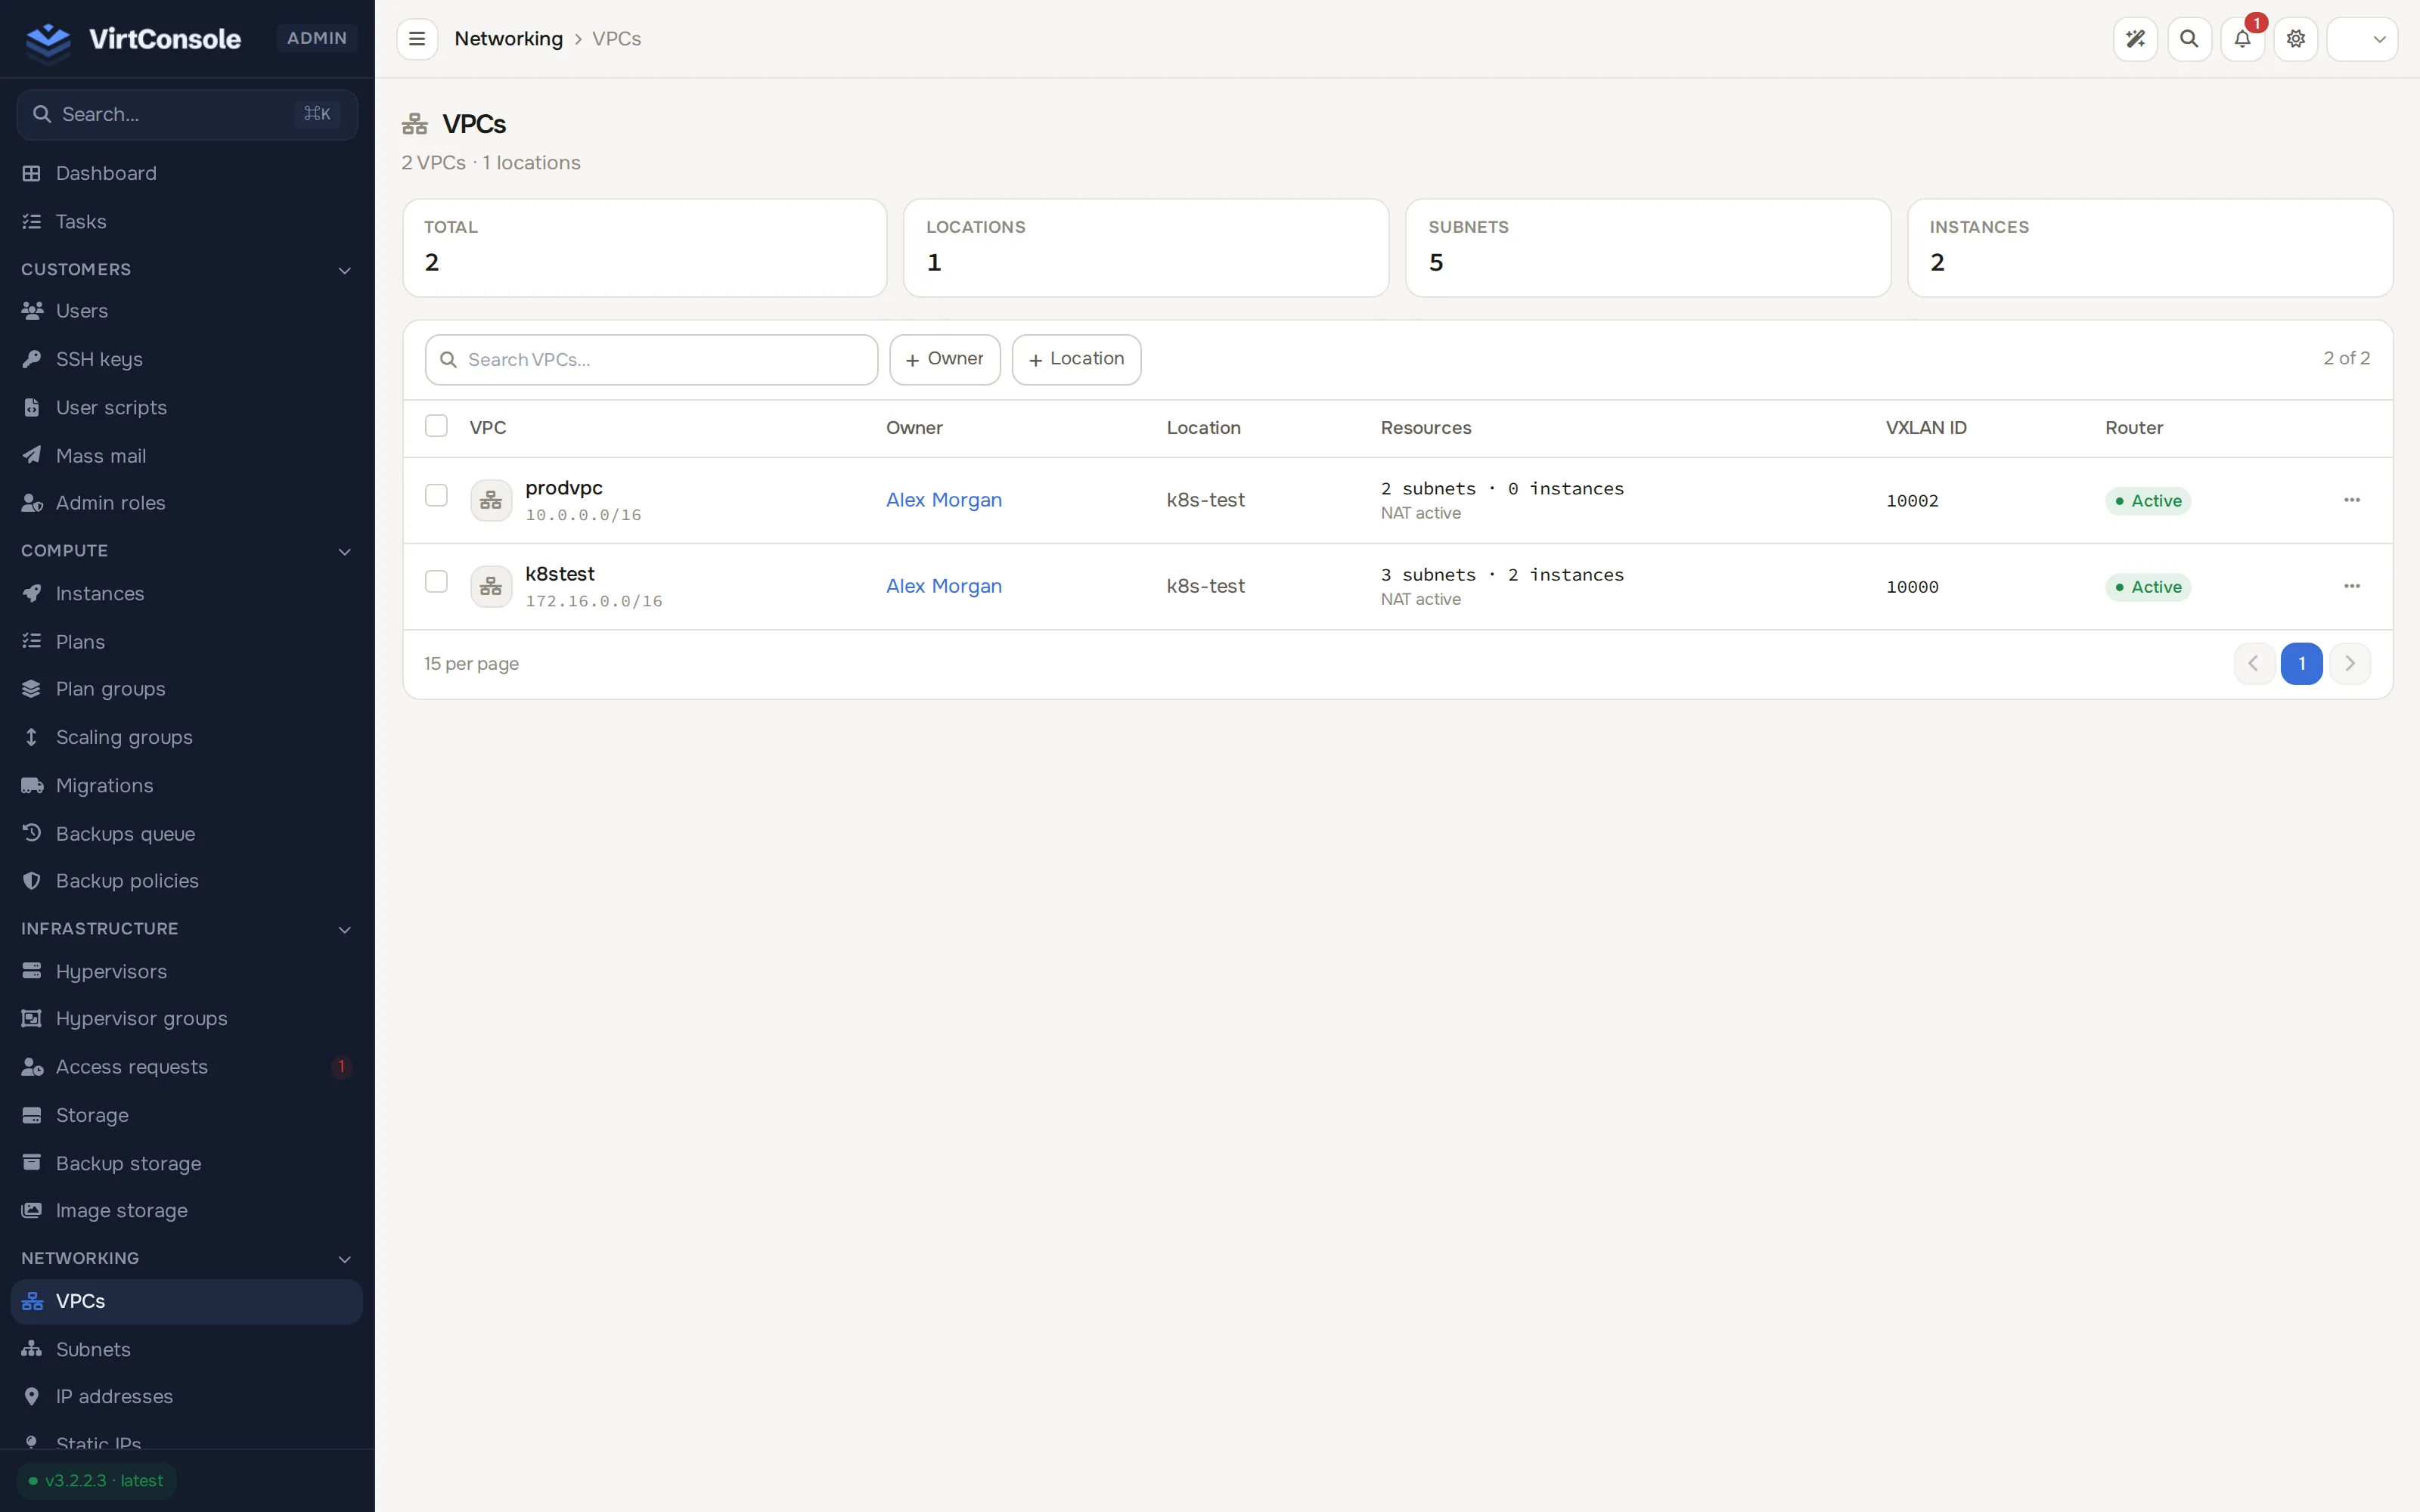
Section titled “View and manage VPCs”Customers create their own VPCs from the user panel. In the admin panel go to Networking > VPCs for the global list: name, owner, location, subnets/instances, VXLAN ID, and router status.
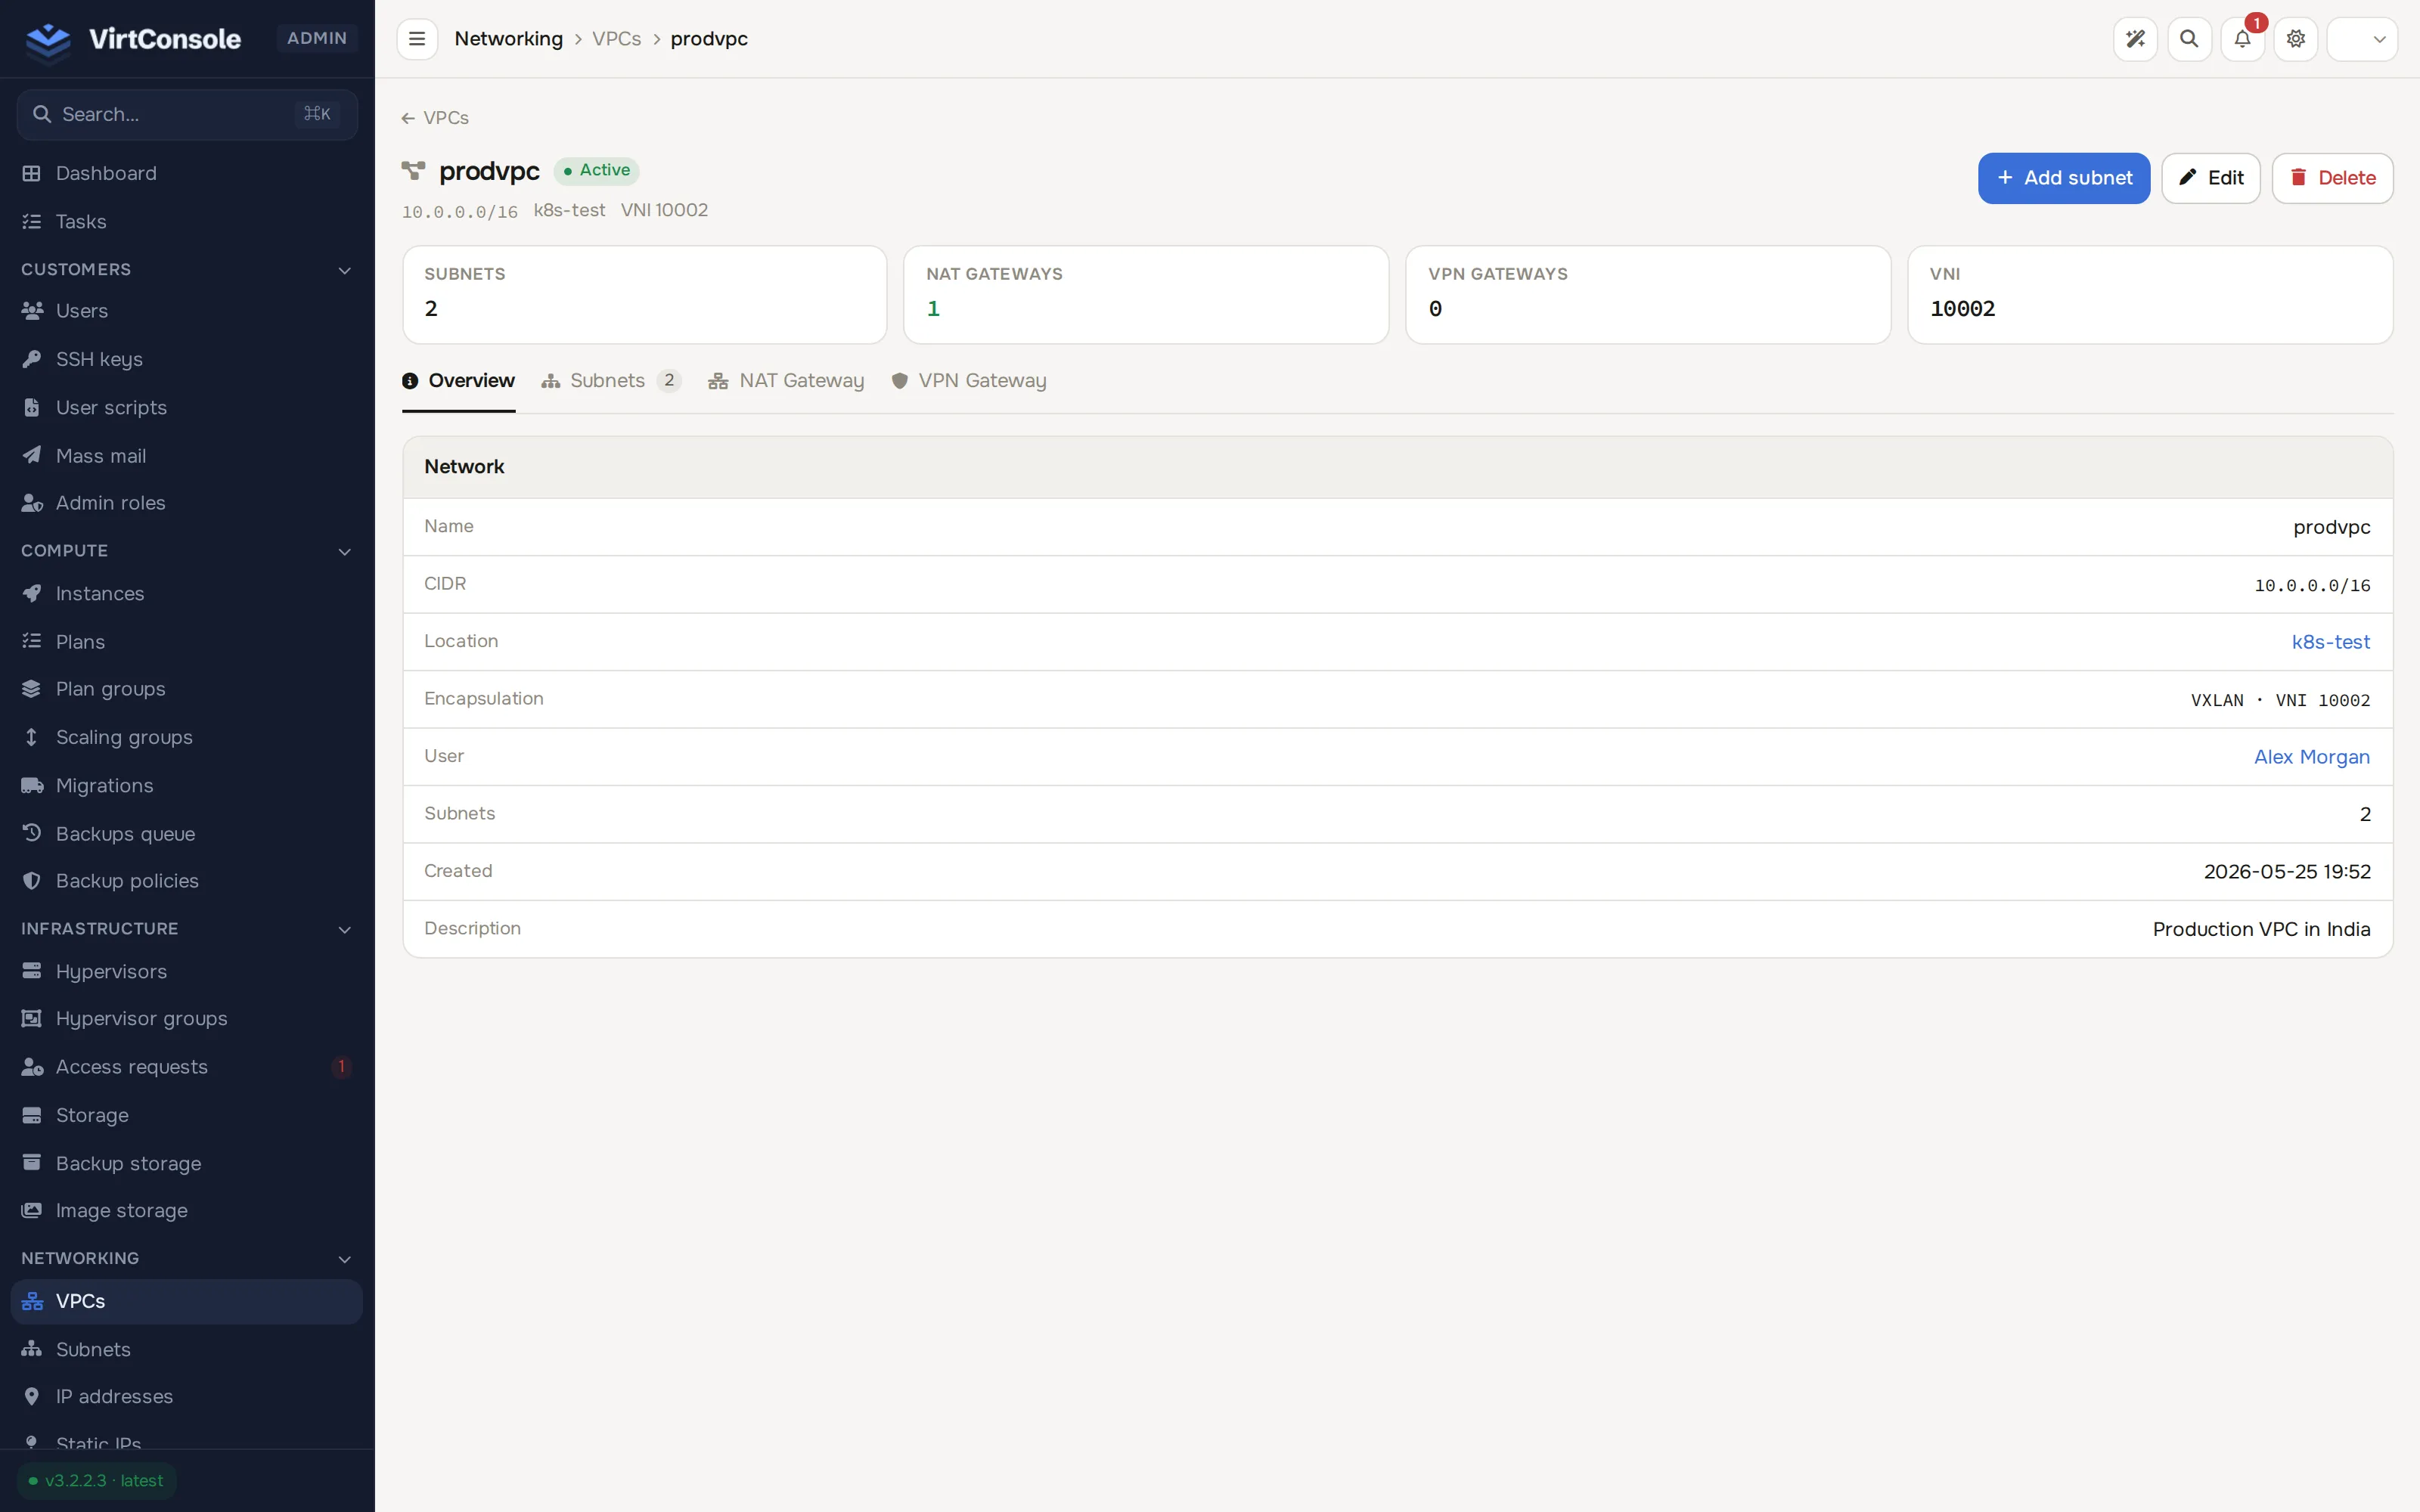
Open a VPC to manage it. The detail page has four tabs:
- Overview. Name, CIDR, location, VXLAN encapsulation, owner, subnet count, and description.
- Subnets. Click Add Subnet and enter a Name, a CIDR inside the VPC range (for example
10.0.1.0/24), and a Type. Private subnets route internet traffic through the NAT gateway; the gateway IP and the address pool are set up automatically. - NAT Gateway. Create or delete the VPC’s NAT gateway. See NAT gateways.
- VPN Gateway. Create the VPC’s VPN gateway, or open it for peers and peering. This tab appears only when the location has VPN gateway enabled. See VPN gateways.
The page header also has Add subnet, Edit (rename, lowercase letters and numbers, max 16 characters, or change the description), and Delete.
Common problems
Section titled “Common problems”- VPC does not appear during instance creation. VPC is not enabled on the hypervisor group for that location. Enable it as above.
- A location is missing from the VPC create picker. A KVM group is listed only when VPC is enabled, the group is not switched off, and an L2 Interface is set on it. Proxmox clusters do not need one. Set the interface on the group and reload.
- A VPC name is refused. VPC names may contain only lowercase letters and digits, up to 16 characters. Dashes, spaces and underscores are not allowed. The L2 Interface on the group must be a plain interface name of 1 to 15 characters (letters, digits,
.,_,@,-), starting with a letter or digit. - Instances in the same VPC cannot reach each other. Confirm both subnets sit inside the VPC CIDR, both instances are running, and no security group blocks the traffic. See Security groups.