

Reverse DNS
Reverse DNS (rDNS) maps a public IP back to a hostname: 203.0.113.7 answers vm-12.example.com. Mail servers, abuse reports, and reputation systems check it. The panel writes PTR records to an upstream DNS provider (PowerDNS or ClouDNS) that you configure.
How the workflow runs
Section titled “How the workflow runs”- You add a DNS provider and a reverse zone, and link subnets to the zone.
- A customer requests an rDNS hostname for one of their IPs.
- You approve or reject the request under Media & DNS > Reverse DNS requests.
- On approval, the PTR record is written to the upstream provider.
Approval is required by default, so customers cannot put arbitrary hostnames on IPs they do not own.
If your reverse zones already exist on the provider, for example after moving from another panel, you do not have to recreate them. See Adopt an existing zone and import PTR records.
Add a DNS provider
Section titled “Add a DNS provider”In the admin panel go to Media & DNS > DNS providers and click Add provider. The Add DNS Provider dialog opens.
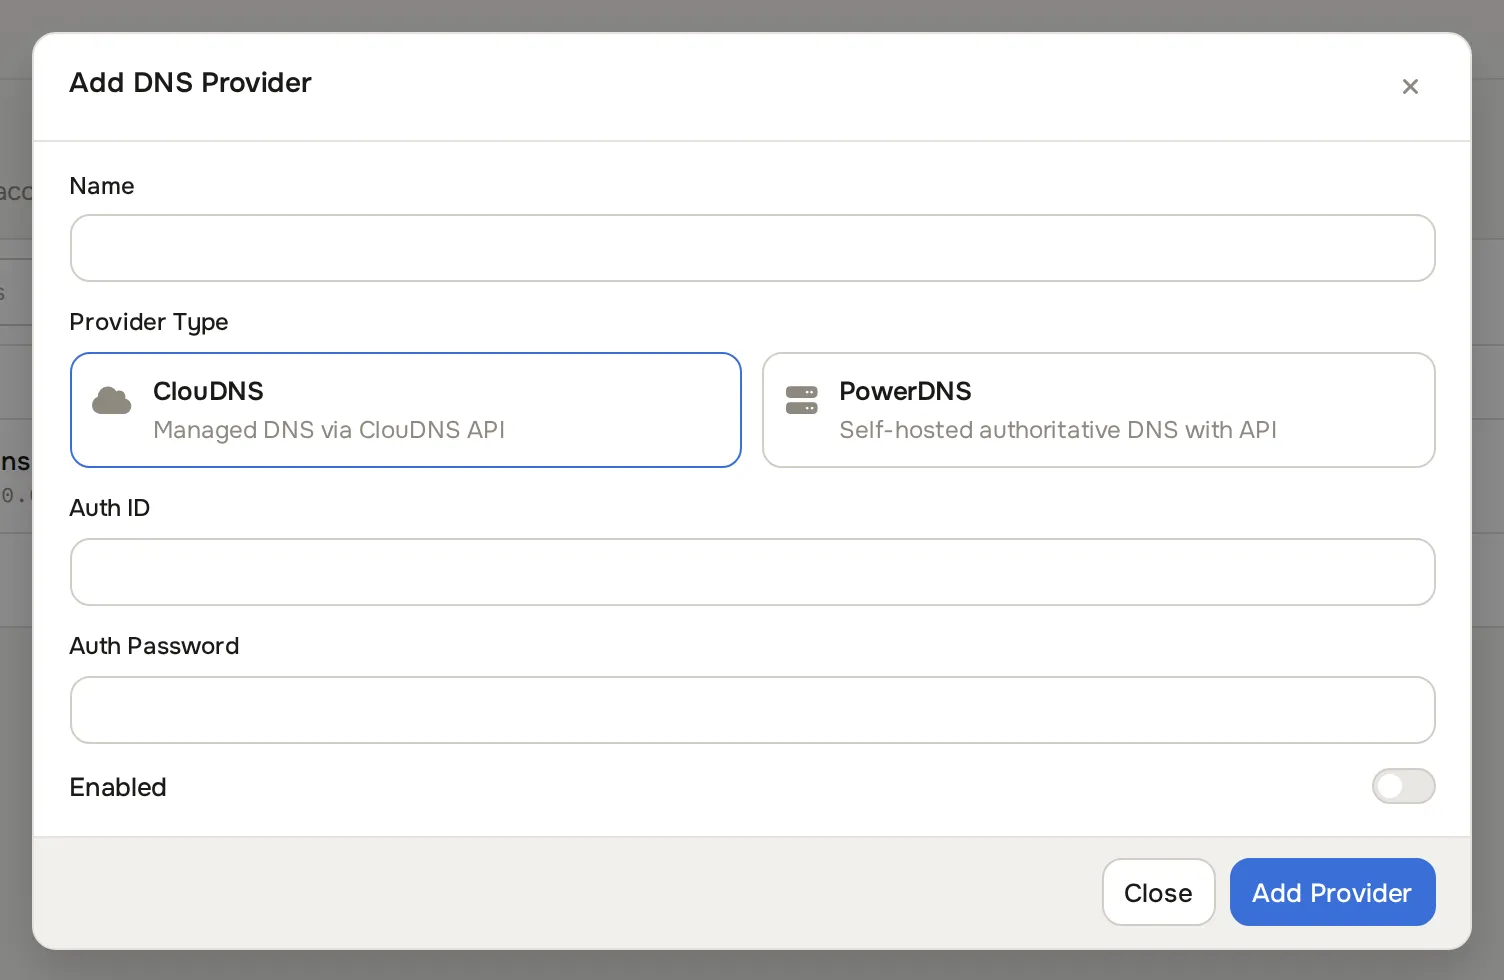
| Field | What to enter |
|---|---|
| Name | A label, for example primary-dns. |
| Provider Type | ClouDNS (managed DNS via the ClouDNS API) or PowerDNS (self-hosted authoritative DNS with API). |
| ClouDNS: Auth ID, Auth Password | Your ClouDNS API credentials. |
| PowerDNS: Hostname, Port, API Key | The API endpoint, for example http://203.0.113.10 and port 8081, plus the key. The scheme is required. |
| Enabled | Toggle. |
Add a reverse zone
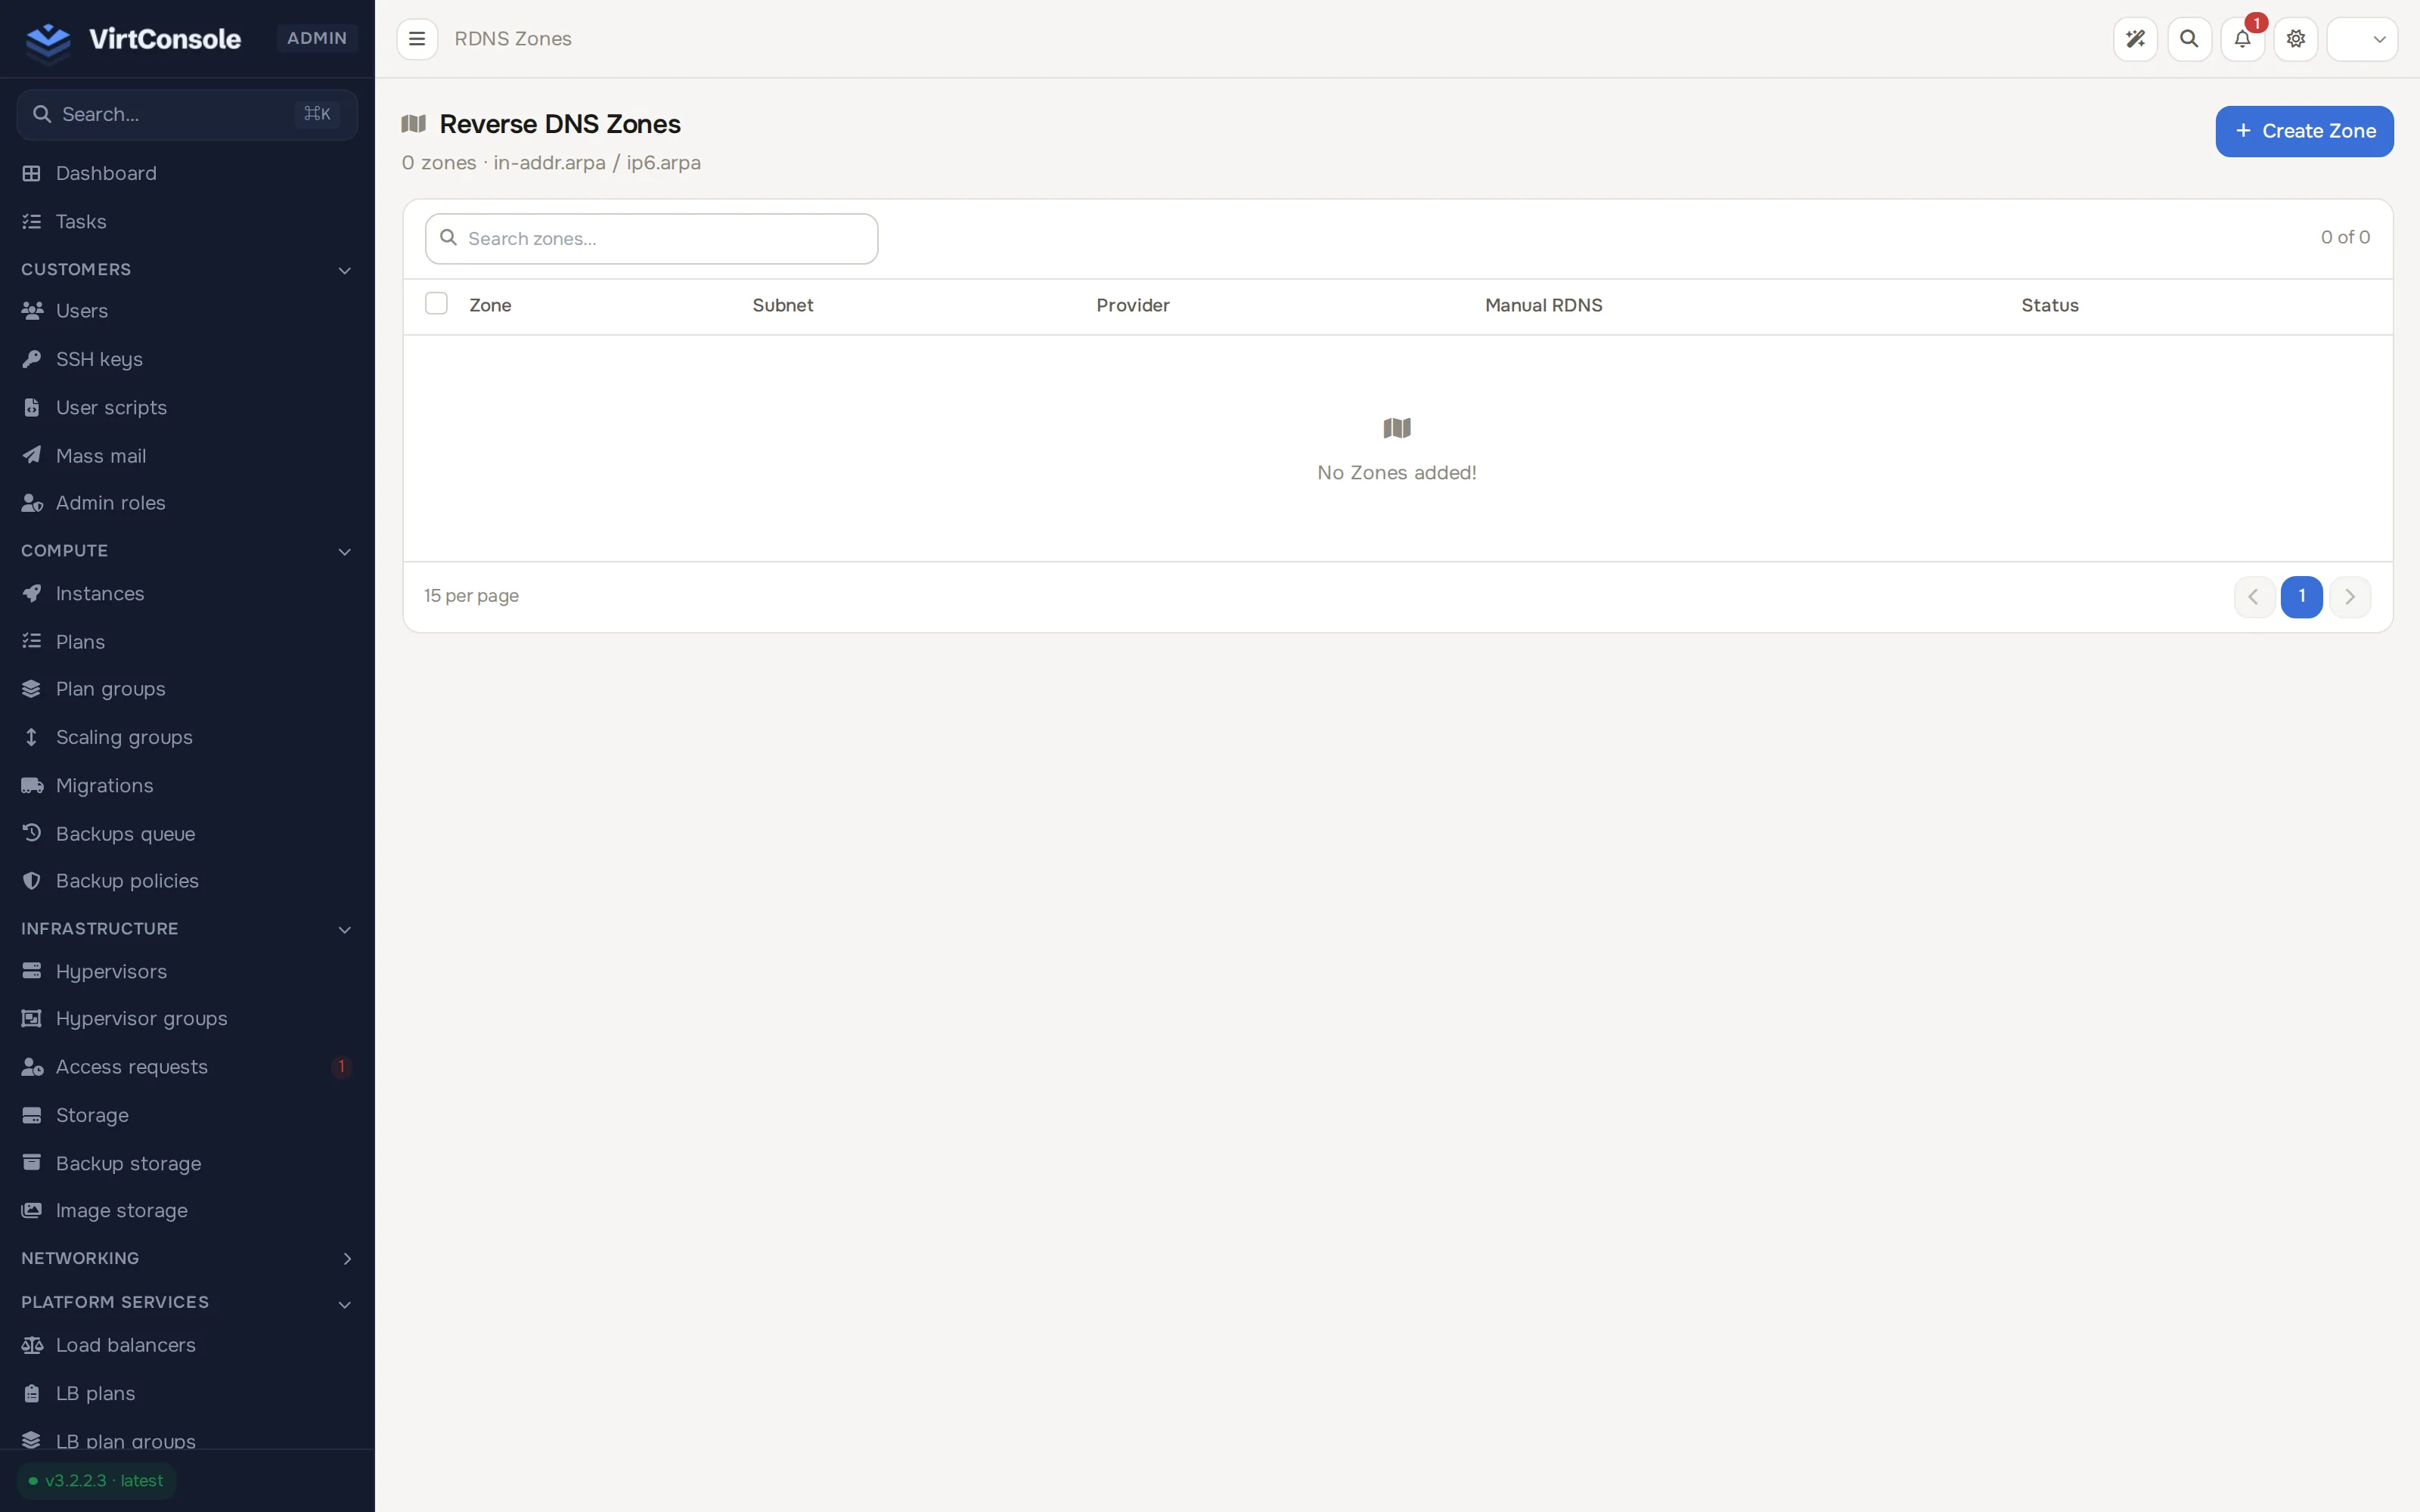
Section titled “Add a reverse zone”A reverse zone is the in-addr.arpa (IPv4) or ip6.arpa (IPv6) zone for a block of IPs. In the admin panel go to Media & DNS > Reverse DNS zones and click Create Zone.
| Field | What to enter |
|---|---|
| Zone Type | IPv4 (reverse zone under in-addr.arpa) or IPv6 (under ip6.arpa). |
| Zone | The reverse zone. The suffix is appended for you, so enter 113.0.203 for 203.0.113.0/24. |
| Provider | The provider that hosts the zone. |
| Auto PTR Format | Format 1 to 4. A live preview shows the PTR generated for 203.0.113.5. |
| Prefix / Domain | The pieces used by the auto PTR format. |
| PowerDNS only: Hostmaster Email, TTL, ns1 to ns4 | SOA and nameserver values for the created zone. |
| Enabled | Toggle. |
The zone list shows the zone, its linked subnet count, its provider, a Manual RDNS toggle, and status. Row actions: Edit, Rebuild (rewrite all PTR records upstream), and Remove.
Link a subnet
Section titled “Link a subnet”On the subnet’s page (Networking > Subnets), the Assignment card holds:
- RDNS Zone. The reverse zone that receives PTR records for this subnet’s IPs.
- Auto-rDNS. On deploy, set the primary public IP’s PTR to the instance hostname. Needs an enabled rDNS zone plus a base domain. See Subnets and IP addresses.
Adopt an existing zone and import PTR records
Section titled “Adopt an existing zone and import PTR records”When you move from another panel, the reverse zones and their PTR records usually already exist on PowerDNS or ClouDNS. Adopt the zone instead of creating it, then import its records so the panel shows the same hostnames as the provider.
Adopt the zone
Section titled “Adopt the zone”- Add the DNS provider first (see above).
- Go to Media & DNS > Reverse DNS zones and click Create Zone. The Add Reverse Zone dialog opens.
- Fill in Zone Type, Zone and Provider as usual, then switch on Use the existing zone on the provider.
- Click Adopt Zone.
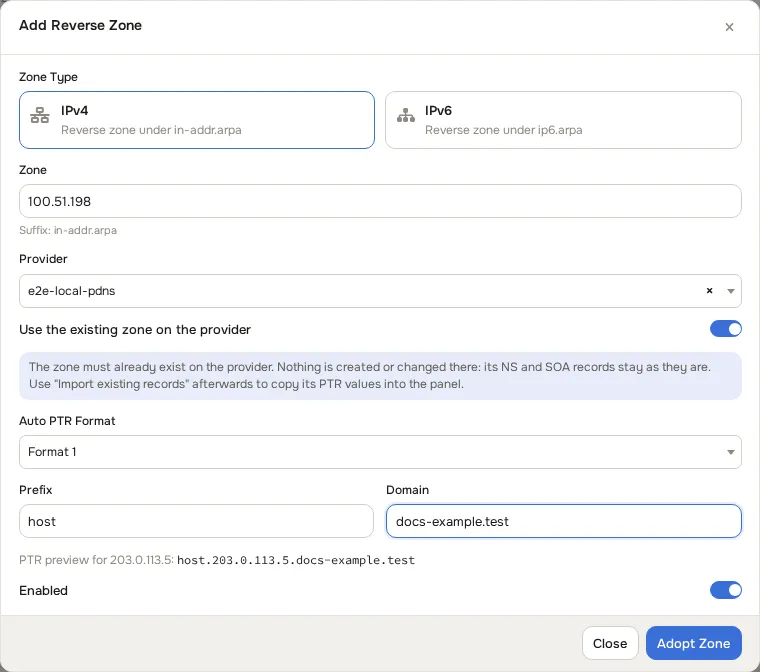
The button changes from Add Zone to Adopt Zone, and a note under the switch repeats the rules: the zone must already exist on the provider, and nothing is created or changed there. For PowerDNS, the hostmaster, TTL and nameserver fields disappear, because an adopted zone keeps the NS and SOA records it already has. Auto PTR Format, Prefix and Domain still apply to the panel, as for any other zone.
What adopting does:
- It links the panel to the zone on the provider. Only a panel record is created.
- It does not rewrite the zone’s NS or SOA records, and it does not write anything else to the provider.
What adopting refuses:
- If the zone is not on the provider, the panel answers: “The zone … does not exist on the DNS provider. Create it there first, or add it here without the “use existing zone” option.”
- If another reverse zone entry already manages the same provider zone, the panel answers: “This provider zone is already managed by another reverse DNS zone entry.”
- If the provider cannot be reached, you see: “The DNS provider could not be reached or did not answer the request.”
On success the panel shows “Existing zone adopted. Nothing was changed on the DNS provider.”
Link the subnets first
Section titled “Link the subnets first”The import only matches records to IPs in subnets that are linked to this zone. Before you import, open each subnet (Networking > Subnets) and set its RDNS Zone to the adopted zone, as described in Link a subnet. An address that sits in two linked subnets is never written, because the panel cannot tell which one owns it. Only ordinary IP addresses are matched: IPv6 /64 allocations are not host addresses and are left alone.
Preview and import
Section titled “Preview and import”On the zone list, open the row menu and choose Import existing records. The Import existing records dialog reads the PTR records on the provider and compares each one with the IPs in the linked subnets. Opening the dialog changes nothing, on the provider or in the panel.
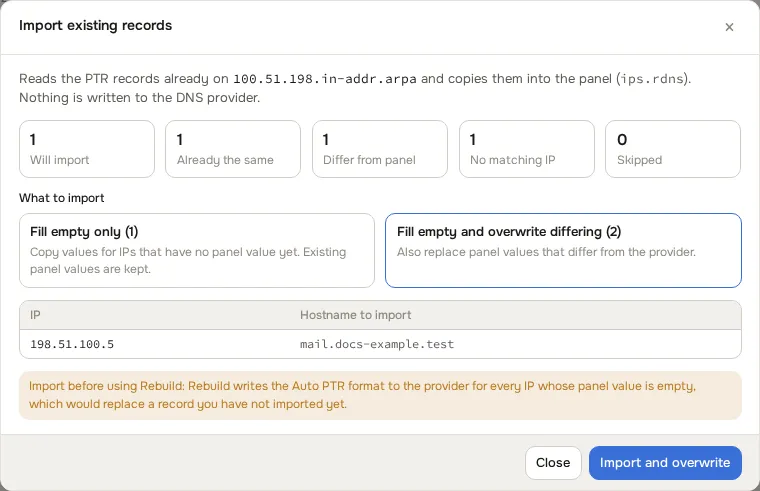
The dialog shows five counts:
| Count | Meaning |
|---|---|
| Will import | The IP is in a linked subnet and has no reverse DNS value in the panel yet. The provider’s hostname will be copied in. |
| Already the same | The panel already holds the same hostname (compared ignoring case and a trailing dot). Nothing to do. |
| Differ from panel | The panel holds a different hostname than the provider. |
| No matching IP | The record is valid, but the address is not in any subnet linked to this zone. |
| Skipped | The record cannot be imported safely (see the reasons below). |
A table under the counts lists the hostnames that will be imported (the first 20). If no subnet is linked to the zone, the dialog warns “No subnet is attached to this zone, so no record can be matched to an IP.”
Under What to import, choose one of two modes:
- Fill empty only copies values only for IPs that have no value in the panel. Values already in the panel are kept. This is the default.
- Fill empty and overwrite differing also replaces panel values that differ from the provider.
Click Import (or Import and overwrite in the second mode). The button stays disabled when there is nothing to import in the chosen mode.
Why a record is skipped
Section titled “Why a record is skipped”The panel dialog shows only the number of skipped records. The preview endpoint of the admin API (see below) lists them with a reason:
| Reason | Meaning |
|---|---|
multiple_values |
The name has more than one record. The panel stores a single hostname per IP, so it will not guess which one. |
non_ptr |
The record is not a PTR record. |
disabled |
The record is disabled on the provider. |
out_of_zone |
The record name is not inside this reverse zone. |
unparseable_name |
The name is not a full host address. Examples are the zone apex, classless delegation labels such as 0/25, and partial IPv6 names. |
family_mismatch |
An IPv6 name in an IPv4 zone, or the other way round. |
invalid_hostname |
The target is not a valid hostname. |
ambiguous_ip |
The address exists in more than one subnet linked to the zone. |
The import runs as a task
Section titled “The import runs as a task”The import runs in the background as a task called Import RDNS Zone records. Follow it under Tasks. When it finishes, its message reads, for example: “Import finished: 2 written, 1 already matching, 0 differing, 1 without a matching IP, 0 skipped.” Large zones are processed in steps, so a big import may take a while but does not time out.
Things to know:
- It is read only toward the provider. The import never creates, changes or deletes anything on PowerDNS or ClouDNS. It only writes the hostnames into the panel.
- Only one import per zone at a time. Starting a second one answers “An import for this zone is already running.”
- It is safe to run again. A second run finds every imported record already the same and writes nothing.
- It does not clobber a change made in the meantime. If an admin edits an IP’s value after the preview, that edit is kept.
- Large ClouDNS zones. The preview scans up to 50 pages of records, within a time limit of about 25 seconds, so on a very large zone it can stop early. The dialog then warns “The zone is large: the preview scanned the first N records. The import itself processes every record.” In that case the import button stays available even if the scanned part showed nothing to import.
Import before you run Rebuild
Section titled “Import before you run Rebuild”Import first, then Rebuild. Rebuild writes the Auto PTR format to the provider for every IP whose panel value is empty. If you rebuild before importing, that overwrites a record you have not imported yet. Any provider record that was not imported, because it was skipped or because you used Fill empty only over a differing value, can be replaced the same way. The dialog carries the same warning: “Import before using Rebuild: Rebuild writes the Auto PTR format to the provider for every IP whose panel value is empty, which would replace a record you have not imported yet.”
Removing an adopted zone
Section titled “Removing an adopted zone”Removing an adopted zone deletes only the panel record. The zone and its records stay on the provider. The confirmation says so: “This zone was adopted from the provider. It is removed from the panel only. The zone on the DNS provider is NOT deleted: its records stay there.”
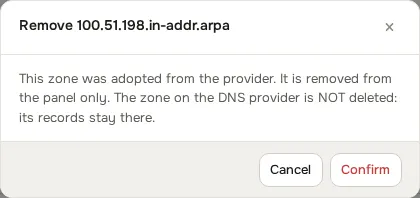
A zone you created in the panel is different: removing it also deletes the zone on the provider.
Admin API
Section titled “Admin API”The same three operations are available in the admin API:
POST /api/v1/dns/reverse/zonesacceptsadopt_existing(boolean).GET /api/v1/dns/reverse/zone/{rdnsZoneId}/import/previewreturns the counts and sample rows, up to 200 per category, with the skip reasons.POST /api/v1/dns/reverse/zone/{rdnsZoneId}/importqueues the import. Sendoverwrite: true(a strict boolean) to replace differing values. The answer carries atask_idto follow.
Refusals use status codes with a reason: 422 zone_not_found_on_provider, 409 zone_already_managed, 409 provider_disabled, 409 import_in_progress and 503 provider_unreachable. See the Admin API reference and the API changelog.
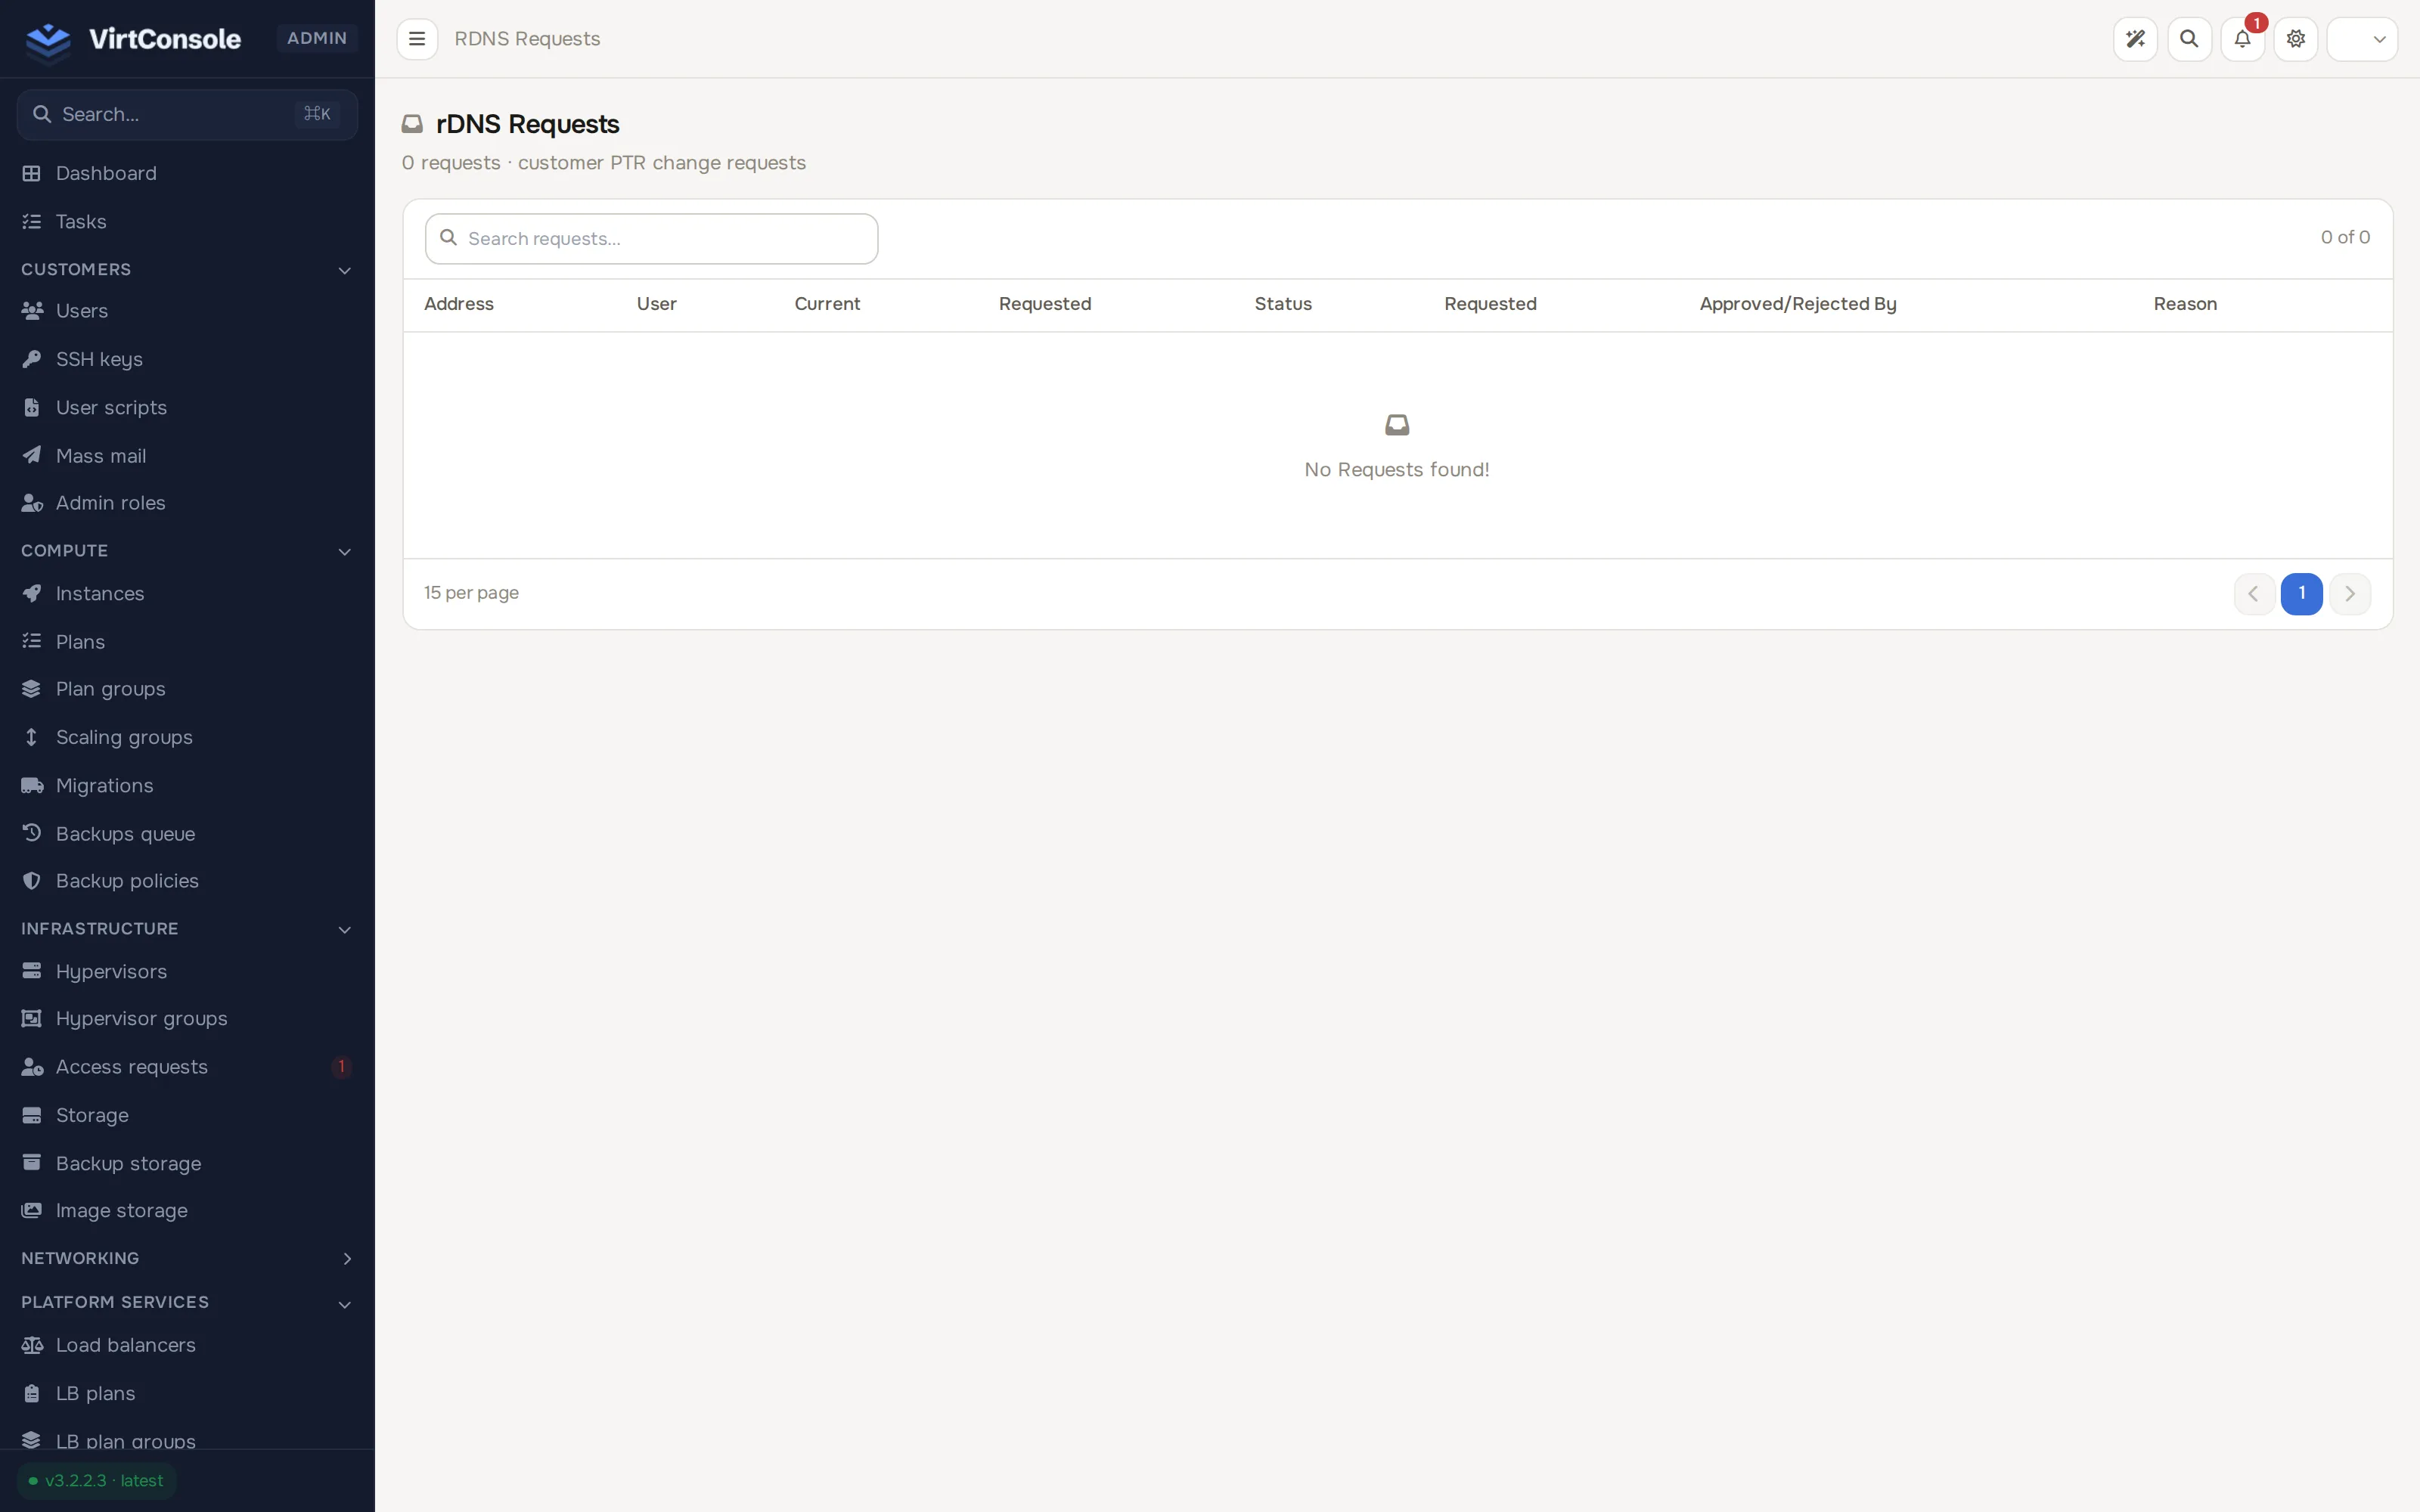
Approve requests
Section titled “Approve requests”In the admin panel go to Media & DNS > Reverse DNS requests. Each row shows the status, IP, user, requested record, current record, who acted, the reason, and the request date.
- Approve. The PTR record is written upstream.
- Reject. The request is closed. The customer sees the outcome in their panel.
Common problems
Section titled “Common problems”- An approval fails to write the PTR. Confirm the IP’s subnet is linked to an enabled reverse zone on a reachable provider. Use Rebuild on the zone to resync all records.
- An import finds nothing to match. Check that the zone’s subnets are linked to it (RDNS Zone on the subnet) and that the preview does not show “No subnet is attached to this zone”.
- A request sits in pending. Requests stay pending until you act on them here; the customer sees no change until then.