

Create an image
An image is the template a MicroVM runs. Build one, then create MicroVMs from it. Every build produces a new version, so you can update an image without breaking MicroVMs already running an older version.
Before you begin
Section titled “Before you begin”- A MicroVM node must be available in at least one location. If MicroVM > Images is not in your menu, your provider has not enabled MicroVMs for your account.
- For a Git repository source, connect a Git source first if the repository is private. See Connectors for the Git source connection, or connect one from Deploy > Git sources if your provider also offers Git Deploy.
Where to find it
Section titled “Where to find it”In the user panel go to MicroVM > Images.
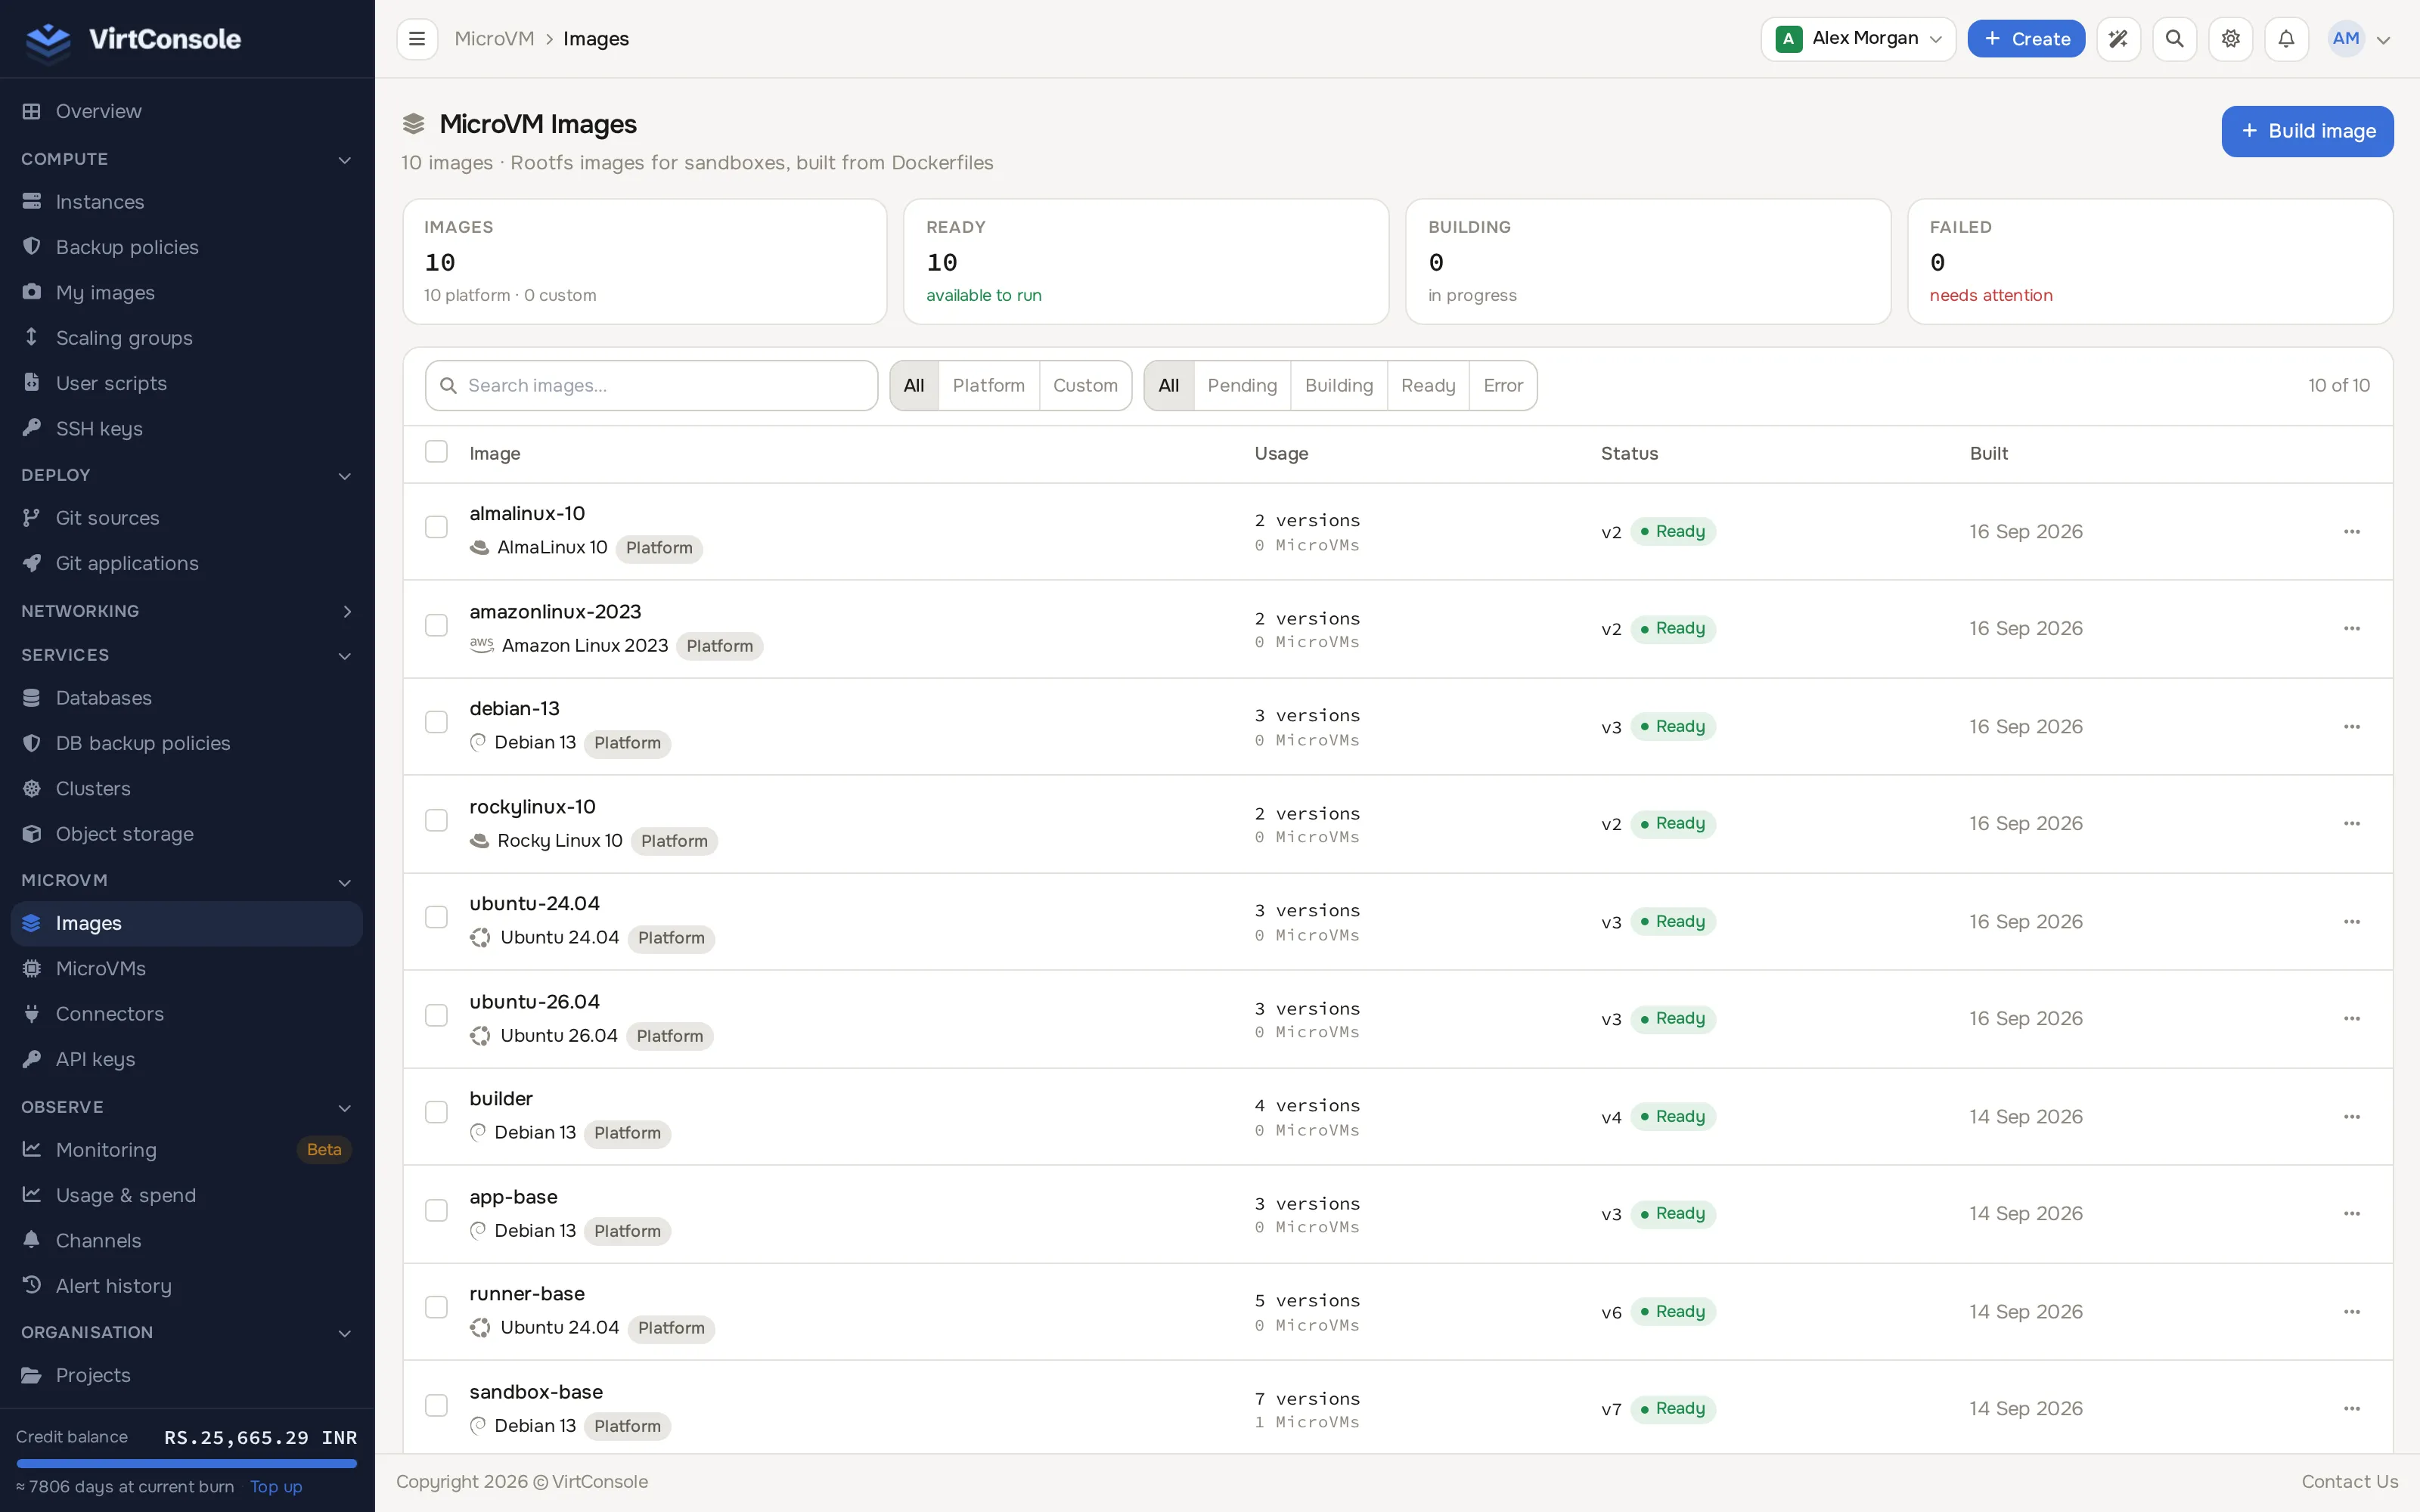
Create an image
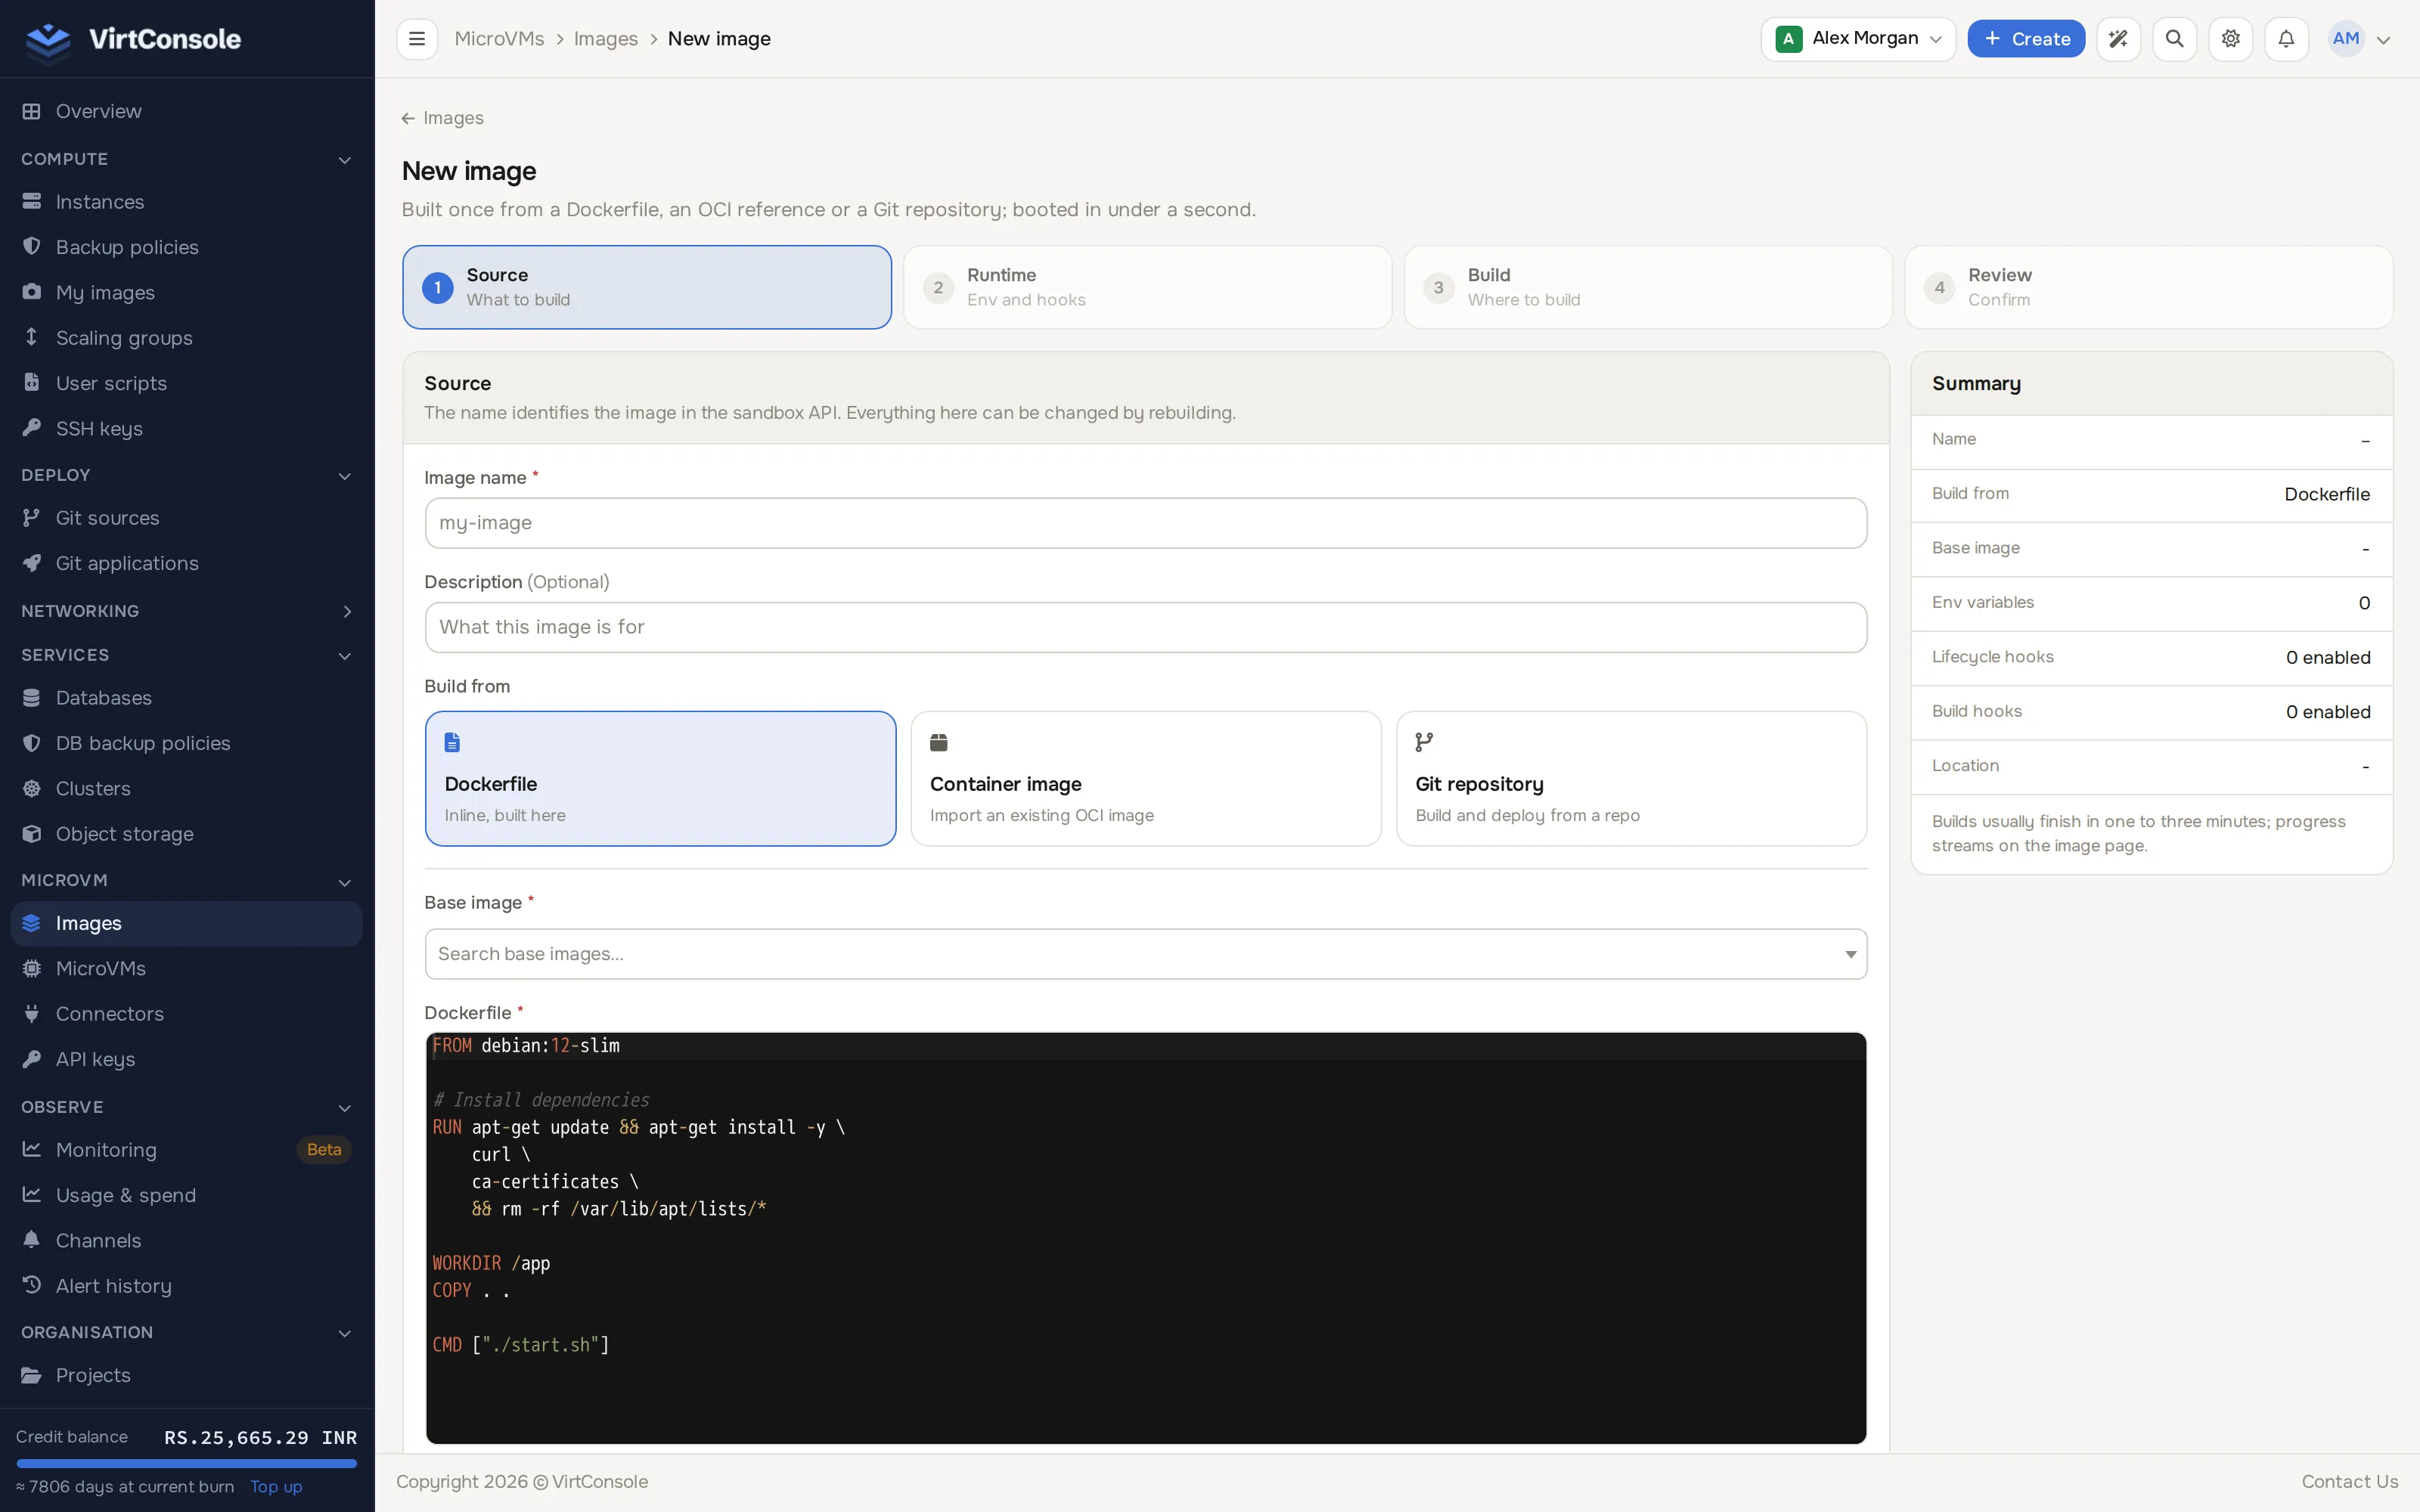
Section titled “Create an image”Click Build image to open the wizard. It has four steps: Source (What to build), Runtime (Env and hooks), Build (Where to build) and Review (Confirm), with a live summary on the right.
-
Source: give the image a Name and an optional Description, then choose Build from:
- Dockerfile: write or paste a Dockerfile.
- Container image: enter an existing image reference, for example
ghcr.io/acme/demo:latest. Optional, collapsed Private registry credentials (username and password) if the image is not public. - Git repository: enter the Repository URL and Branch. For a private repository, expand Private repository and pick an already-connected Git source instead of a bare URL.
Whichever source you choose, pick a Base image from the platform’s ready base images - it’s required for every source kind, not just Dockerfile. See Platform base images for what each one provides.
-
Runtime: add Environment variables as key-value pairs - these are the image’s defaults; a MicroVM created from this image can add its own variables, and a MicroVM variable overrides an image variable with the same name. Optionally expand Lifecycle hooks:
run,resume,suspendandterminate, each with a timeout and a payload - called on the port you set, and every MicroVM created from this image starts with them; a MicroVM can override its own copy later. Separately, expand Build hooks (readyandvalidate, each with its own timeout) to run a check once during the build itself, before the version is marked ready. -
Build: pick the Location to build on. The image is built once there and can run anywhere your plan allows.
-
Review: check the summary, then click Create image. The build starts immediately.
What happens next
Section titled “What happens next”The image is created with its first version in building status. A build runs on a MicroVM node and produces a ready version on success, or an error version with a build log on failure. Ready is required before any MicroVM can use the image.
Versions
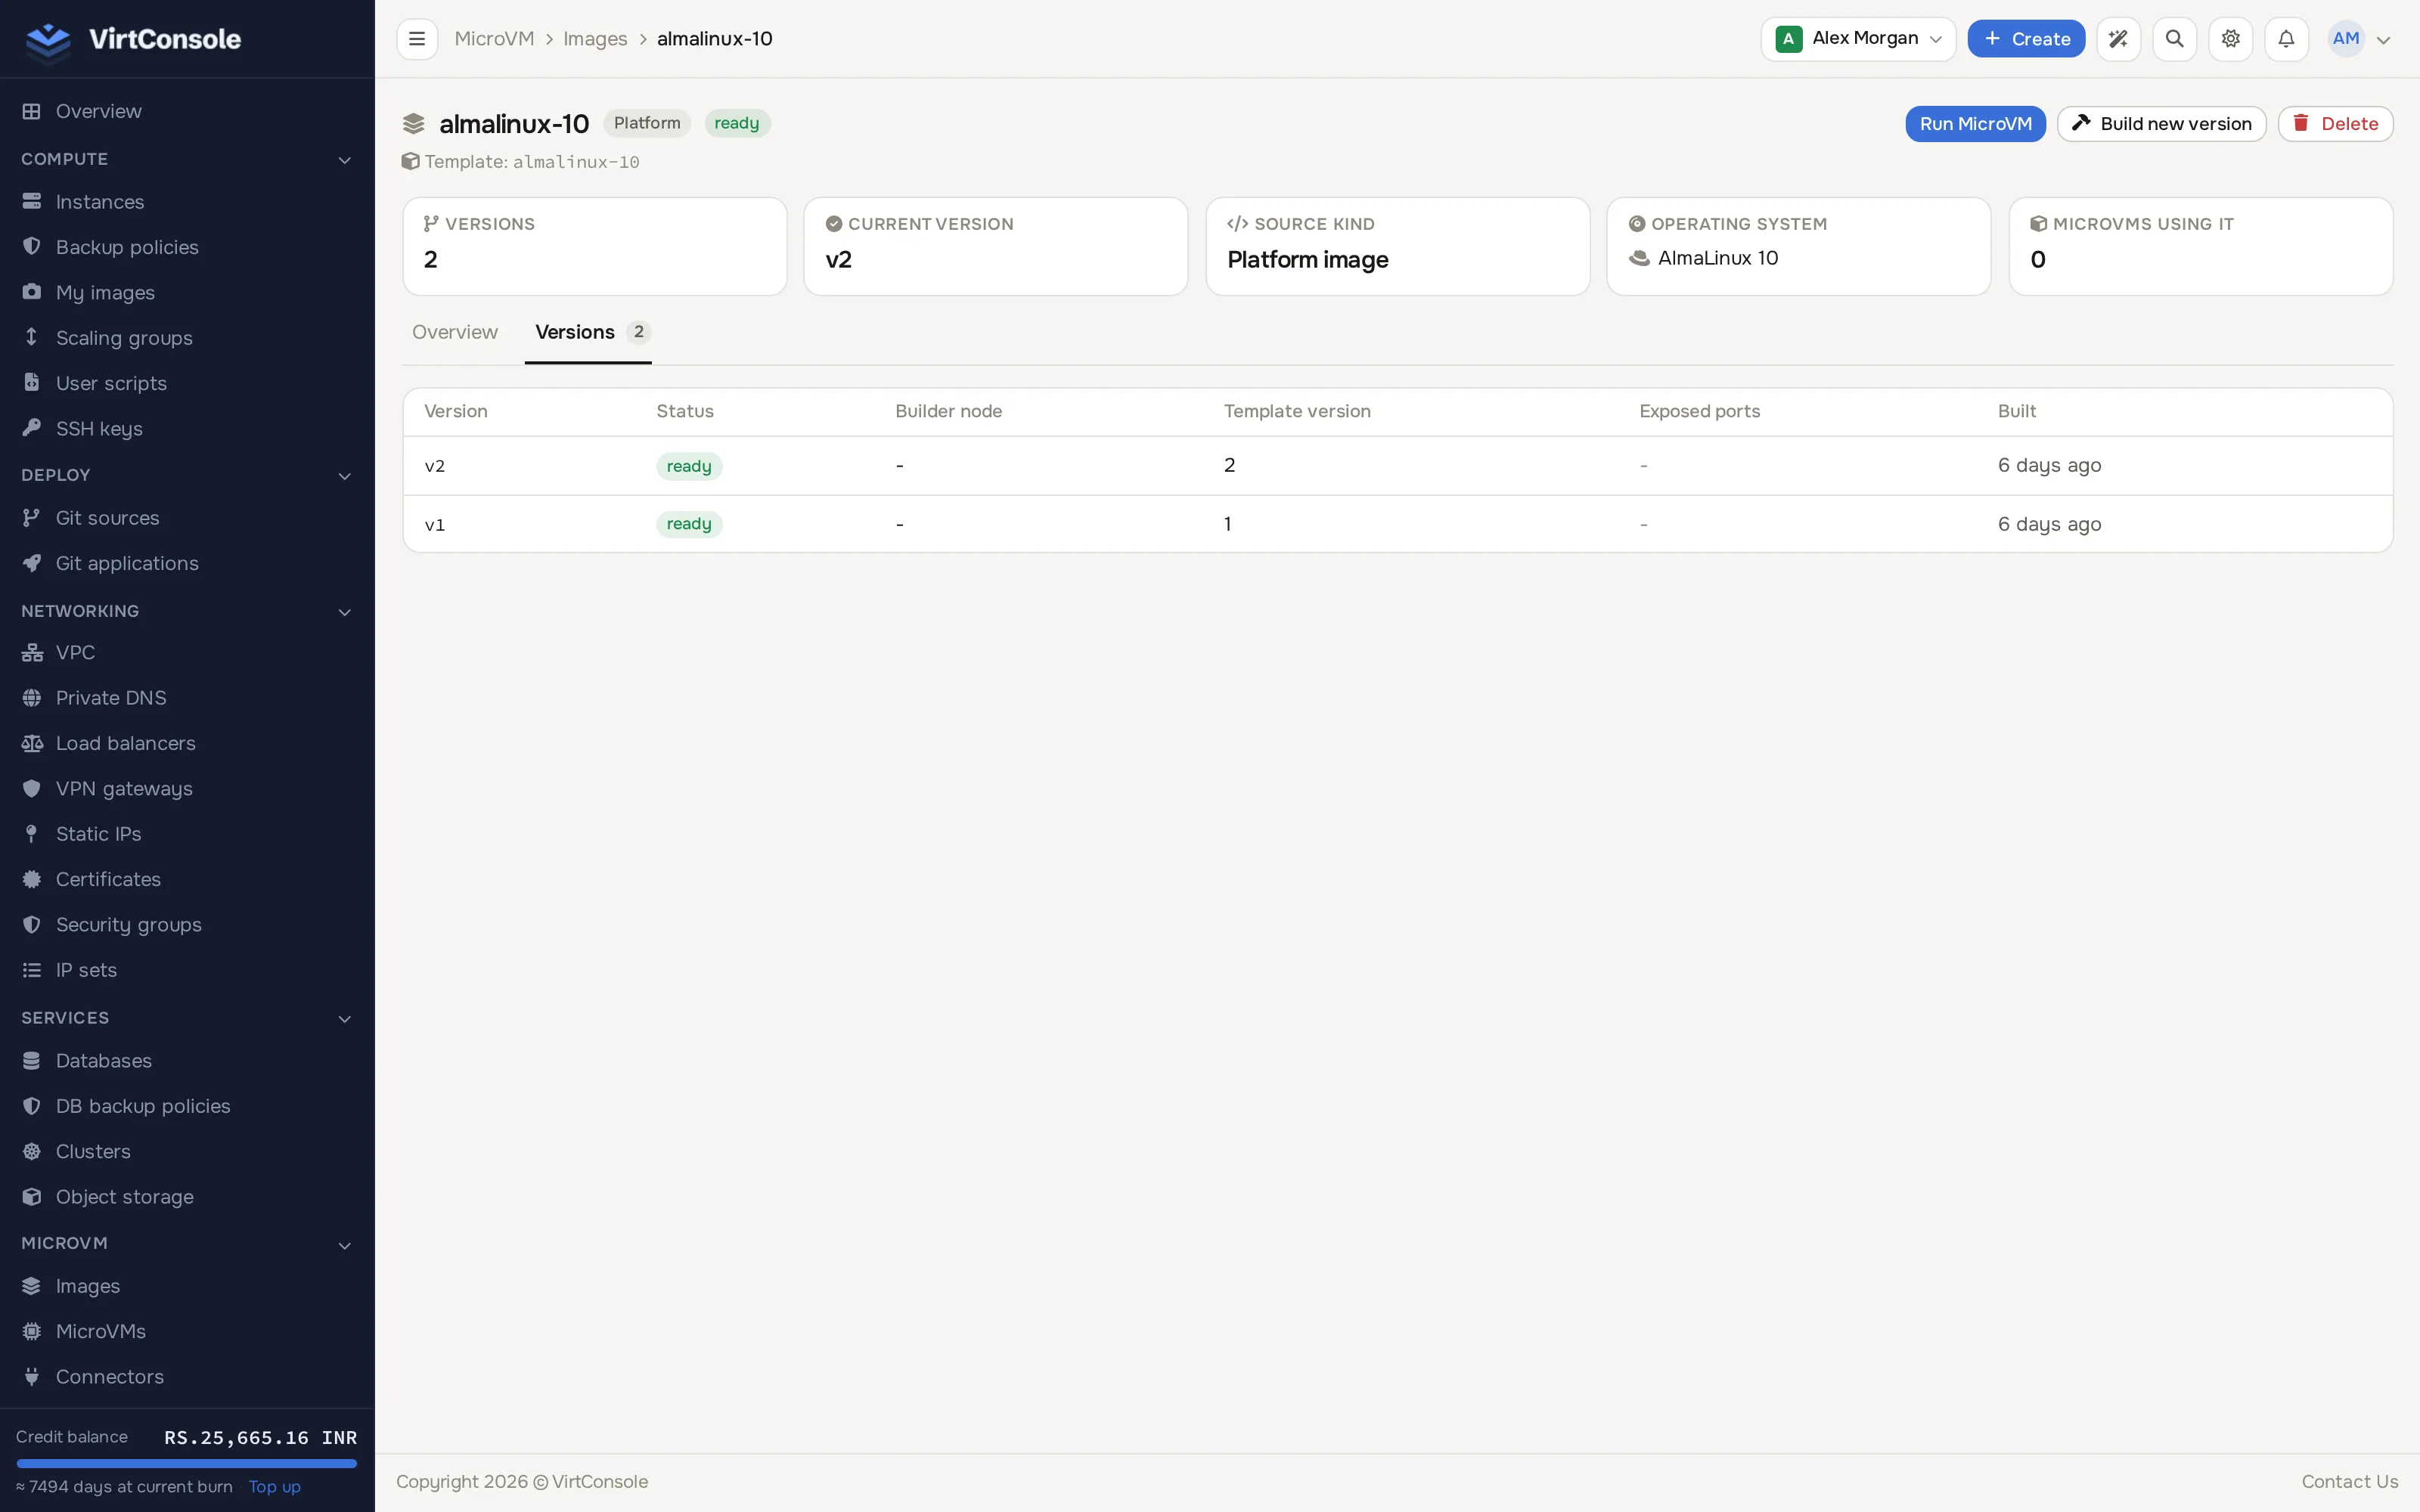
Section titled “Versions”Open the image to see its Versions tab: each row shows the version number, its status, the node that built it, the template version it was built from, its exposed ports and when it was created. Click View log on a row to see its full build output. Rebuilding the image (from the image page’s Build new version button) adds a new version rather than replacing the current one; the newest ready version becomes current automatically.
The interactive shell agent
Section titled “The interactive shell agent”Every image is built on top of a base, and it’s the base - not your source kind - that decides whether the result includes envd, the agent that powers the web shell and the E2B SDK’s command/file operations. sandbox-base, debian-13, ubuntu-24.04 and ubuntu-26.04 ship envd; app-base, runner-base, builder and the other operating-system bases don’t, so a MicroVM created from an image built on one of those cannot enable shell ingress, regardless of whether you built it from a Dockerfile, a container image or a Git repository. See Platform base images for the full list, and Web shell, logs and metrics.
Common problems
Section titled “Common problems”- The build fails immediately. Check the version’s build log from the Versions tab; a Dockerfile syntax error or an unreachable base image are the most common causes.
- A private Git repository or registry fails to pull. Confirm the connected Git source still has access, or that the registry credentials are correct and have pull access to that image.
- Shell ingress is greyed out when creating a MicroVM. The image was built on a base that doesn’t ship envd. Rebuild it on
sandbox-base,debian-13,ubuntu-24.04orubuntu-26.04.