

Certificates
Certificates live in your account’s certificate store, independent of any single load balancer. Upload a certificate (or issue one from Let’s Encrypt) once, then attach it to as many HTTPS listeners, on as many of your load balancers, as you like. A listener holds an ordered list: the first certificate is the default, and any others are served by hostname (SNI), so one port 443 can serve several unrelated domains each with its own certificate.
Where to find it
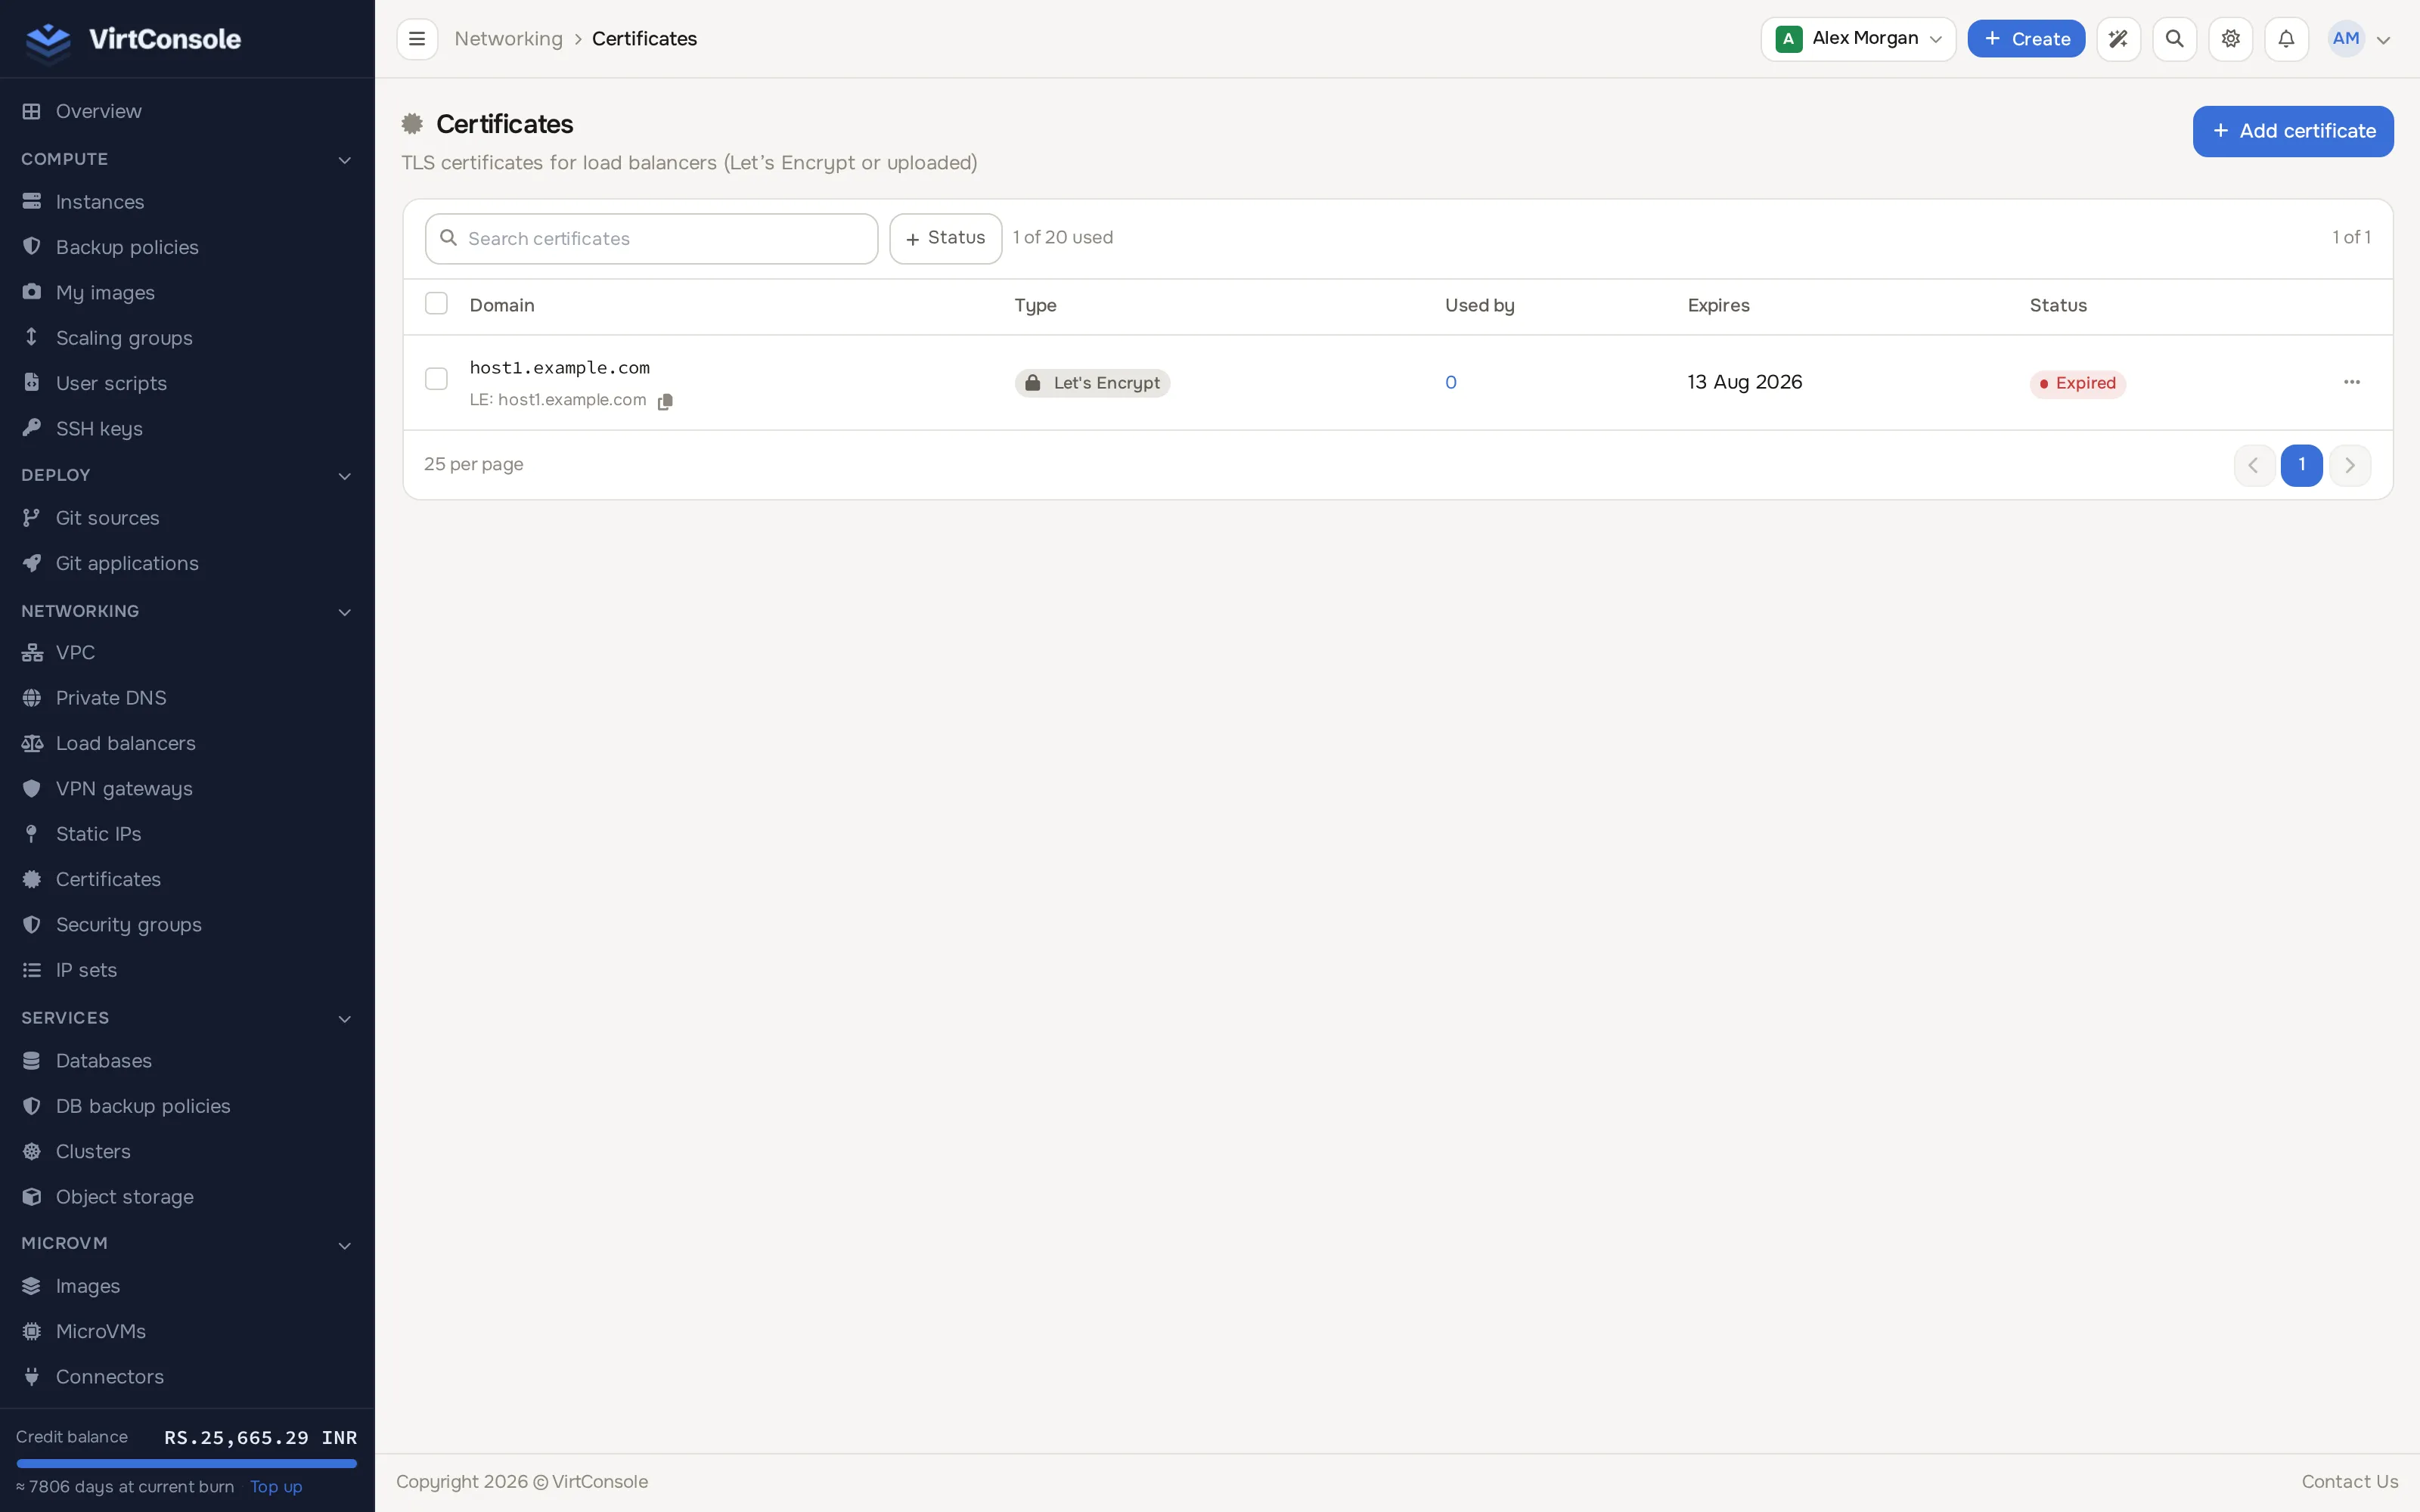
Section titled “Where to find it”In the user panel go to Networking > Certificates.
The certificate store.
Upload a certificate
Section titled “Upload a certificate”-
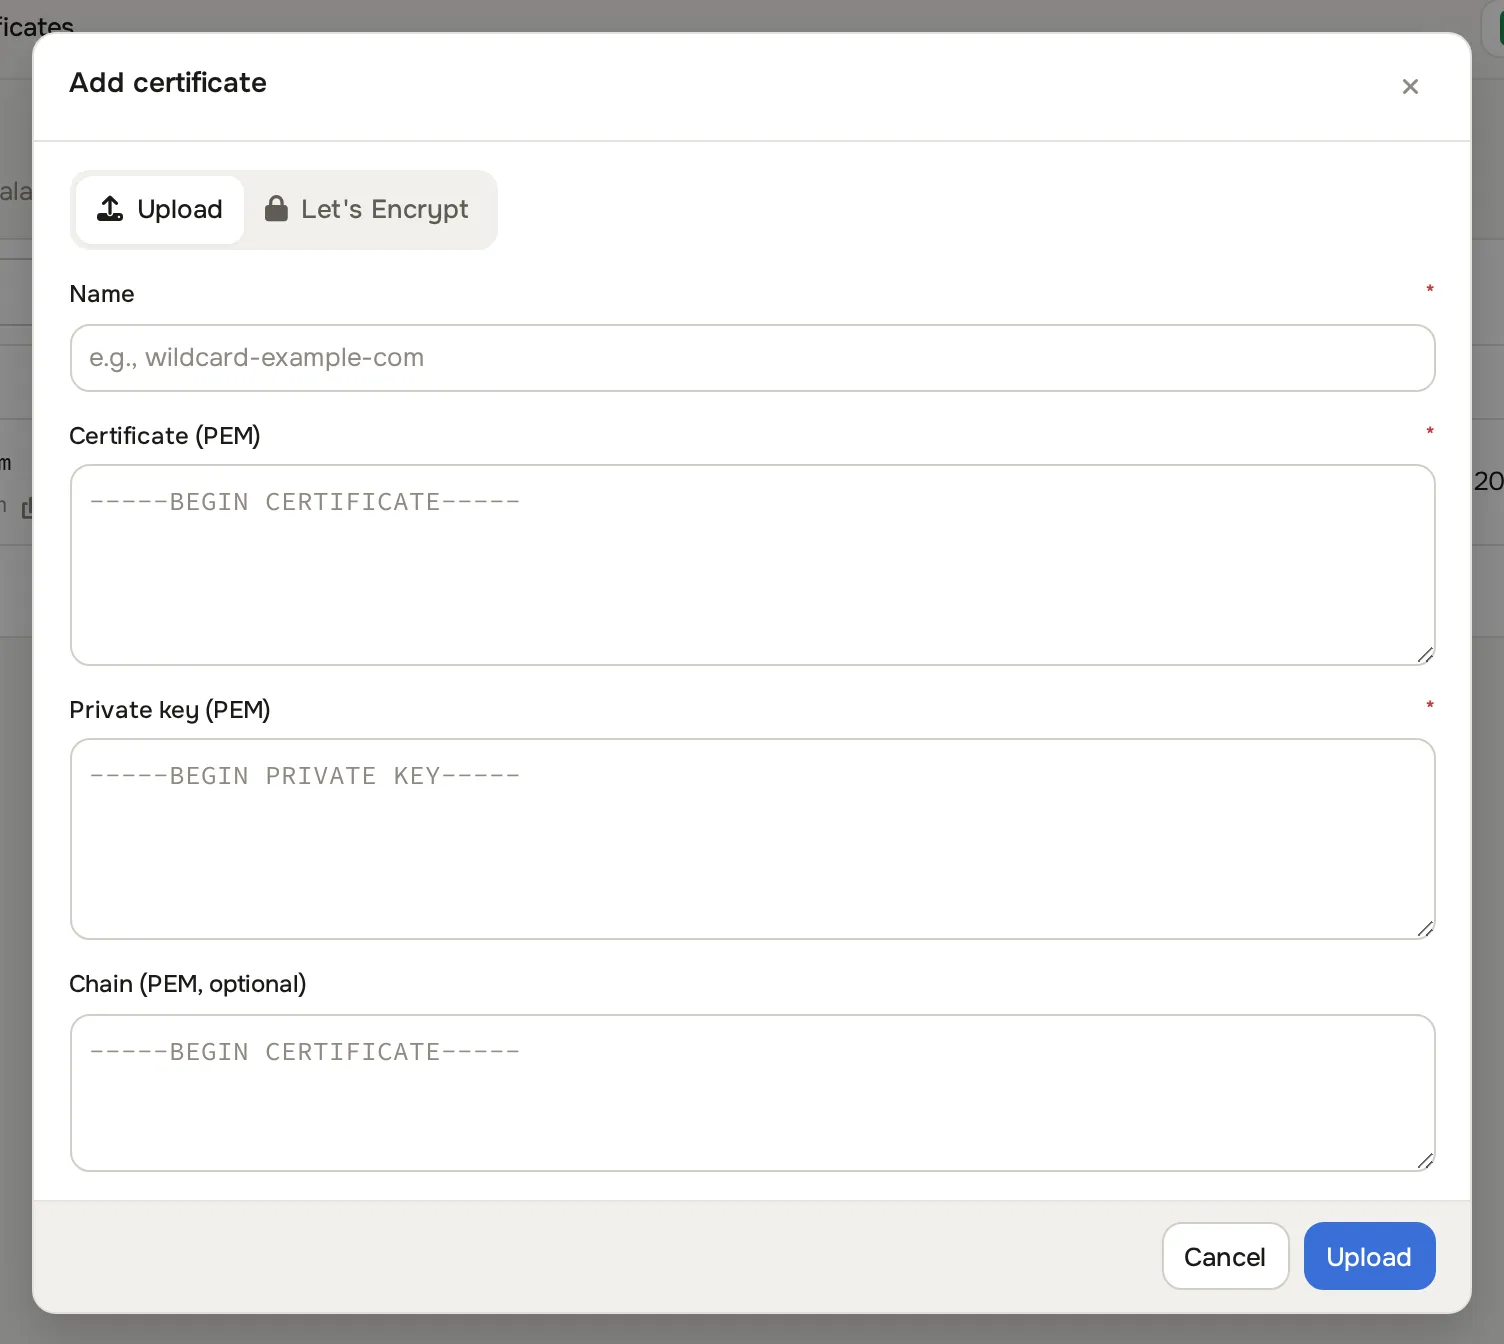
Click Add certificate and choose the Upload tab. The Add Certificate dialog opens.
-
Fill in:
Fields
| Field | What to enter |
|---|---|
| Name | A label for your own reference. |
| Certificate (PEM) | The PEM-encoded certificate. |
| Private key (PEM) | The PEM-encoded private key for that certificate. |
| Chain (PEM, optional) | The intermediate certificates from your certificate authority. |
- Click Upload.
Uploads are validated before storing: the key must match the certificate, a supplied chain must actually sign the certificate, and an already-expired certificate is rejected. Domain, alternative names and expiry are read out of the certificate, so there is nothing else to fill in.
Your account has a certificate quota (default 20). Ask your provider to raise it if you hit it.
Request a Let’s Encrypt certificate
Section titled “Request a Let’s Encrypt certificate”- Click Add certificate and choose the Let’s Encrypt tab.
- Optionally set a Name, enter the Domains (one per line), and pick which of your load balancers answers the ownership challenge under Issue via load balancer. That load balancer must have a public IP; the system creates a system-managed port 80 listener for the challenge automatically if needed.
- Click Request certificate.
If DNS already points at the chosen load balancer, issuance usually completes within a minute or two. Otherwise the certificate sits in Pending DNS and is rechecked periodically for up to 24 hours; point your domain’s A record (or a CNAME that resolves to it) at the load balancer’s public IP and it picks up on the next check.
Certificate statuses: Pending DNS, Issuing, Active, Failed, Renewal Pending. Let’s Encrypt certificates are valid for 90 days and renew automatically starting 30 days before expiry, through the same load balancer. If that load balancer is deleted, the certificate is marked renewal blocked; request it again through a load balancer that still exists.
Attach certificates to a listener
Section titled “Attach certificates to a listener”- Open the load balancer and edit (or create) an
HTTPSlistener on its Listeners tab. - In the Certificates field, select one or more certificates from the store. The first is the default; the rest are served by SNI.
- Click Create Configuration (a new listener) or Save Configuration (an existing one).
A listener needs at least one certificate to serve HTTPS. A load balancer’s own page shows which certificates its listeners use, with a link back to the store.
Expiry alerts
Section titled “Expiry alerts”An uploaded certificate approaching expiry emails the account owner. For earlier warning, use the Alert when expiring action in the list to open a pre-filled alert rule. See Monitoring and alerts.
Delete a certificate
Section titled “Delete a certificate”A certificate still attached to a listener cannot be deleted; the error lists exactly which load balancers and ports use it. Detach it (or attach a replacement) first, then delete.
Common problems
Section titled “Common problems”- Upload rejected with a key mismatch. The private key does not correspond to the certificate. Re-export both from the same source.
- Upload rejected because the chain does not sign the certificate. Use the intermediate bundle your certificate authority issued for that specific certificate, not a generic chain.
- Stuck in Pending DNS. Verify the domain points at the load balancer with
nslookupor an online DNS checker. After 24 hours the status becomes Failed; fix DNS and request a new certificate. - Renewal failed. You get an email and the system retries daily. Confirm DNS still points at the load balancer, port 80 is reachable, and the load balancer is not suspended.