

Instance backups
A backup is a copy of an instance’s disk written to a separate storage location, so you can roll the instance back if its disk is lost, corrupted or broken by a bad change. Your provider configures where backups are stored. Depending on the location, either you attach your own backup policy, or the provider already backs the instance up for you.
Take a one-off backup
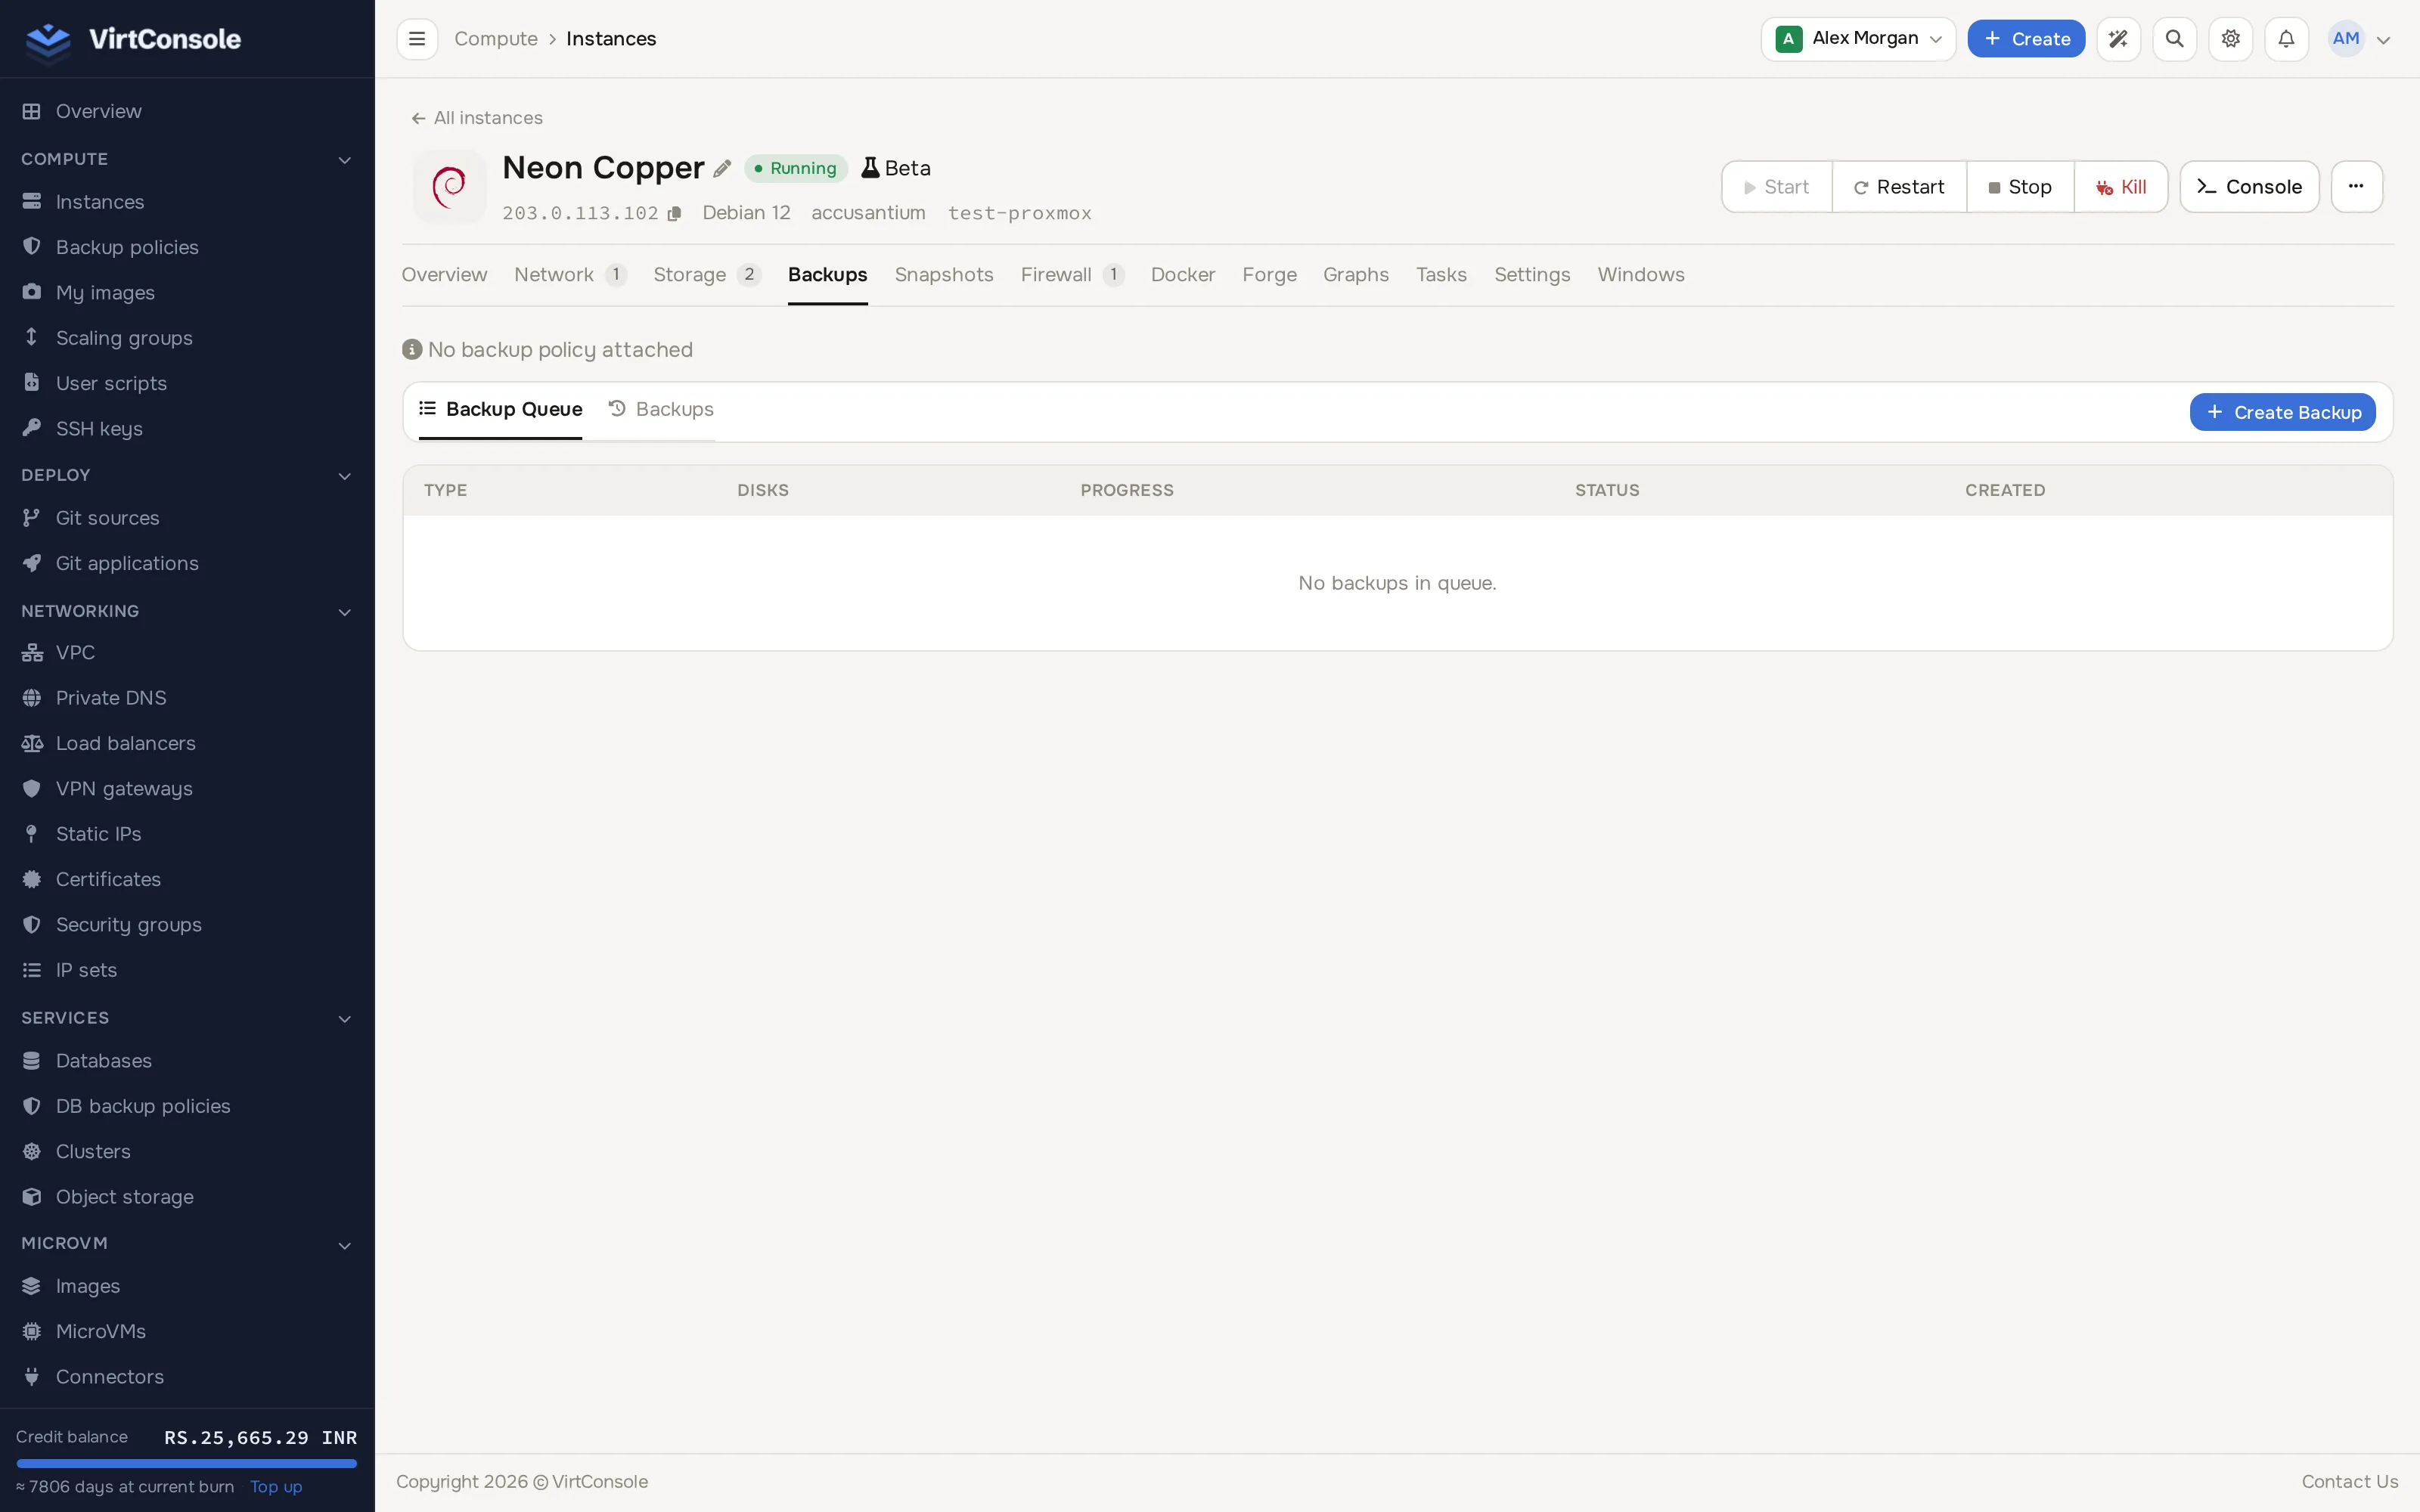
Section titled “Take a one-off backup”- Open the instance manage page (Compute > Instances > Manage) and click Backups in the tab bar.
- Click Create Backup.
- Fill in the dialog:
Fields
| Field | What to pick |
|---|---|
| Backup Type | Full Backup copies the whole disk. Incremental Backup copies only what changed since the last full backup; it needs a prior full backup to exist. |
| Backup Device | Primary Disk Only or All Disks (the boot disk plus secondary disks). |
- Click Create Backup.
The job starts right away. Watch its percentage and transfer rate under the Backup Queue sub-tab on the same page.
The Backups section with the create dialog.
Backed up by provider
Section titled “Backed up by provider”If the instance’s location is provider-managed, the Backups tab shows a Backed up by provider badge instead of No backup policy attached. Next to the badge is the schedule summary, for example Daily at 02:00 UTC, how many chains are kept, and which disks are copied.
Automatic backups are included with that location. You can still create backups on demand and restore from the list as usual. You cannot attach your own backup policy to that instance.
When every location you use is provider-managed and you have no leftover policies of your own, Compute > Backup Policies is hidden from the menu. That is expected: there is nothing for you to configure. If the menu is still there, at least one of your locations lets customers set their own policies, or you still have a policy from before the location changed.
On a hybrid location, instances with no policy of your own use the provider default (and show the same badge). Attaching your own policy to an instance replaces the provider default for that instance only.
Automate with a backup policy
Section titled “Automate with a backup policy”A backup policy is a reusable schedule: when to run, how many copies to keep, which disks to include. You attach instances to it once and backups run on their own. Skip this section if the Backups tab already says Backed up by provider and the Backup Policies menu is absent.
Where to find it
Section titled “Where to find it”In the user panel go to Compute > Backup Policies. If that item is missing from the menu, see Backed up by provider.
Create a policy
Section titled “Create a policy”- Click New policy.
- Under General, give the policy a Name, for example
Daily production. - Under Schedule:
Schedule fields
| Field | What to pick |
|---|---|
| Full Backup Frequency | Daily or Weekly. |
| Full Backup Time | The hour of day, in your account timezone. |
| Day of Week | Weekly schedules only: which day the full backup runs. |
- Under Retention & Incremental:
Retention fields
| Field | What it means | Default |
|---|---|---|
| Max Incremental Chain | How many incremental backups sit between two full backups. Set to 0 for full-only. |
6 |
| Retention type | Keep a number of backups (the default) or Keep by age (daily, weekly, monthly, yearly). | Keep a number |
| Retention Count | With a number-based policy: how many chains (one full plus its incrementals) to keep. The oldest chain is deleted when you exceed this. | 3 |
| Keep last, Keep within (days), Keep daily, Keep weekly, Keep monthly, Keep yearly | With an age-based policy: a backup is kept when any rule selects it. Rules run in the order keep last, daily, weekly, monthly, yearly, and a period already covered by a kept backup is skipped. Keep within is an extra window on top. Days, weeks, months and years follow your account timezone. Set at least one rule above 0. | empty |
| Backup Device | Primary Disk or All Disks. |
Primary Disk |
- Click Create Policy.
Attach instances
Section titled “Attach instances”- Click the policy’s name in the list to open it.
- Open the Attached Instances tab, pick an instance from the Attach Instance dropdown and click Attach.
An instance can belong to only one policy at a time. Only deployed instances get backed up. Instances whose location is provider-managed do not appear in the attach dropdown. Detaching stops future backups from this policy; existing backups stay until retention removes them. On a hybrid location the instance then falls back to the provider default.
The policy detail page has Overview and Attached Instances tabs, with Edit and Delete actions in the header. If backups start failing, a banner at the top of the page shows the failure count and last error, and the policy pauses after repeated failures; fix the cause and click Reset & Reactivate to resume it.
Restore a backup
Section titled “Restore a backup”- Open the instance’s Backups tab.
- Find the backup in the list (incrementals sit under their full backup) and click Restore on its row.
- Confirm.
The instance powers off, the backup is written back to the disk (for an incremental, the full backup is restored first and each incremental applied in order), and the instance starts again. Watch progress in the Tasks tab.
Delete backups
Section titled “Delete backups”Click Remove on the backup’s row, or tick several backups and click Delete Selected. On KVM nodes, deleting a backup does not block other actions on the instance, and every selected backup of the instance is sent. A full backup cannot be deleted while incrementals in its chain still exist; delete the incrementals first.
Backups when you destroy an instance
Section titled “Backups when you destroy an instance”Destroying an instance keeps its backups by default. Find Destroy instance on the instance’s manage page; the confirmation asks you to type the instance’s name and offers a checkbox, Also delete this instance’s backups, unticked by default. Leaving it unticked keeps every backup you have of the instance (it tells you how many); ticking it queues them for deletion once the instance is gone, except any you have marked protected, which are never deleted this way.
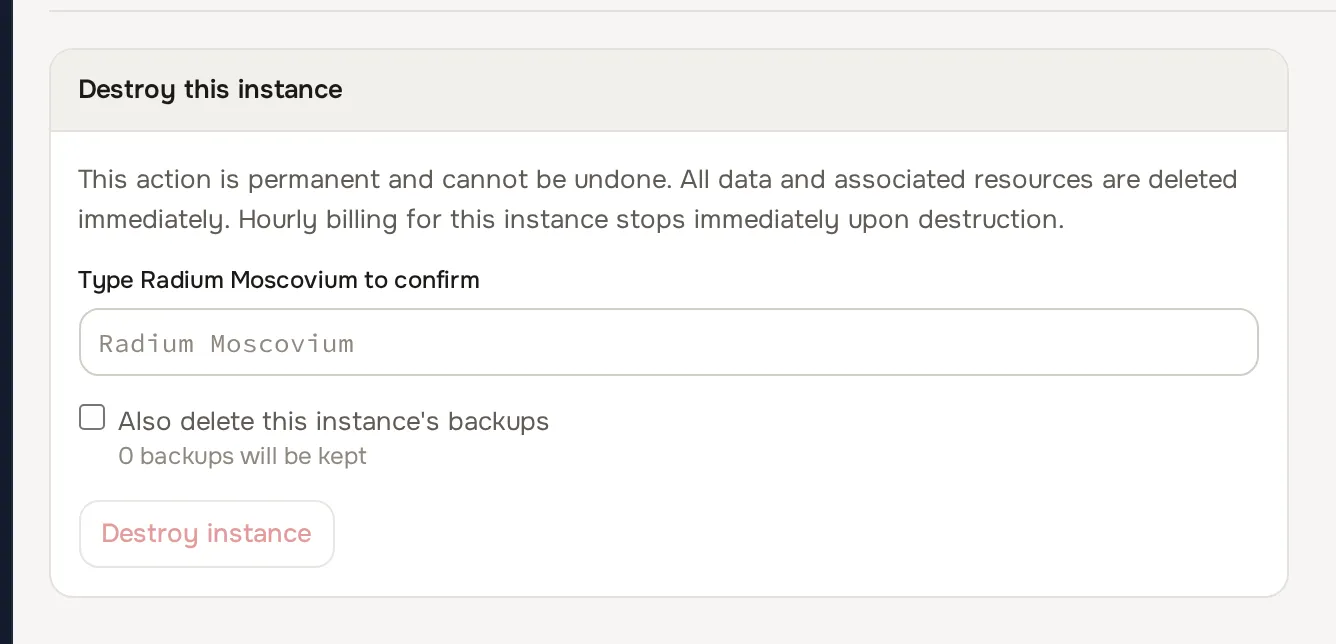
A kept backup keeps billing for its stored size the same as before, and you can still delete it whenever you want. Since it no longer has an instance page to sit under, find it from Compute > Backups, which lists every backup on your account, including backups of instances you have already destroyed. A backup of a destroyed instance has nothing to restore in place; ask your provider if you need its data recovered.
Backups on a Proxmox Backup Server destination
Section titled “Backups on a Proxmox Backup Server destination”Your provider may store backups on a Proxmox Backup Server (PBS). You do not have to configure anything; the Backups tab works as described above, with a few differences worth knowing:
- A PBS badge marks backups stored this way.
- Each backup shows its read mode.
Fullmeans the whole disk was read;incrementalmeans only blocks changed since the previous backup were read. Both kinds are equally complete: every PBS backup can be restored on its own, and deleting one never affects any other. - Each backup shows a verification state once the backup server has checked the snapshot’s integrity. A backup that has not been checked yet simply shows as unverified; that is normal right after it is taken.
- Restores work the same, but there is no chain to rebuild first, so a restore from an “incremental” backup is not slower than from a full one.
Your provider can also restore any PBS backup into a brand-new instance instead of overwriting this one, which is the safe way to recover files from an older point in time without touching the running instance. Ask your provider if you need that; it is an admin-side action.
Common problems
Section titled “Common problems”- There is no Create Backup button or the backup fails immediately. Your provider has not enabled backup storage for this location. Contact your provider.
- The Backups tab says Backed up by provider, or Backup Policies is missing from the menu. Your provider already schedules backups for this location. Manual backups and restores still work. See Backed up by provider.
- You cannot attach an instance to a policy. Either it already belongs to another policy, or backups for that instance are managed by your provider.
- The incremental option ran a full backup instead. The change-tracking state from the last backup was missing, so the system fell back to a full backup. The next incremental works normally.
- Backups did not run at the expected time. Check the policy is Active, and check your timezone under Account > Profile; schedule times are local to it.
- A backup is much larger than expected. The policy’s Backup Device is set to
All Disks, so every attached disk is included. - An “incremental” PBS backup took as long as a full one. The change-tracking state was reset (for example after a resize or a failed run), so that run re-read the whole disk. The next run is incremental again.