

Manage an instance
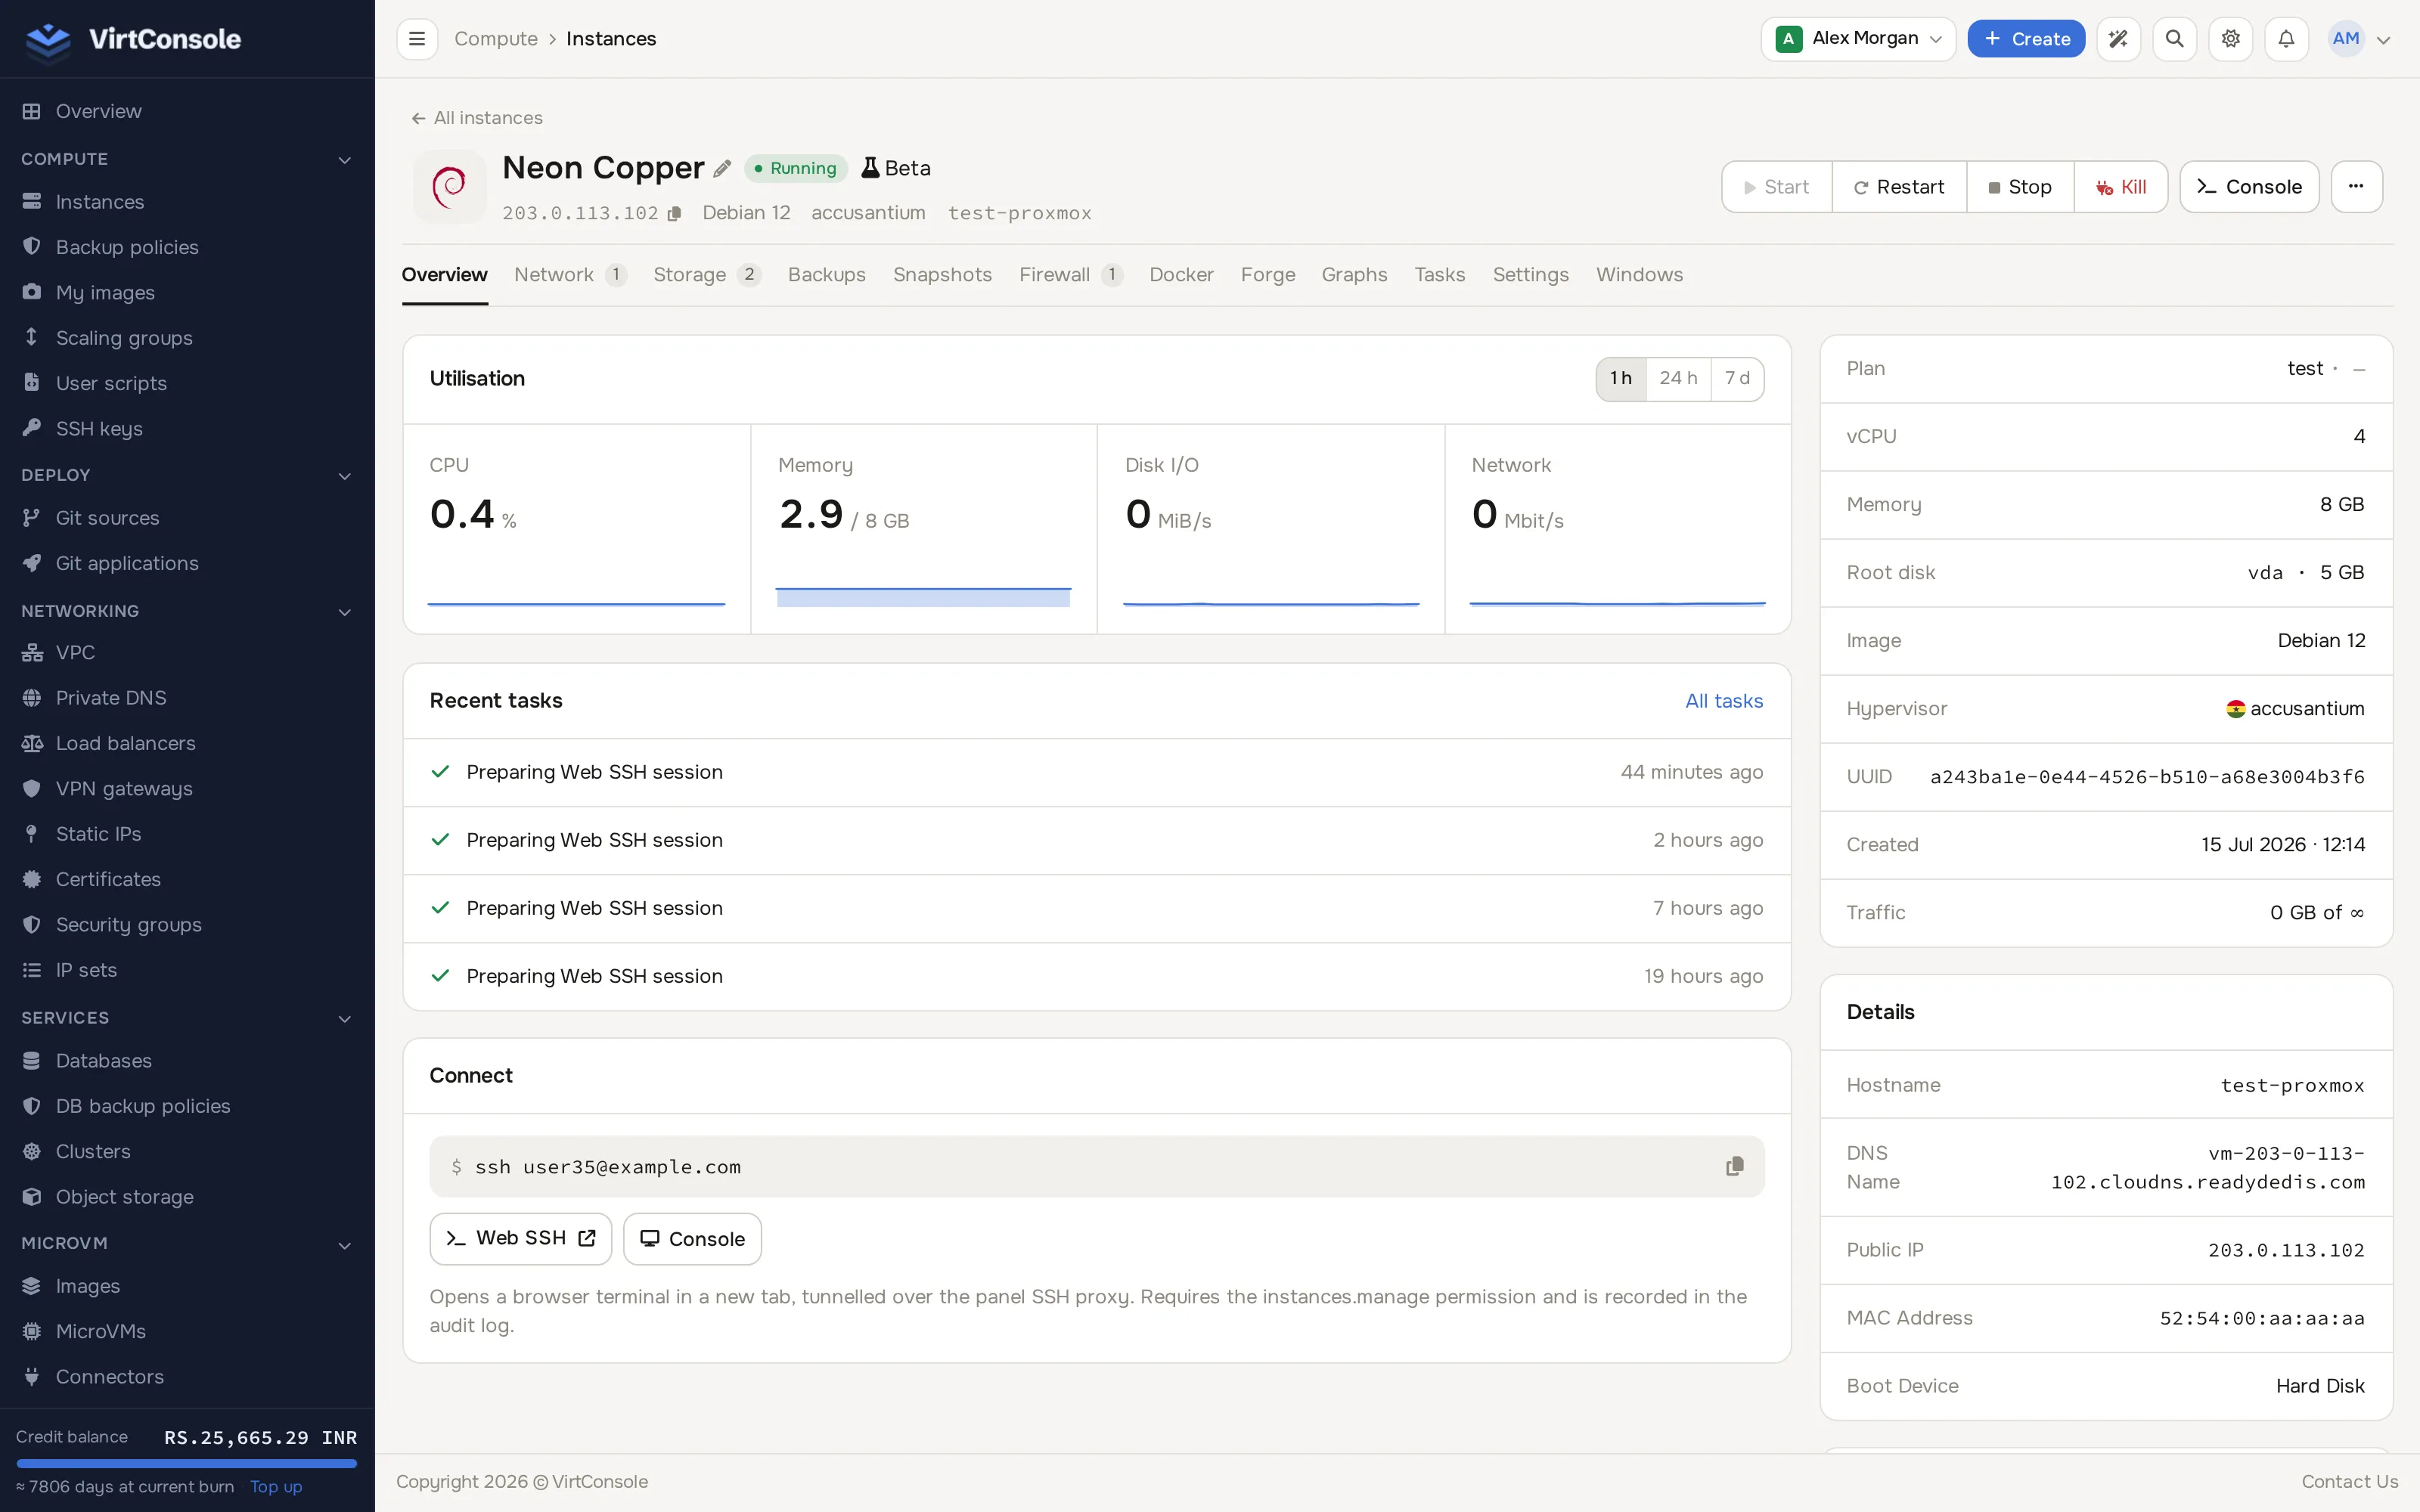
The manage page is the control center for one instance: status and power actions in the header, and a row of tabs across the top for overview, networking, storage, backups, firewall and settings.
Where to find it
Section titled “Where to find it”In the user panel go to Compute > Instances and click Manage next to the instance. Undeployed instances show Deploy instead; deploy them first (see Create an instance).
The manage page header with status, power buttons and tabs.
Power actions
Section titled “Power actions”The buttons in the header reflect the current state:
- Start: boots a stopped instance.
- Restart: reboots a running instance.
- Stop: asks the operating system to shut down cleanly. Always prefer this over pulling the plug.
- Kill: forces the instance off immediately. Use this only when Stop does not respond; it can corrupt unsaved data.
- Console: opens the VNC console in a new browser tab (see below).
Web SSH and Reinstall sit in the … menu next to Console rather than in the button row. Web SSH only appears there for running Linux instances; see Web SSH. Both actions are also reachable from the Overview tab (Web SSH from the Connect card, Reinstall from Quick actions).
While any task is running on the instance (a deploy, a backup, a migration), the power buttons are disabled until it finishes. Suspended instances cannot be started; if you did not suspend the instance yourself, contact your provider.
The Overview tab
Section titled “The Overview tab”The tab you land on shows:
- Utilisation: CPU, memory, disk I/O and network graphs, switchable between 1h, 24h and 7d.
- Recent tasks: the instance’s latest background tasks, with an All tasks link to the full Tasks tab.
- Connect: the SSH command, a Web SSH button and a Console button.
- A specification card on the right (Plan, vCPU, Memory, Root disk, Image, Hypervisor, UUID, Created, Traffic), a Details card (hostname, DNS name, IP addresses, MAC address, boot device, project), and a Quick actions card with Change plan, Reinstall OS, Take snapshot, Mount ISO, Create image and Destroy instance buttons.
VNC console
Section titled “VNC console”The Console button opens a remote screen of the instance in a new browser tab. This is the fallback when SSH does not answer: you see exactly what a monitor attached to the machine would show, including the boot process.
The console is only available when VNC is enabled on the instance:
- Open the Settings tab.
- Under Remote Console (VNC), click Enable VNC.
- Optionally change the VNC keymap so your keyboard layout matches, then click Update keymap.
Disable VNC again from the same place when you do not need it.
Reinstall
Section titled “Reinstall”Reinstalling wipes the primary disk and deploys a fresh OS.
- Click the … menu next to Console and choose Reinstall, or click Reinstall OS under Quick actions on the Overview tab.
- Confirm Do you really want to switch to Reinstallation Mode?.
- You land on the Install page. Pick the OS, hostname, timezone, SSH keys and scripts, then click Deploy instance. See Create an instance for the field-by-field walkthrough.
To back out before deploying, click Cancel Reinstallation on the Install page.
Rescue and recovery
Section titled “Rescue and recovery”To rescue a broken system (a lost password you cannot reset, a bad firewall rule, a failed upgrade):
- Open the Settings tab and find Media.
- Under Primary CD/DVD-ROM, pick a rescue or installer ISO from the dropdown and click Insert. Use Custom ISO to boot from an ISO URL instead.
- Under Boot Device, set the boot device to CD/DVD ROM and click Update.
- Open the Console and restart the instance. It boots from the ISO.
- When you are done, eject the ISO and set the boot device back to Hard Drive.
If the page shows a banner saying A different operating system was detected on this instance’s disk (for example after your provider imported a converted disk), stop the instance and click Repair imported OS in the banner. The repair adapts drivers and firmware settings so the disk boots on this platform.
Other settings worth knowing
Section titled “Other settings worth knowing”- Rename: click the instance name in the header to edit it.
- Reset password: under Settings > Reset Password, pick root or Administrator and click Reset password. Requires the guest agent inside the OS; cloud images include it. The new password is shown once and emailed to you. If the password is set but SSH password login cannot be enabled in the guest, the task still finishes as done and says “Password set, but SSH password login could not be enabled” with the reason; enable
PasswordAuthenticationin the guest, and install or unblock the guest agent if the message names it. - TPM 2.0 and Secure Boot: hardware security toggles under Settings > Boot Security. A change is saved at once and takes effect the next time the instance starts; a running guest is not changed. On a KVM node, TPM can be turned on only when the node supports it, and the panel shows an error if it does not. Turning TPM off is always allowed.
- Change plan (Cloud Service instances only): click Change plan under Quick actions on the Overview tab. Billing follows the new plan from the moment the resize completes; disk size cannot be reduced.
What happens next
Section titled “What happens next”Power actions and reinstalls run as background tasks. Watch the live status dot in the header and the Tasks tab; both update in real time. A failed task shows its error inline.
Common problems
Section titled “Common problems”- All buttons are greyed out. A task is already running on the instance. Wait for it to finish.
- The Console button is disabled. VNC is off. Enable it under Settings > Remote Console (VNC).
- Web SSH is missing from the … menu. The instance is stopped or is not running a Linux image. Use the console instead.
- Reinstall is blocked. The Deletion Lock is on, or a task is running. Turn the lock off under Settings first.
- Password reset fails. The guest agent is not running inside the OS. Boot from a rescue ISO to reset the password manually, or contact your provider.