

VPC networks
A VPC (Virtual Private Cloud) is a private virtual network that only your resources can see. Instances placed in a VPC get private IPs and can talk to each other directly, even when they run on different physical hosts.
With a VPC you can:
- Carve the VPC into subnets (smaller IP ranges inside the VPC range).
- Deploy instances into those subnets.
- Add a NAT gateway so instances in private subnets can reach the internet outbound.
- Add a VPN gateway for remote access and site-to-site links. See VPN gateways.
- Attach private DNS zones for internal names like
web.prod. See Private DNS. - Peer two VPCs so their instances can talk. See VPN gateways for peering.
Before you begin
Section titled “Before you begin”- Your provider has enabled VPC in at least one location. If Networking > VPC is missing from your sidebar, contact your provider.
Create a VPC
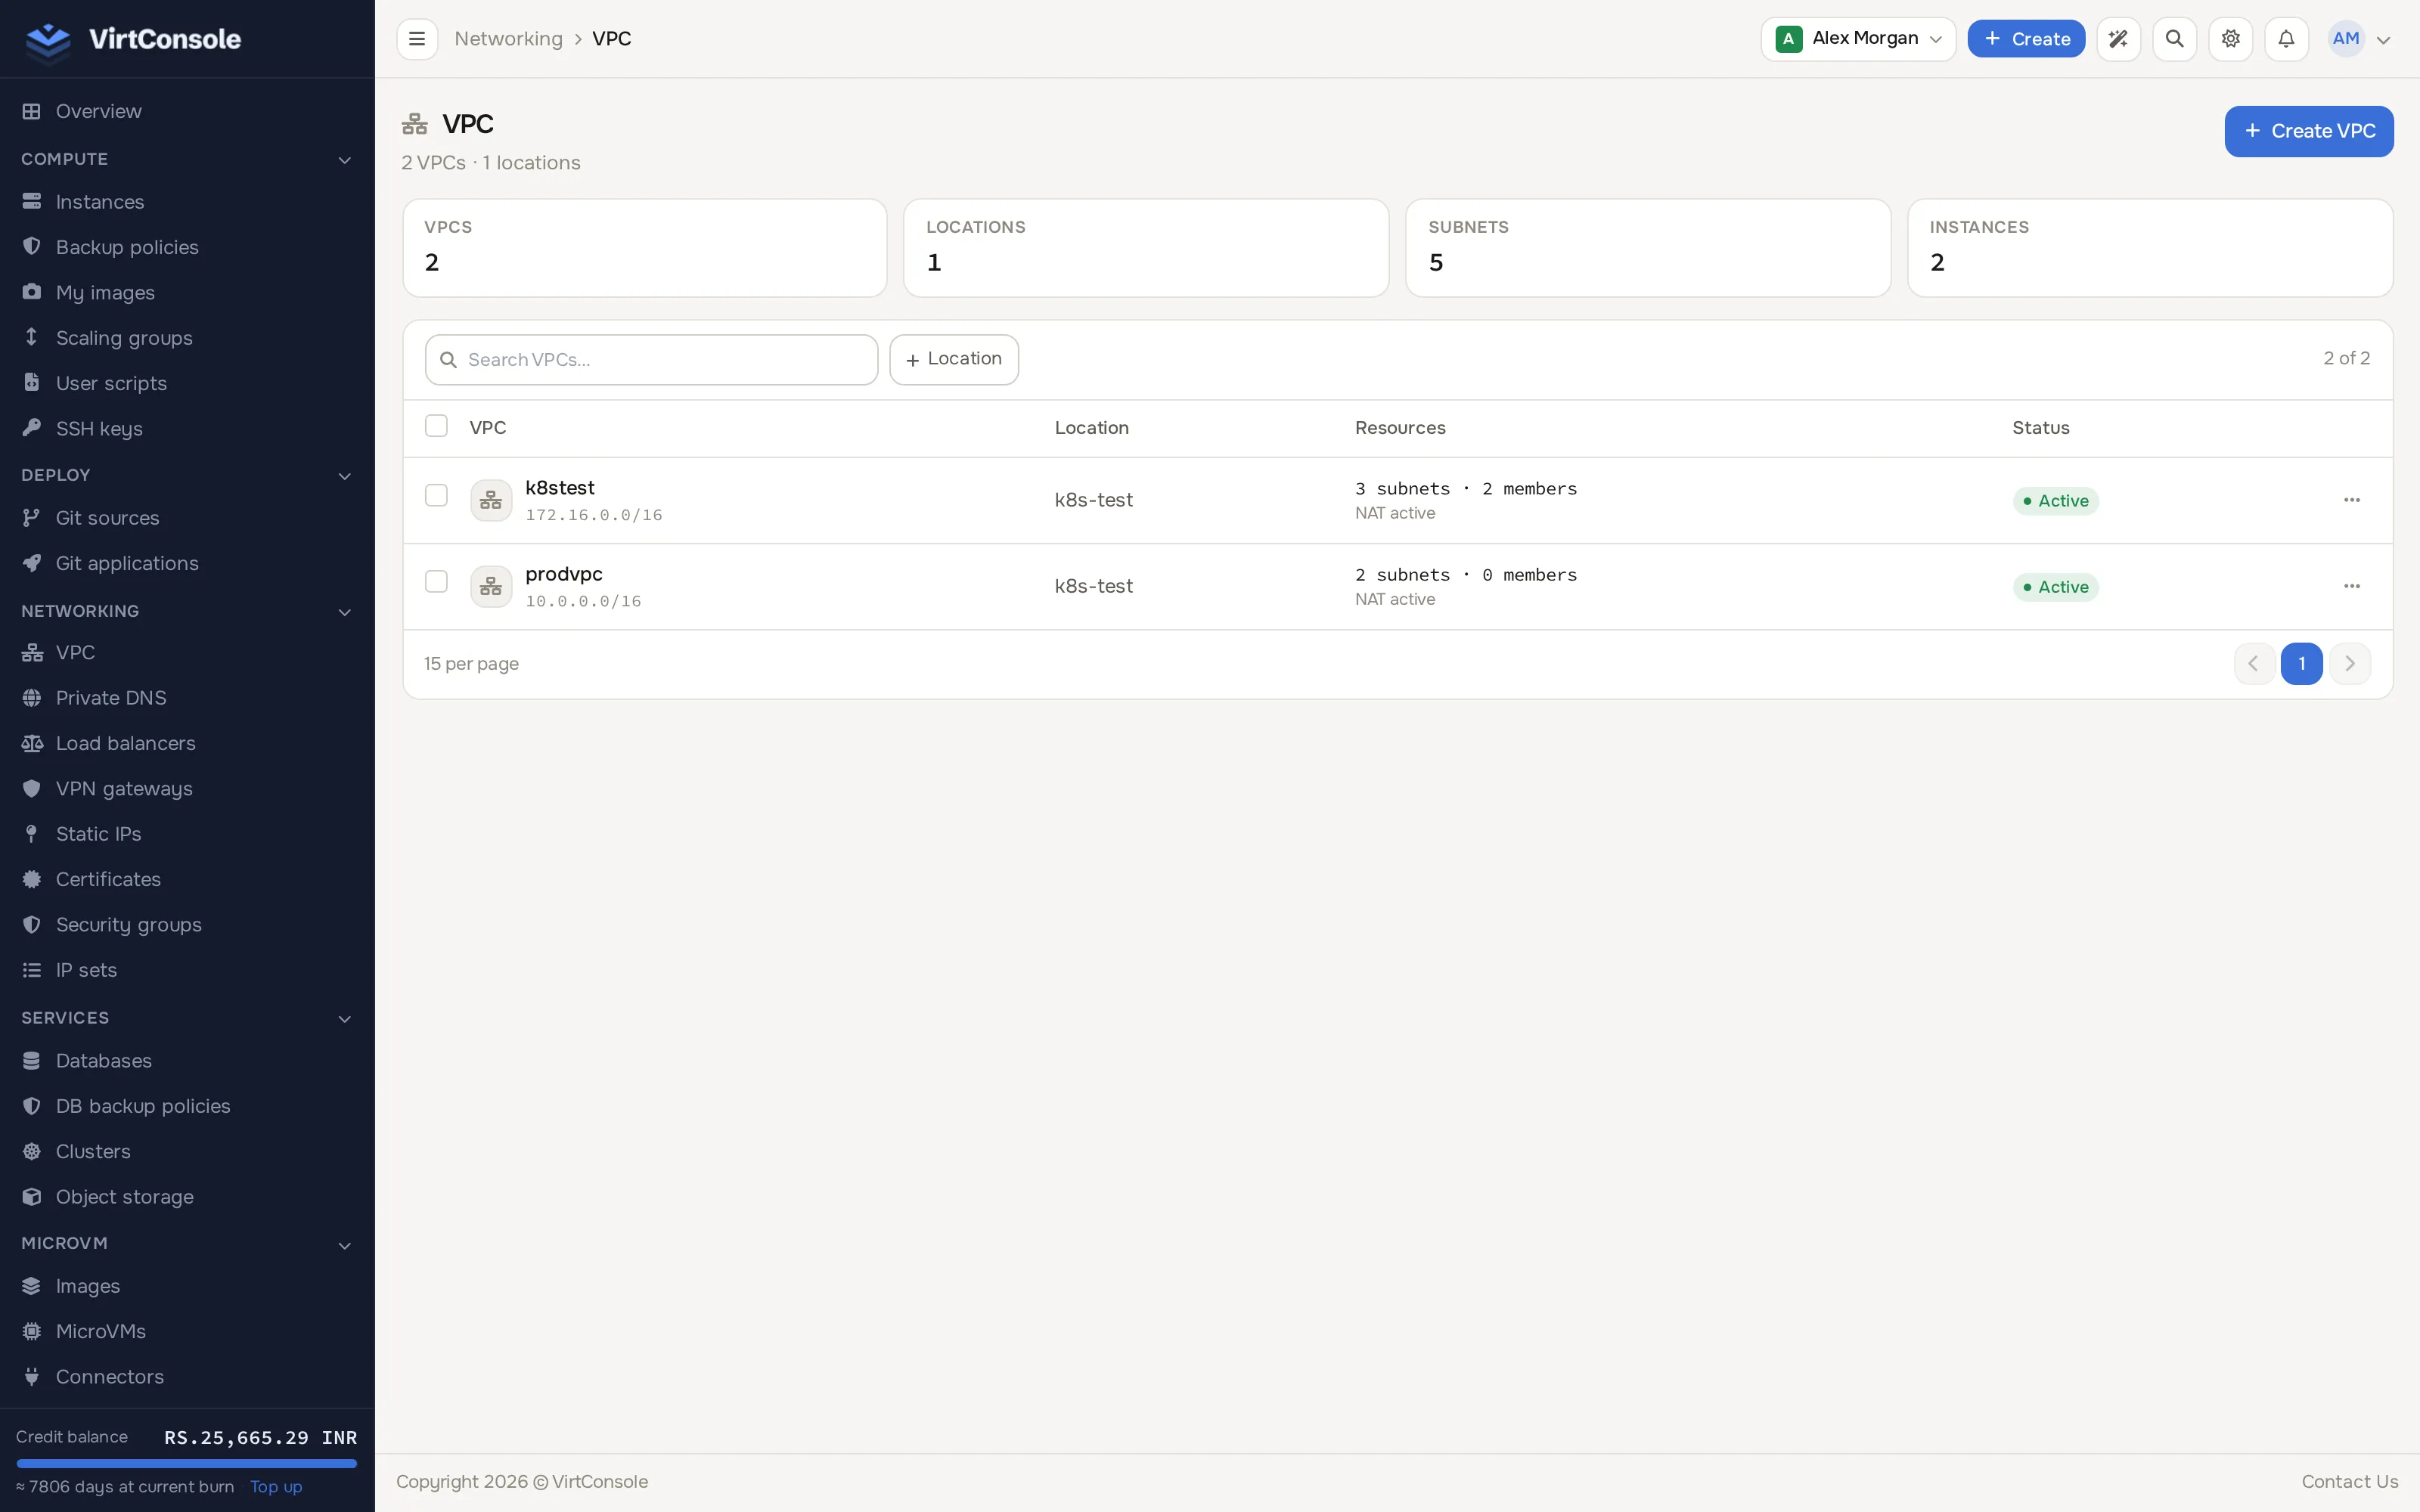
Section titled “Create a VPC”Go to Networking > VPC to see every VPC you own.
-
Click Create VPC. The create page opens.
-
Click a Location, then click Continue.
-
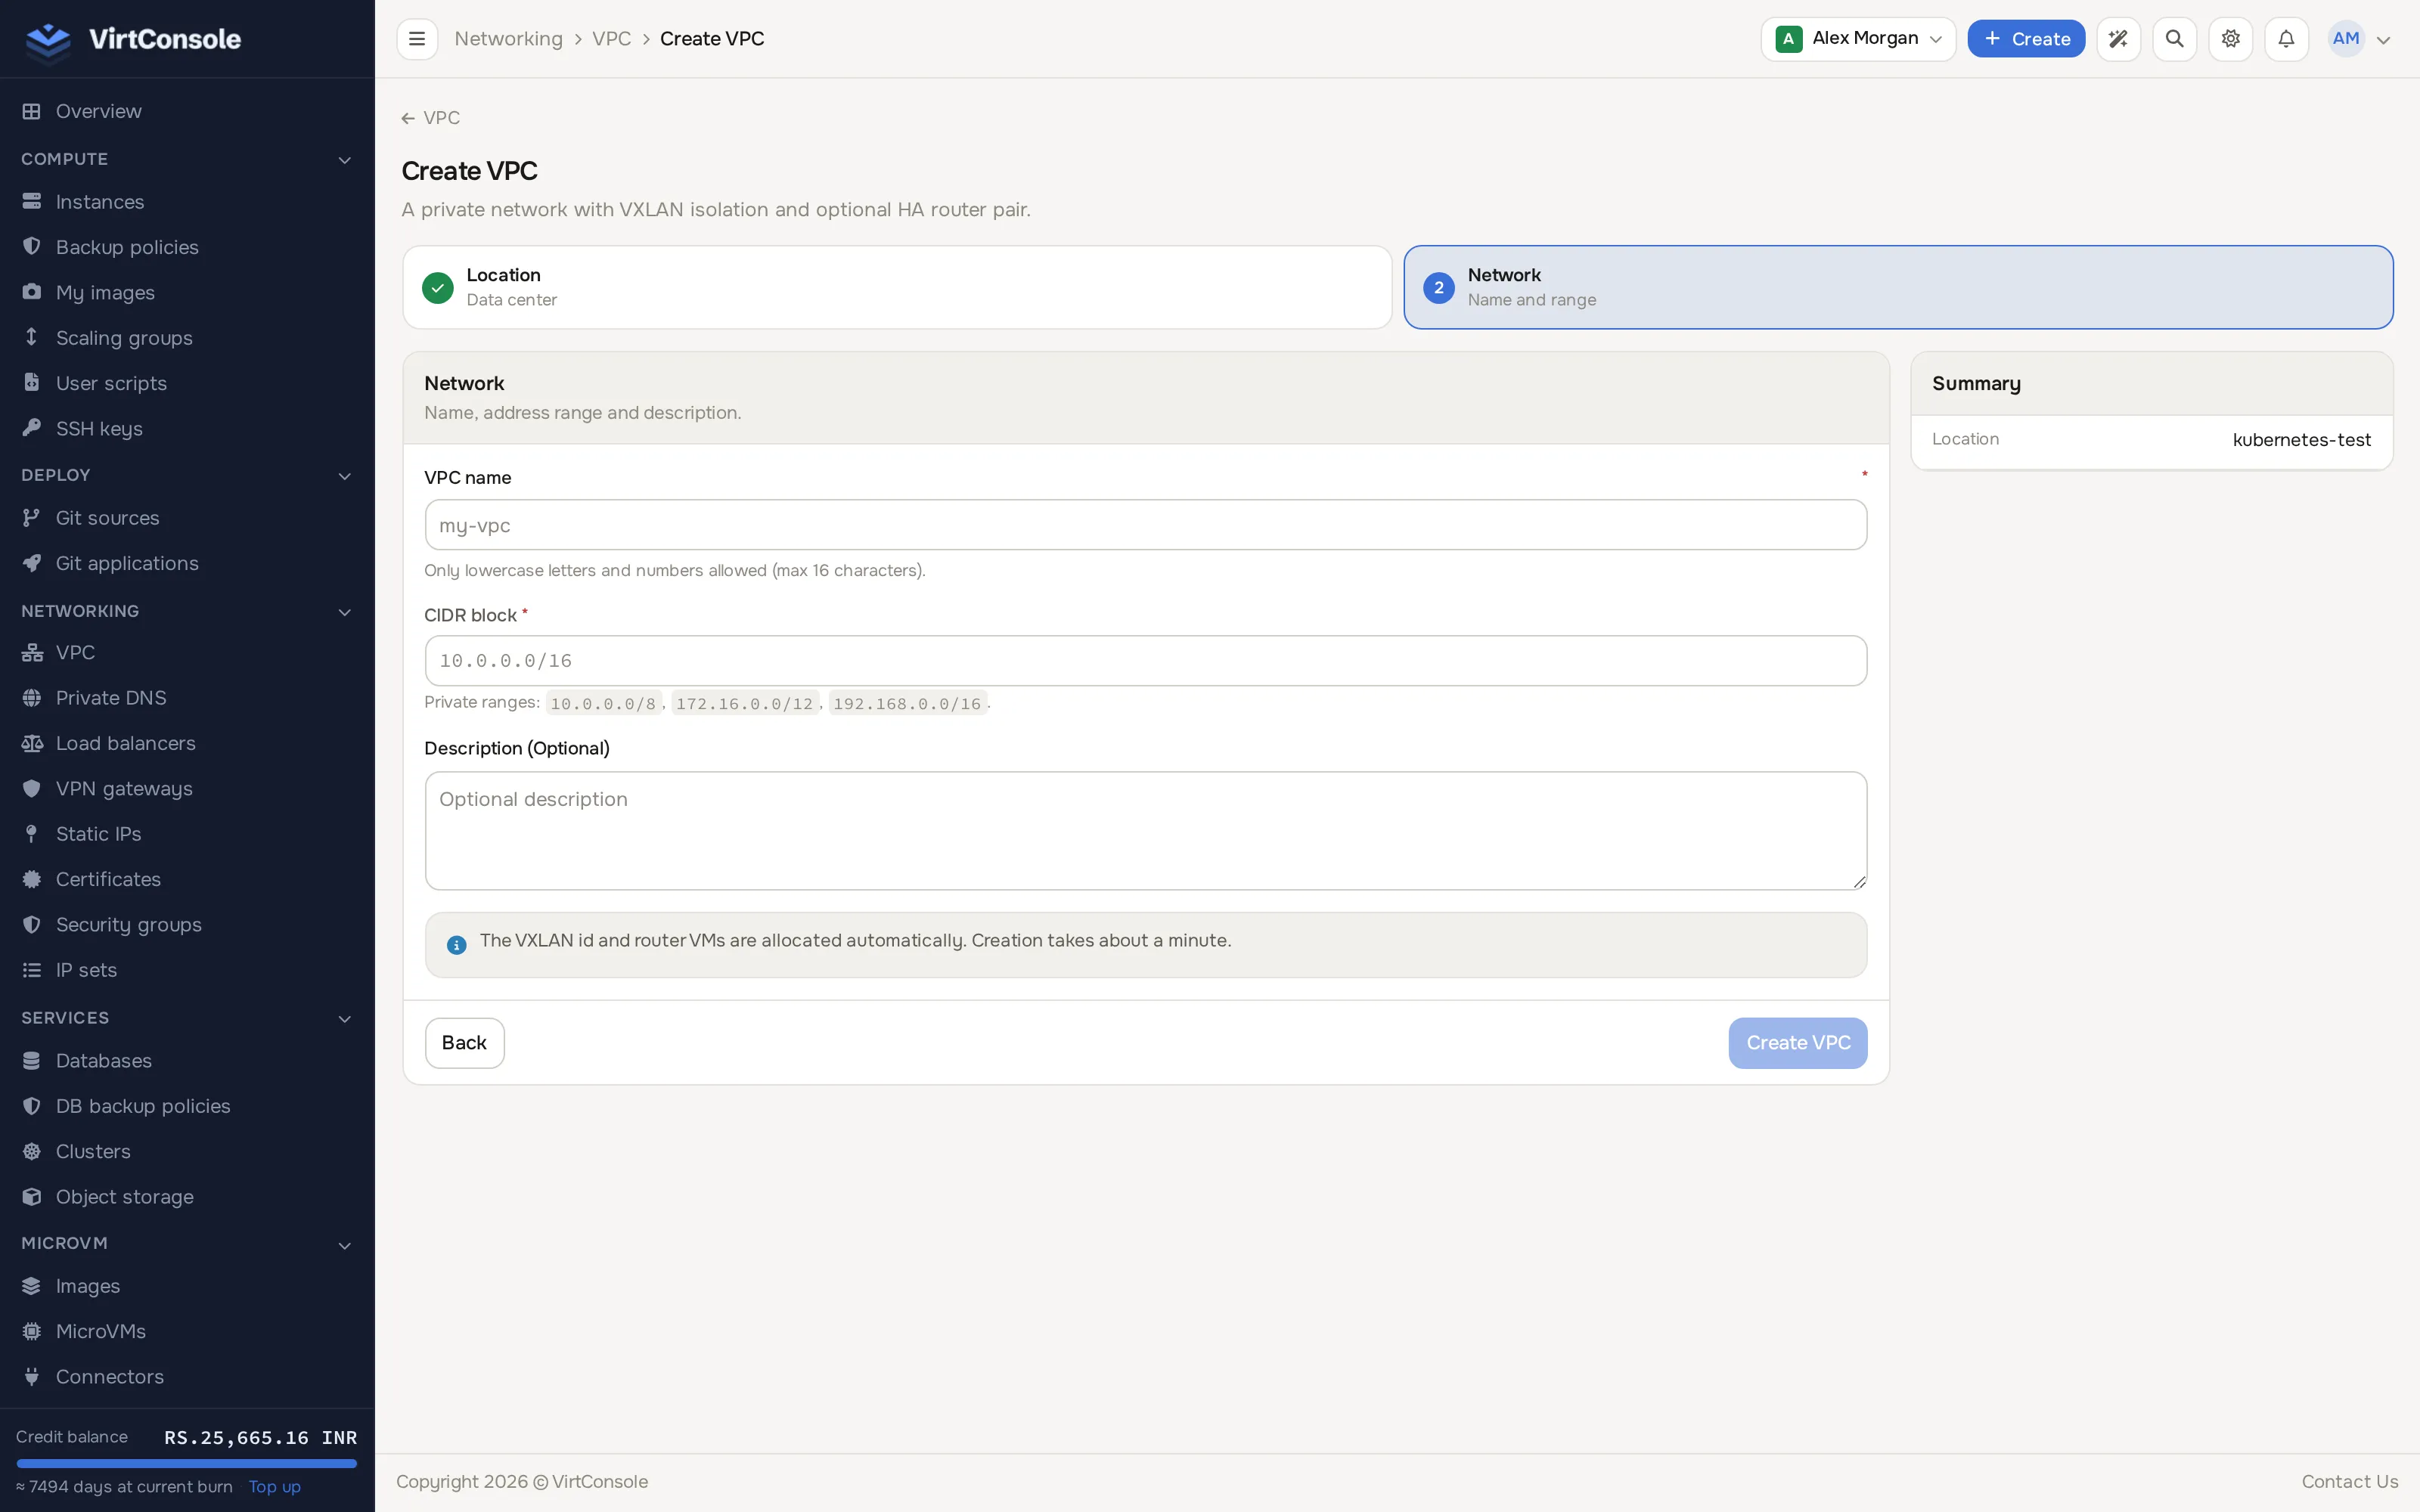
On the Network step, enter:
Fields
| Field | What to enter | Example |
|---|---|---|
| VPC name | A label you recognise. Lowercase letters and numbers, max 16 characters. | production1 |
| CIDR block | The overall private address range of the VPC. Subnets are carved from it. | 10.0.0.0/16 |
| Description (Optional) | Optional. |
Common CIDR choices: 10.0.0.0/16, 172.16.0.0/16, 192.168.0.0/16.
- Check the Summary panel and click Create VPC.
Create subnets
Section titled “Create subnets”- Open the VPC from the list. The detail page shows its subnets.
- Click Add Subnet. The Add subnet dialog opens.
- Enter a Name and a CIDR inside the VPC range, for example
10.0.1.0/24. Pick the subnet Type:Privatesubnets are for internal-only instances;Publicsubnets can hold instances that also get public IPs. - Click Add subnet.
The gateway IP is auto-assigned (the first usable address) and addresses for the whole range are generated automatically.
Deploy instances into a VPC
Section titled “Deploy instances into a VPC”When creating an instance, the VPC Networking section of the create flow lets you pick the VPC and subnet. The instance gets a private IP and its networking is configured automatically on first boot. Instances in the same VPC can reach each other on their private IPs. See Create an instance.
You can also move an existing instance into a VPC from its Networking section. See Instance networking.
Source check (anti-spoofing)
Section titled “Source check (anti-spoofing)”Every VPC interface is protected against address spoofing by default. The host only forwards traffic the instance sends from its own MAC address and from the VPC addresses assigned to that interface, including any secondary VPC IPs you added. Anything sent from another MAC or IP address is dropped before it reaches the VPC, so one instance cannot impersonate another or poison its neighbours’ ARP caches. Traffic sent to the instance is not affected.
Some workloads legitimately send from addresses the panel does not know about. Turn the source check off for the instance’s VPC interface when you run:
- A floating virtual IP shared between instances, for example keepalived or VRRP failover pairs.
- MetalLB or kube-vip in layer 2 mode on a self-managed Kubernetes cluster.
- Docker macvlan or ipvlan networks, where containers get their own MAC or IP address.
- Nested virtualization, where guests inside the instance bridge onto the VPC with their own addresses.
- A router, firewall or VPN appliance that forwards traffic for other networks.
To change it, open the instance’s Networking tab and use the Source check switch in the VPC Network section. Turning it off asks for confirmation; turning it back on does not. The change reaches the host within about a minute and needs no restart. You can also set it through the API with POST /api/instance/{id}/vpc/source-check and a JSON body {"source_check": false} (or true).
NAT gateway: outbound internet for private subnets
Section titled “NAT gateway: outbound internet for private subnets”Instances in a private subnet can talk to each other but cannot reach the internet until you add a NAT gateway (a managed gateway that rewrites outbound traffic to its own public IP).
- Open the VPC detail page and click NAT Gateway.
- Click Create NAT gateway, optionally name it, and select which private subnets route through it. Leave the selection empty to attach all private subnets.
- Click Create.
The gateway gets a dedicated public IP. While it exists it is billed hourly at the location’s rate, and traffic through it may be metered per GB, depending on your provider’s pricing.
From the NAT gateway page you can:
- Enable NAT / Disable NAT without deleting the gateway.
- Attach subnet / Detach a subnet.
- See bandwidth used this billing cycle.
- Delete the gateway.
If the state shows Bandwidth Suspended, the bandwidth allowance was exhausted and NAT resumes automatically at the start of the next billing cycle. Contact your provider to raise the allowance.
What happens next
Section titled “What happens next”VPCs and subnets are ready within seconds. A NAT gateway takes a few moments to provision and shows Active when ready. Deploy an instance into a subnet and it can reach its VPC neighbours immediately.
Common problems
Section titled “Common problems”- “No locations with VPC enabled.” Your provider has not enabled VPC in any location for your account. Contact your provider.
- Instances in the same VPC cannot reach each other. Confirm both are running and in the same VPC, and check their security groups. See Security groups.
- A floating IP, MetalLB/kube-vip address or container network does not answer. The traffic is sent from an address that is not assigned to the instance and is dropped by the source check. Assign the address as a secondary VPC IP if only one instance uses it, or turn the source check off for that instance (see Source check).
- Instances in the VPC cannot reach the internet. Confirm a NAT gateway exists, its NAT state is Enabled, and the instance’s subnet is attached to it.
- The VPC does not appear when creating an instance. VPC is not enabled in that location. Pick a location where it is, or contact your provider.
- The Create NAT gateway option is missing. NAT gateway is not enabled for this VPC’s location. Contact your provider.