

Create a MicroVM
A MicroVM is a running instance of an image version. Create one from a ready image, pick where and how big it runs, and choose how long it should stay up.
Before you begin
Section titled “Before you begin”- A ready image, or use one of the platform’s own base images.
- Your account has a MicroVM quota (5 by default, higher if your provider raised it) and needs a positive credit balance if MicroVM billing is enabled for your account.
Where to find it
Section titled “Where to find it”In the user panel go to MicroVM > MicroVMs.
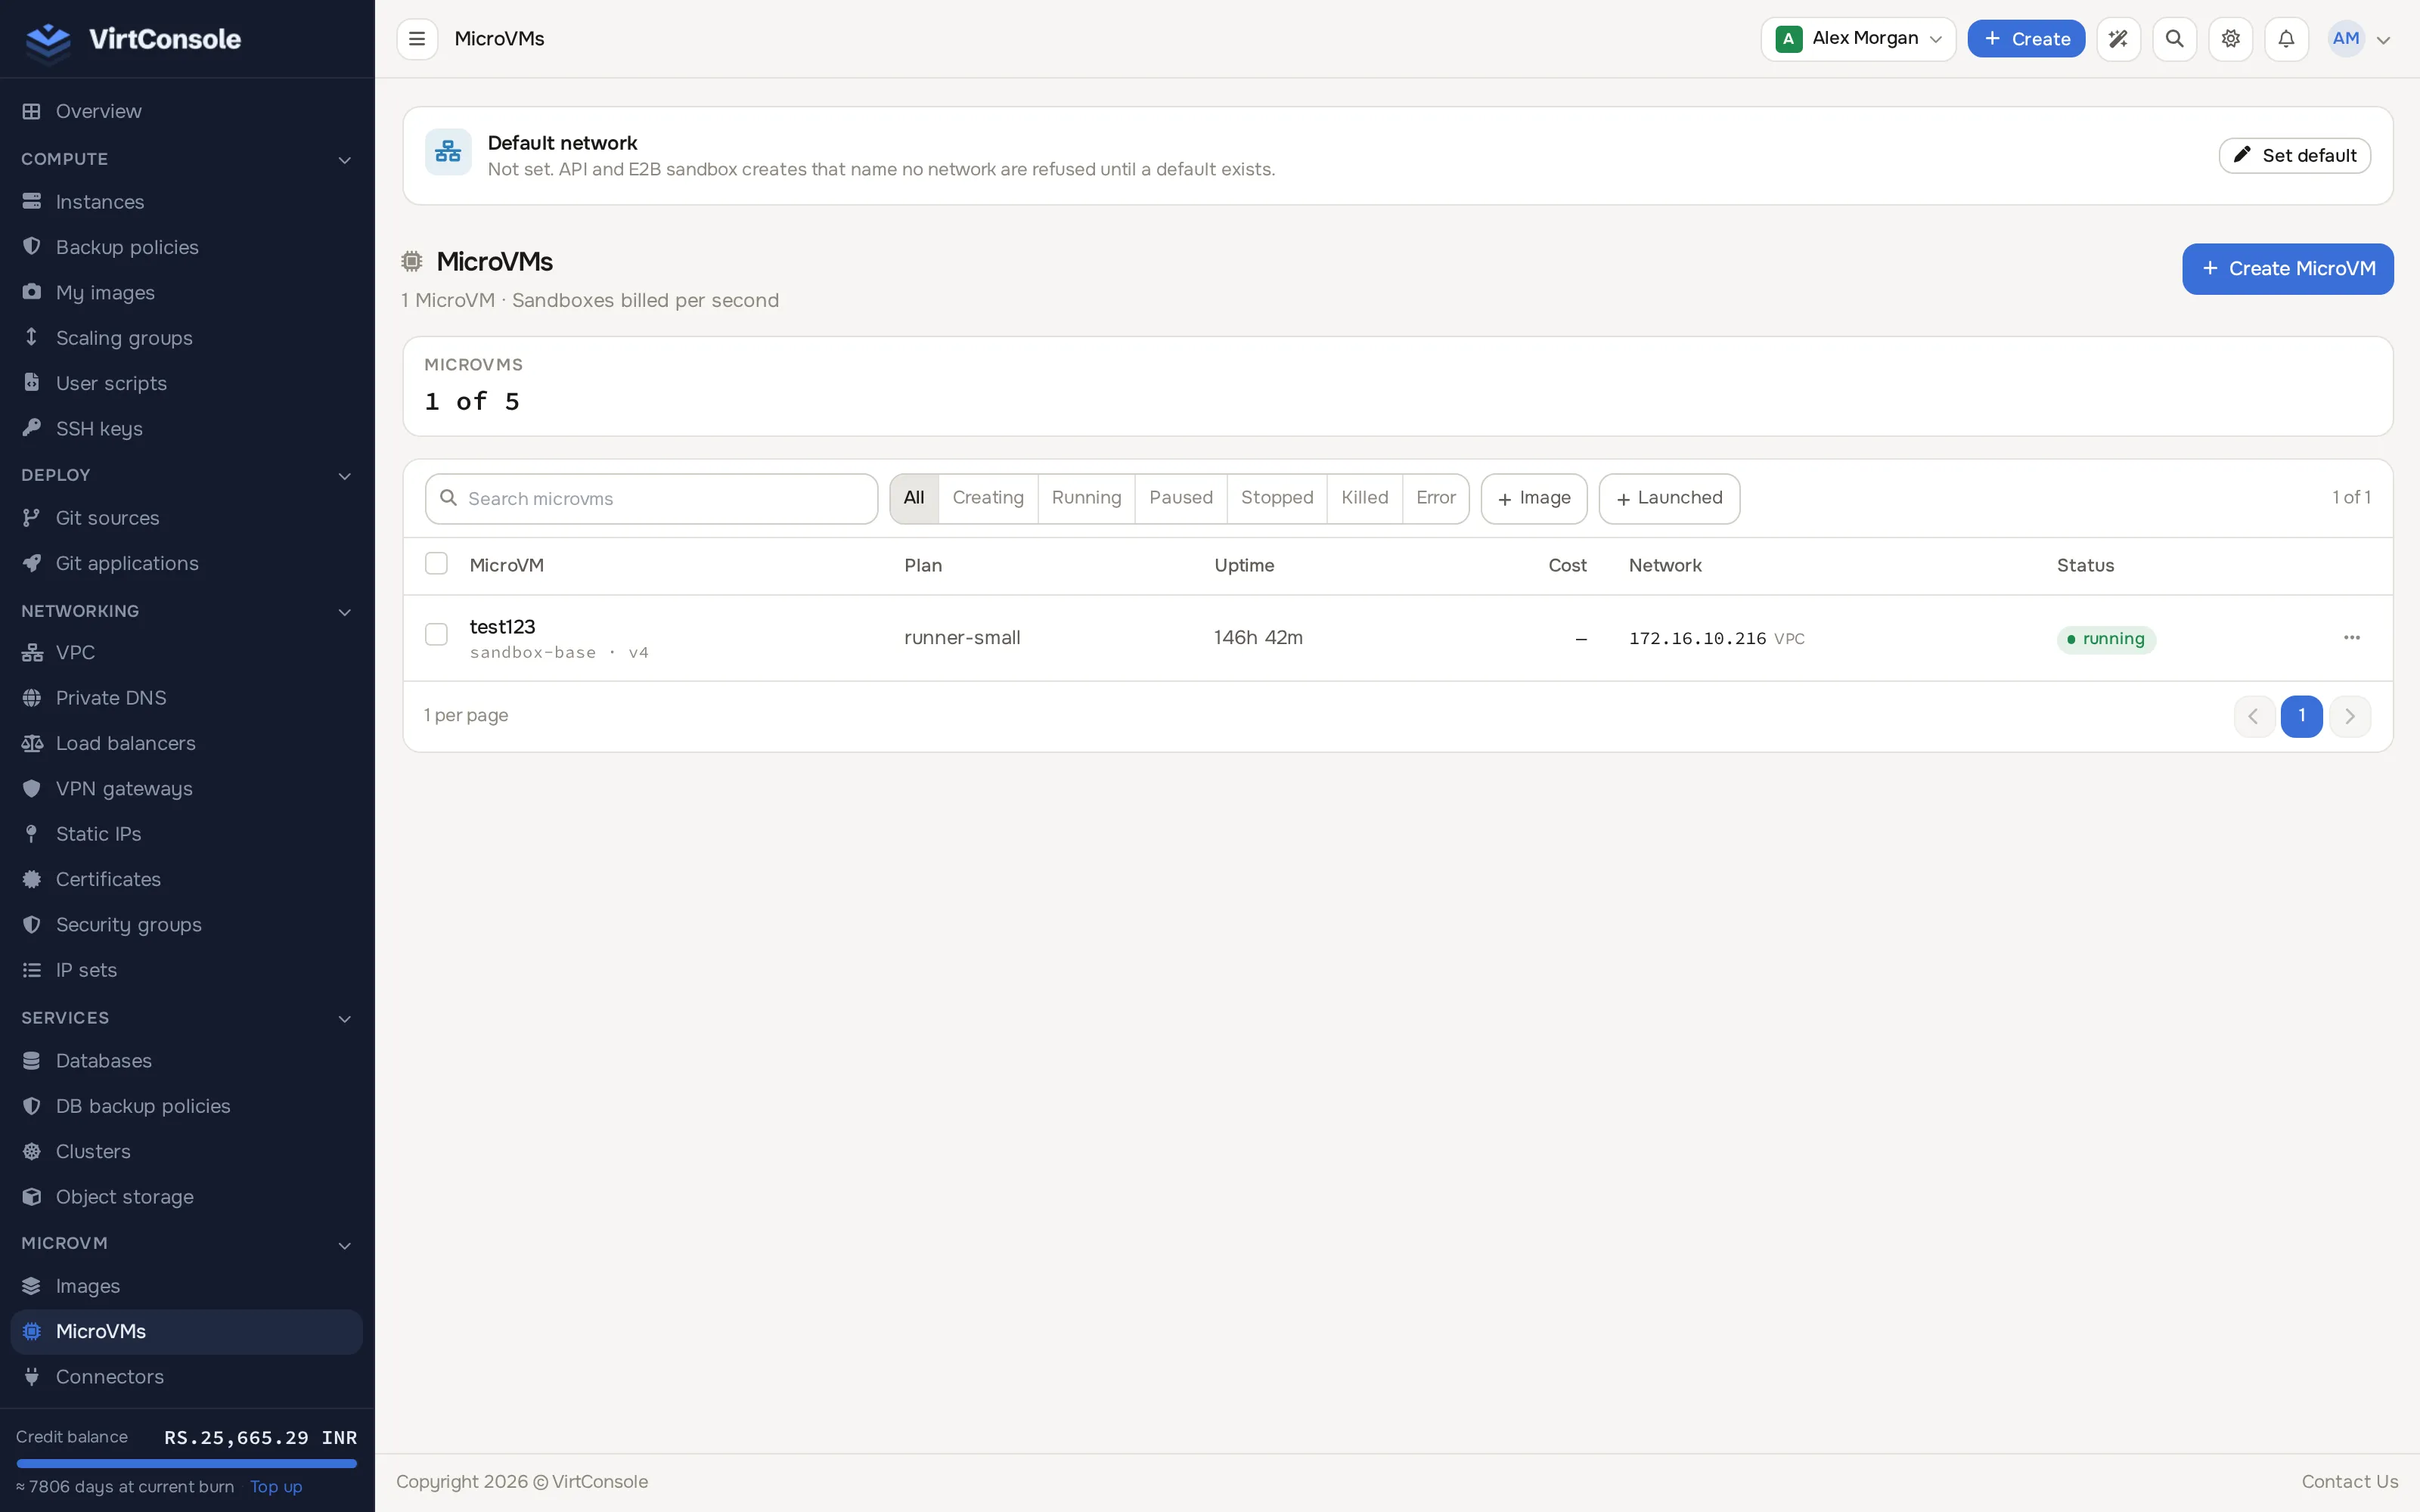
Create a MicroVM
Section titled “Create a MicroVM”Click Create MicroVM to open the wizard. It has three steps, with a live summary (image, plan, location, lifetime, network, env variables, persistent, estimated cost) on the right throughout.
-
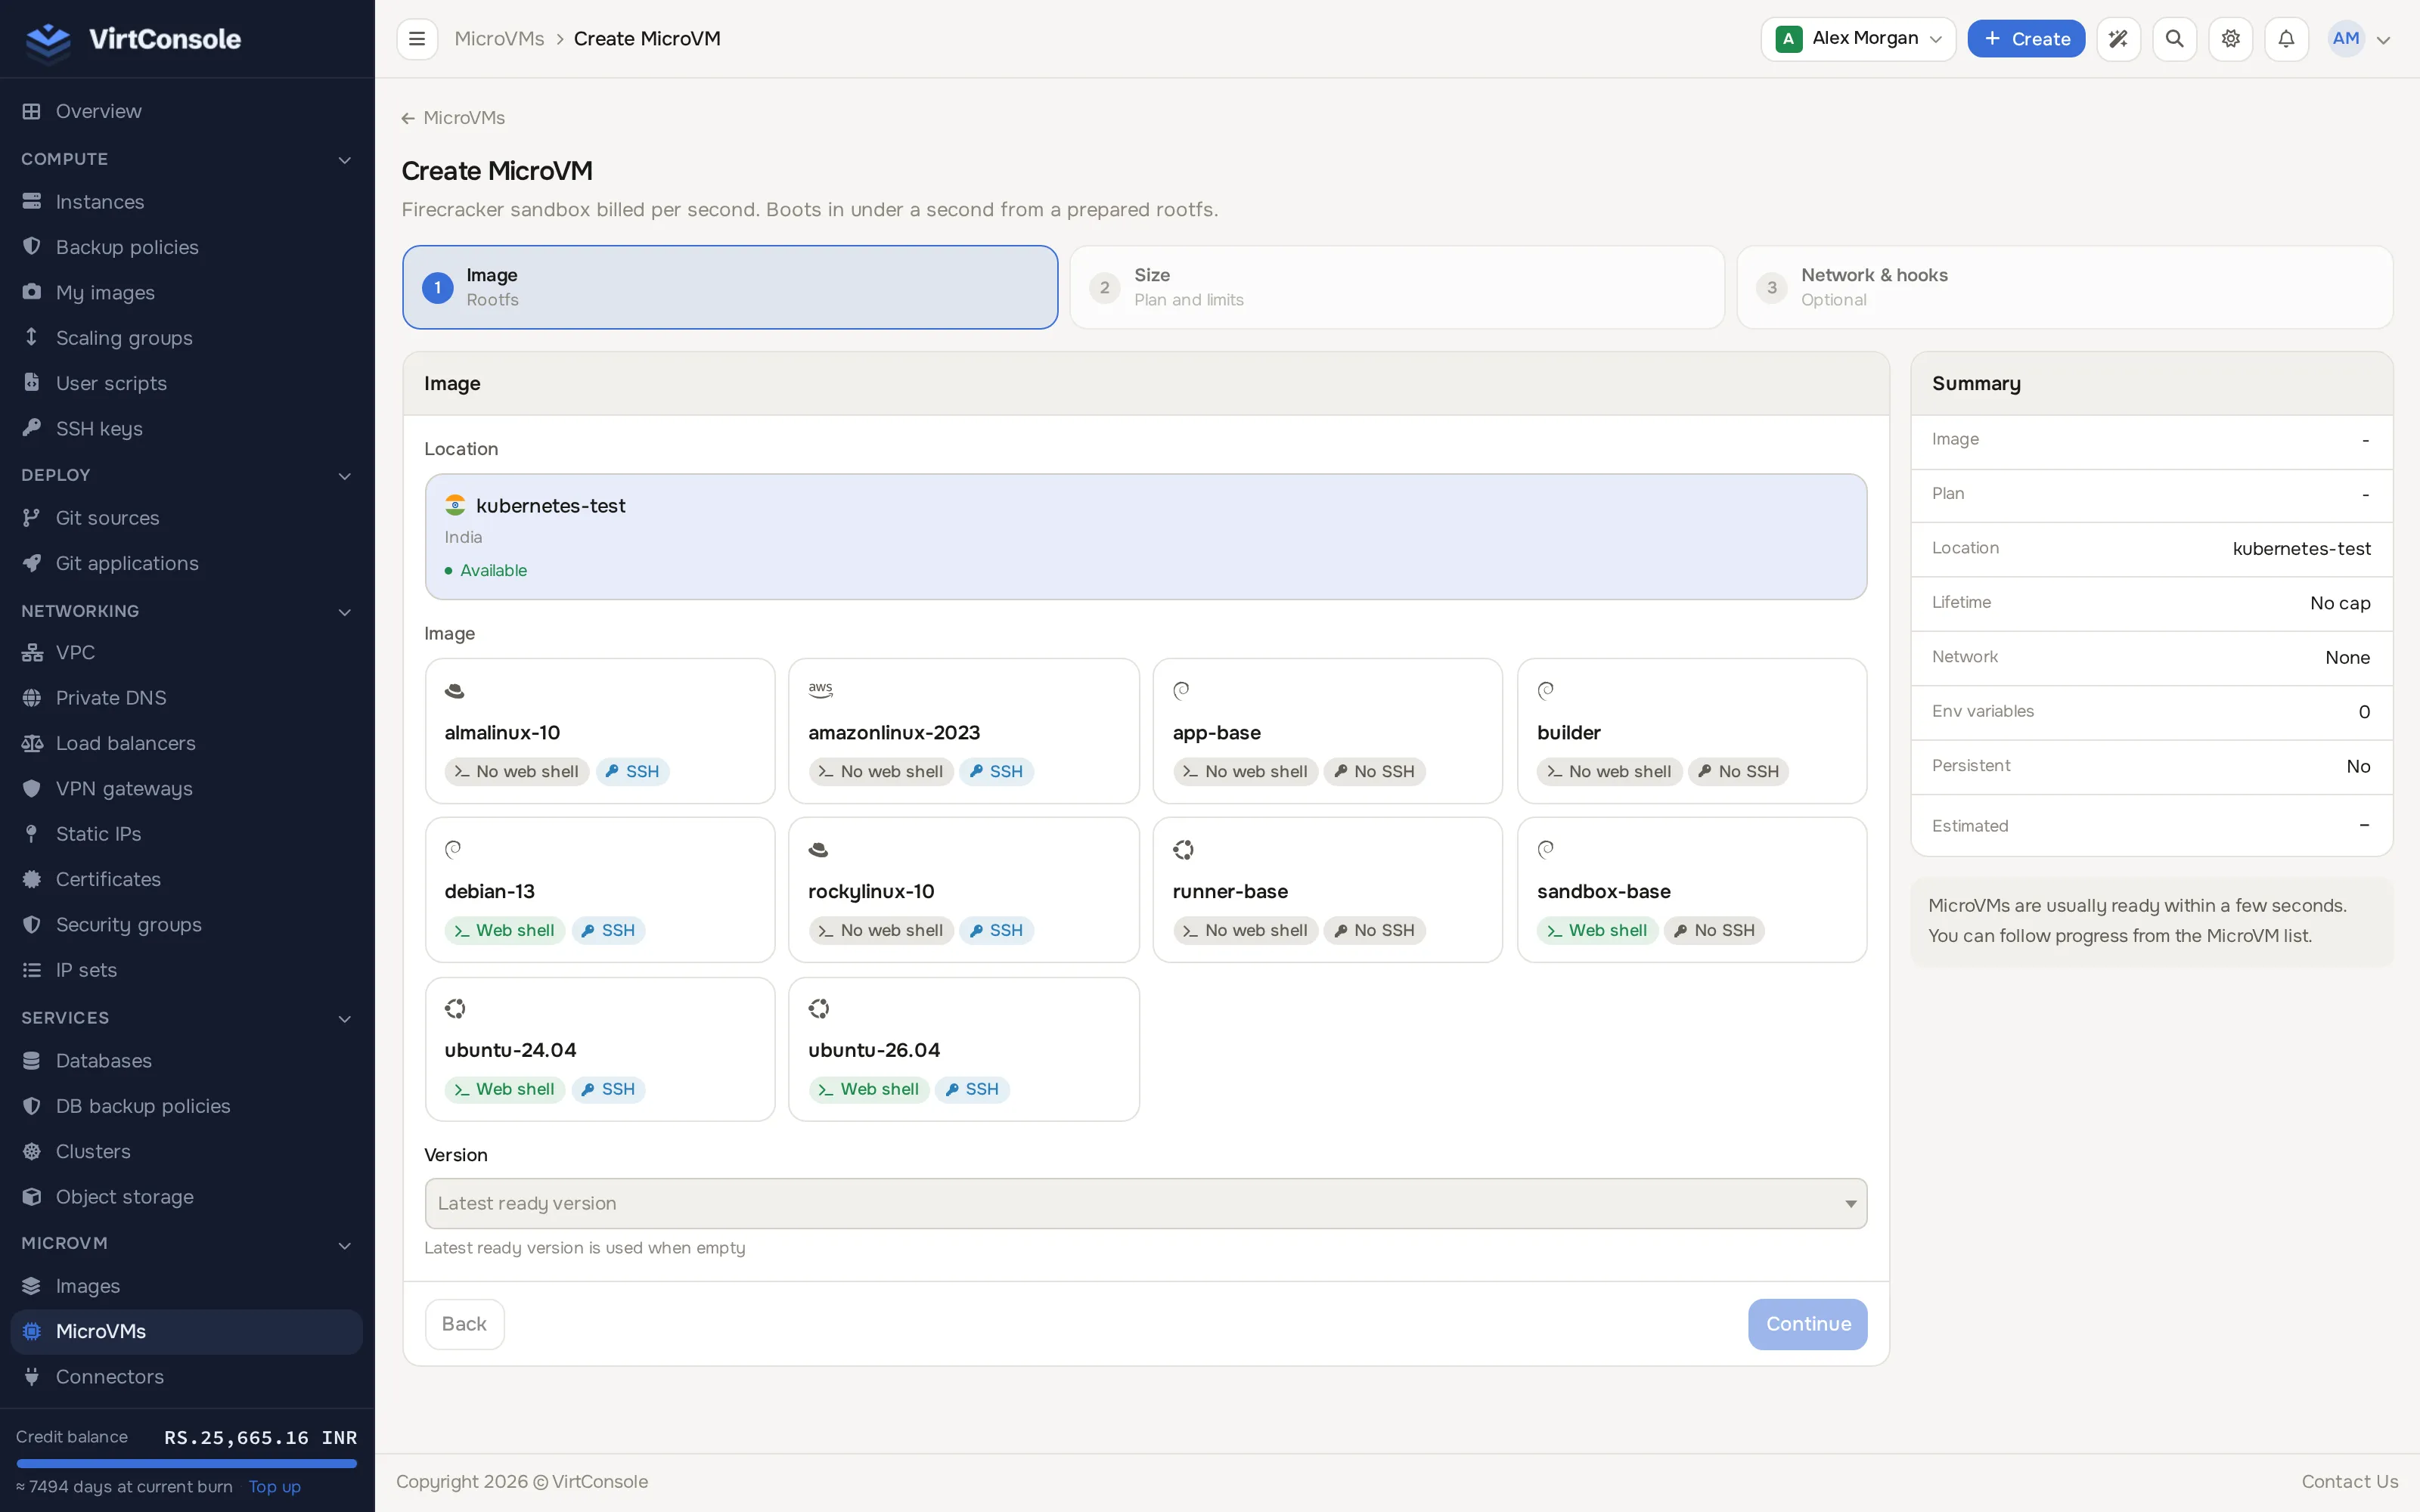
Image (Rootfs): pick a Location to deploy into first - a location you do not have access to yet shows a Request access option instead of letting you select it. Once a location is picked, an Image card grid appears: search the catalog and pick one (badged Platform or Custom, with Web shell/No web shell and SSH/No SSH capability chips), and optionally a specific Version (the latest ready version is used when left empty).
-
Size (Plan and limits): pick a Plan from the location’s list (some locations assign the plan automatically instead, with no list to pick from). Give the MicroVM a Name (lowercase letters, digits and hyphens, 1-63 characters - used for the URL
<name>.<your apps domain>). Set Maximum lifetime or leave Never checked for no cap (up to 8 hours when set); when set, choose When the lifetime ends: Pause or Kill. Turn on Always on to keep it running continuously and skip idle pause, or leave it off and set Idle pause (or leave Never checked).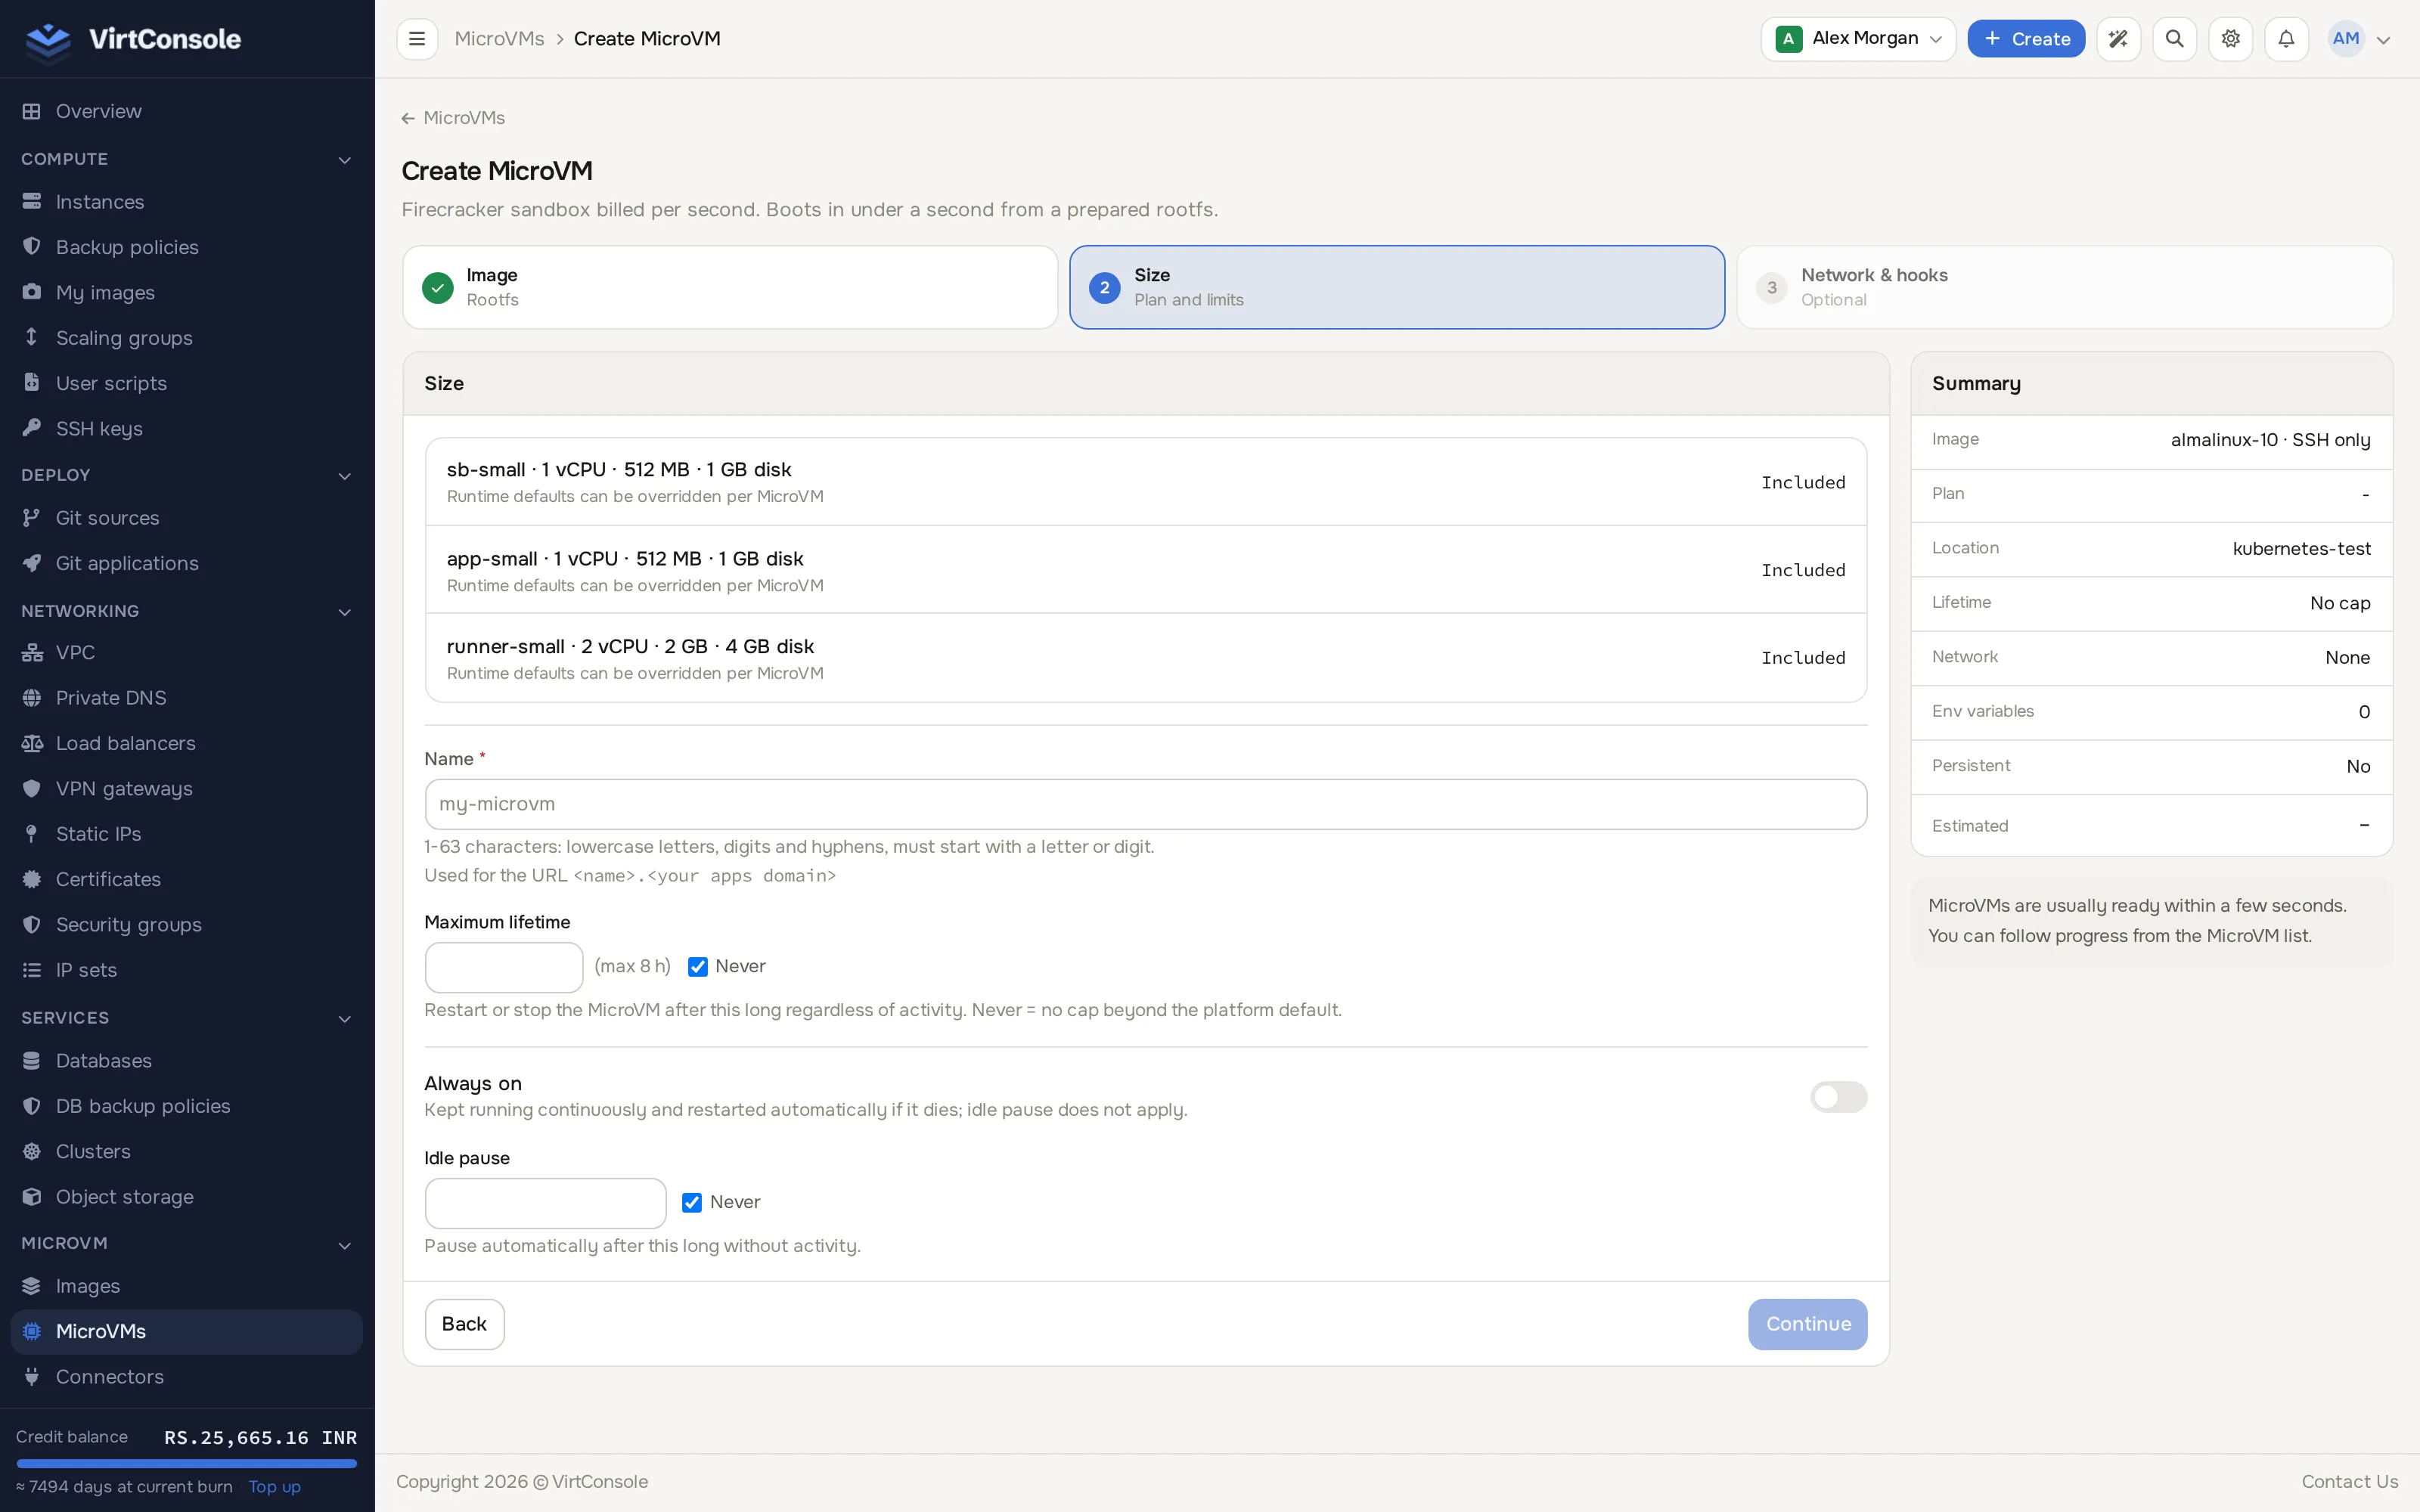
-
Network & hooks (Optional): turn on Public network, VPC network, or both - at least one is required, or set an account default under MicroVMs to skip this step next time. The public network gets an automatically assigned public IPv4 (or one of your reserved static IPs); no subnet to pick. See Networking for the full model, including VPC egress and SSH access. Under Ingress: HTTP (a Port auto-detected from the image when possible, a Health path, any Extra ports, and an optional Custom domain needing a CNAME to the generated hostname pointed at it first) and Shell (envd), greyed out with an explanation when the image has no web shell agent. Environment variables and Lifecycle hooks are collapsible and optional, starting from the image’s own defaults and overridable here. SSH keys (optional) are added to
root’s authorized keys on the node before the MicroVM boots; manage your keys from the Manage keys link.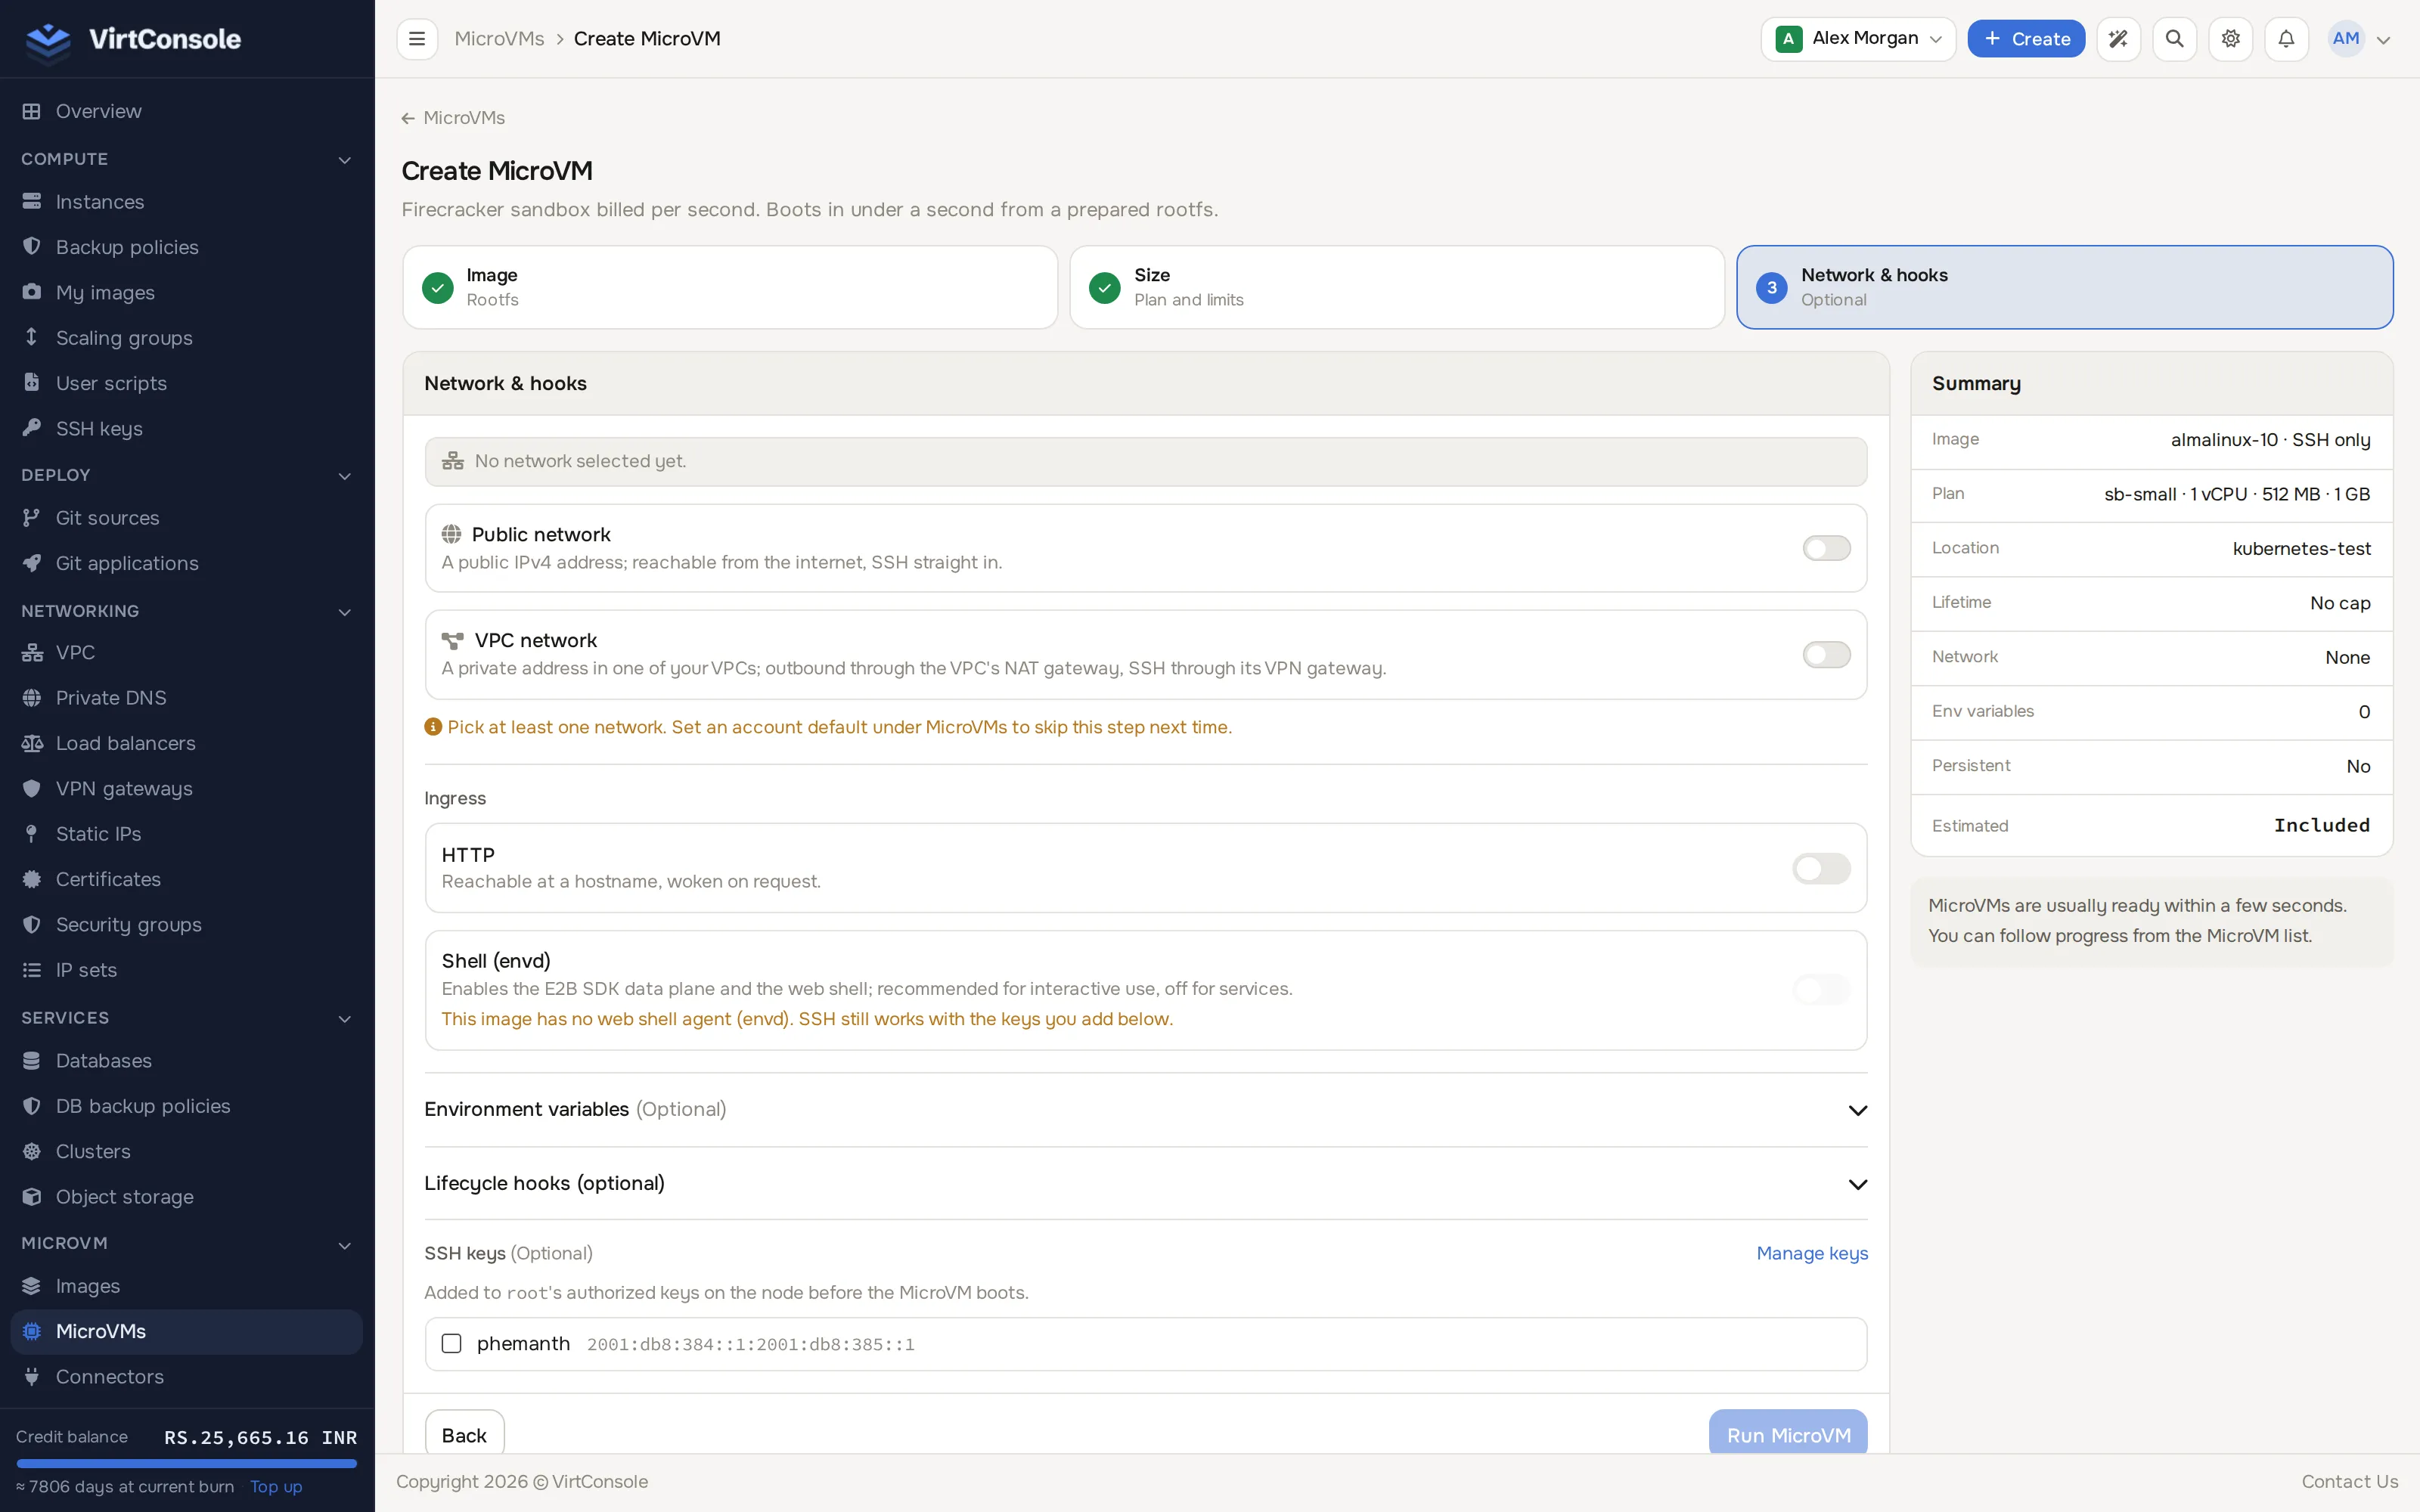
-
Click Run MicroVM.
What happens next
Section titled “What happens next”The MicroVM is placed on a node with capacity in the chosen location and boots in a few seconds. It appears in the list as running once the daemon confirms it. A MicroVM that crashes during boot is reported as failed rather than left silently running.
The MicroVM page
Section titled “The MicroVM page”Opening a MicroVM shows these tabs:
| Tab | What it shows |
|---|---|
| Overview | Plan, always-on and idle-pause settings, network interfaces and ingress ports, lifecycle hooks, and the current image version. |
| Runs | The history of runs (a new run is created by every deploy, rollback, start or restart), each with its status and start/end time. |
| Deploy | Pick an image version and deploy it as a new run, or roll back to an older version from the version table. |
| Environment | Edit environment variables. Values are write-only; the panel never displays a saved value back to you. |
| Domains | Add or remove custom hostnames for HTTP ingress, with certificate status. |
| Logs | A live tail of the guest console log. |
| Shell | An interactive web terminal, when shell ingress is enabled on an envd-capable image. |
| Metrics | Live CPU, memory, disk and network usage. See Web shell, logs and metrics. |
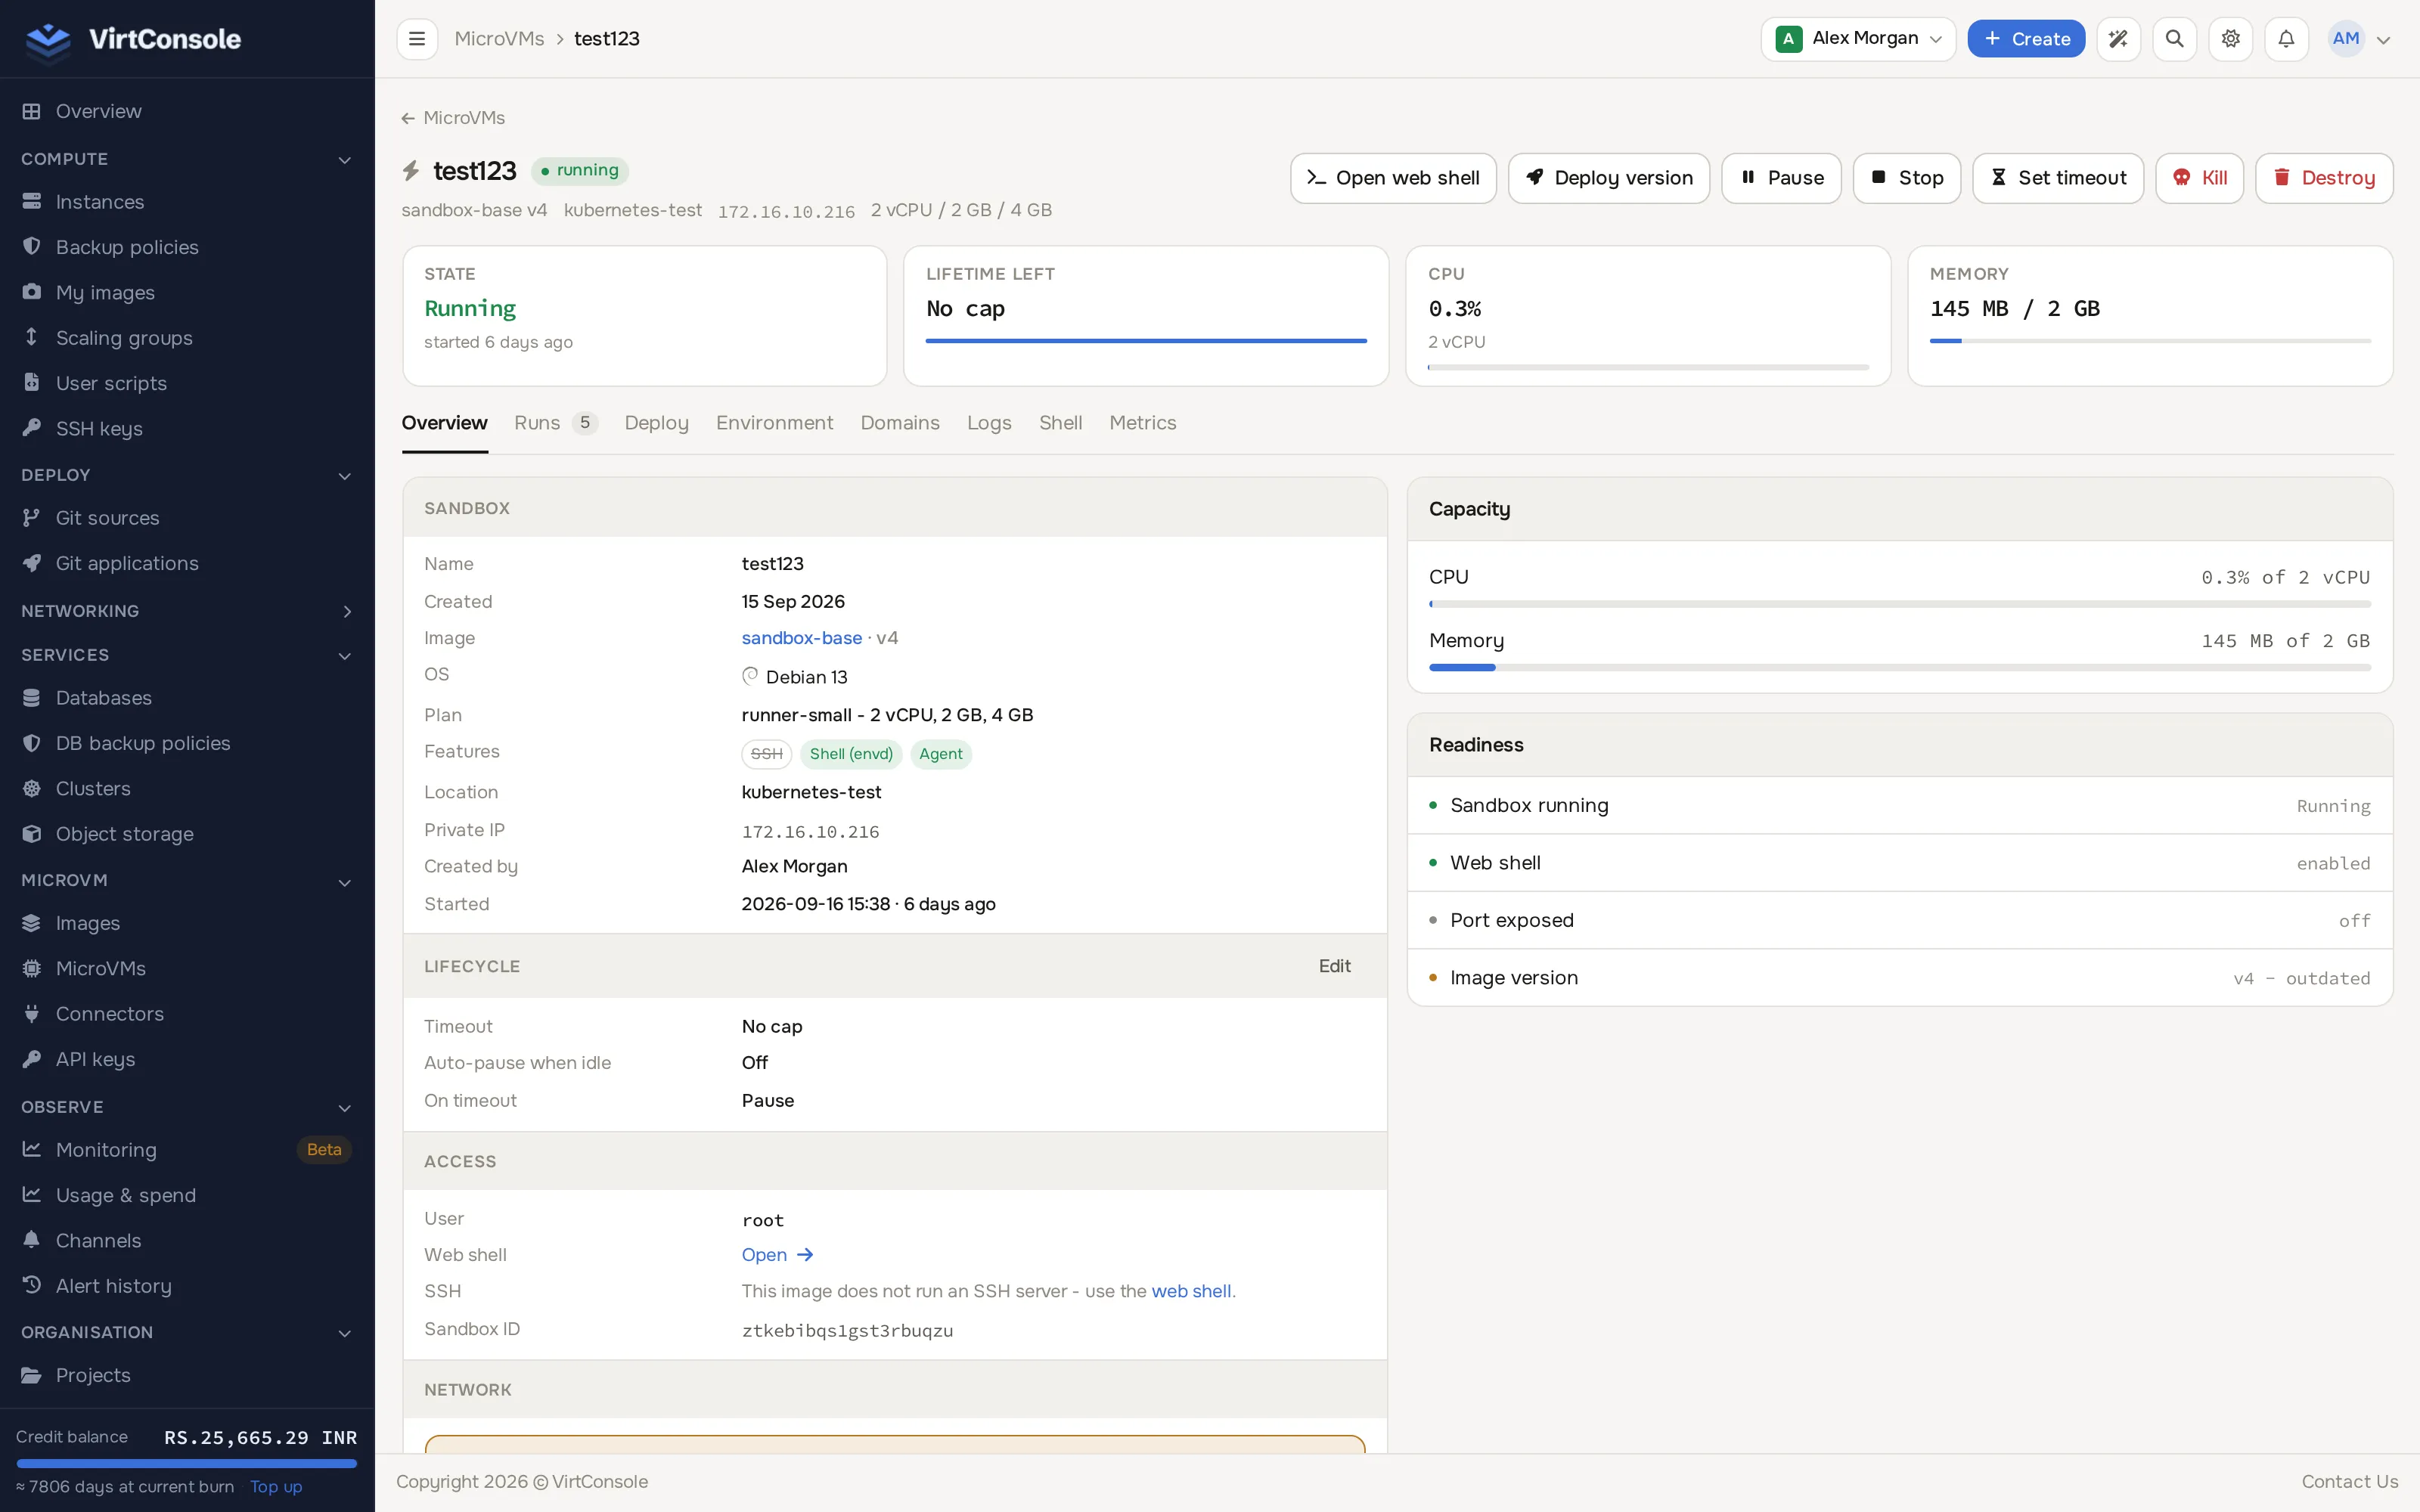
Pause, resume, stop, kill and delete
Section titled “Pause, resume, stop, kill and delete”| Action | What it does |
|---|---|
| Pause | Freezes the running MicroVM to disk. Resume continues exactly where it left off. |
| Resume | Brings a paused MicroVM back to running. |
| Stop | Shuts the MicroVM down; the row and its disk stay, and Start deploys a fresh run of the current image version. |
| Start | Starts a stopped (or errored) MicroVM by deploying a new run. |
| Kill | Destroys the running MicroVM immediately. The row stays until you delete it. |
| Delete | Removes the MicroVM. Killing it first if it is not already stopped or killed. |
Set or change the maximum lifetime at any point from Set timeout on the show page; it replaces the current lifetime cap without restarting the MicroVM.
Common problems
Section titled “Common problems”- “No microVM node currently has capacity for this plan in this location.” Every node in that location is full for the chosen plan size. Try a smaller plan or another location.
- A duplicate name is rejected. MicroVM names are unique per account; pick a different one.
- Shell ingress cannot be enabled. The image does not include envd. See Create an image.
- A VPC network option is missing. VPC networking is not activated for your account in that location, or you have no VPC subnets yet.
- Networking questions (NAT gateway warning, mapping a static IP, no network selected). See Networking.