

Admin roles
An admin role is a named set of permissions for staff administrators. Each permission is a short string such as instances.view or billing.credits.manage, and a role is a list of them. Assign a role to an administrator’s account and the admin panel shows only what that role allows.
How it works
Section titled “How it works”- Roles apply only to accounts with User Type set to Administrator. Customers never see roles.
- An administrator with no role gets full access to everything. Assign a role the moment you want to restrict someone.
- The built-in Super Admin role grants every permission through the wildcard
*. Keep at least one account on it. - System roles (Super Admin, Support, Billing, Instance Manager) ship with the panel and cannot be deleted. Custom roles are yours.
- Staff admins see only the menu items their role permits. Everything else is hidden.
The default system roles, beyond Super Admin:
| Role | Purpose |
|---|---|
| Support | View-only access plus basic instance actions (power, console) and the support tickets area. |
| Billing | User management plus Cloud Service, credits and Self-Provisioning billing areas. |
| Instance Manager | Full instance lifecycle (create, edit, delete, power, suspend, migrate, backup, firewall, reinstall) without system settings. |
Where to find it
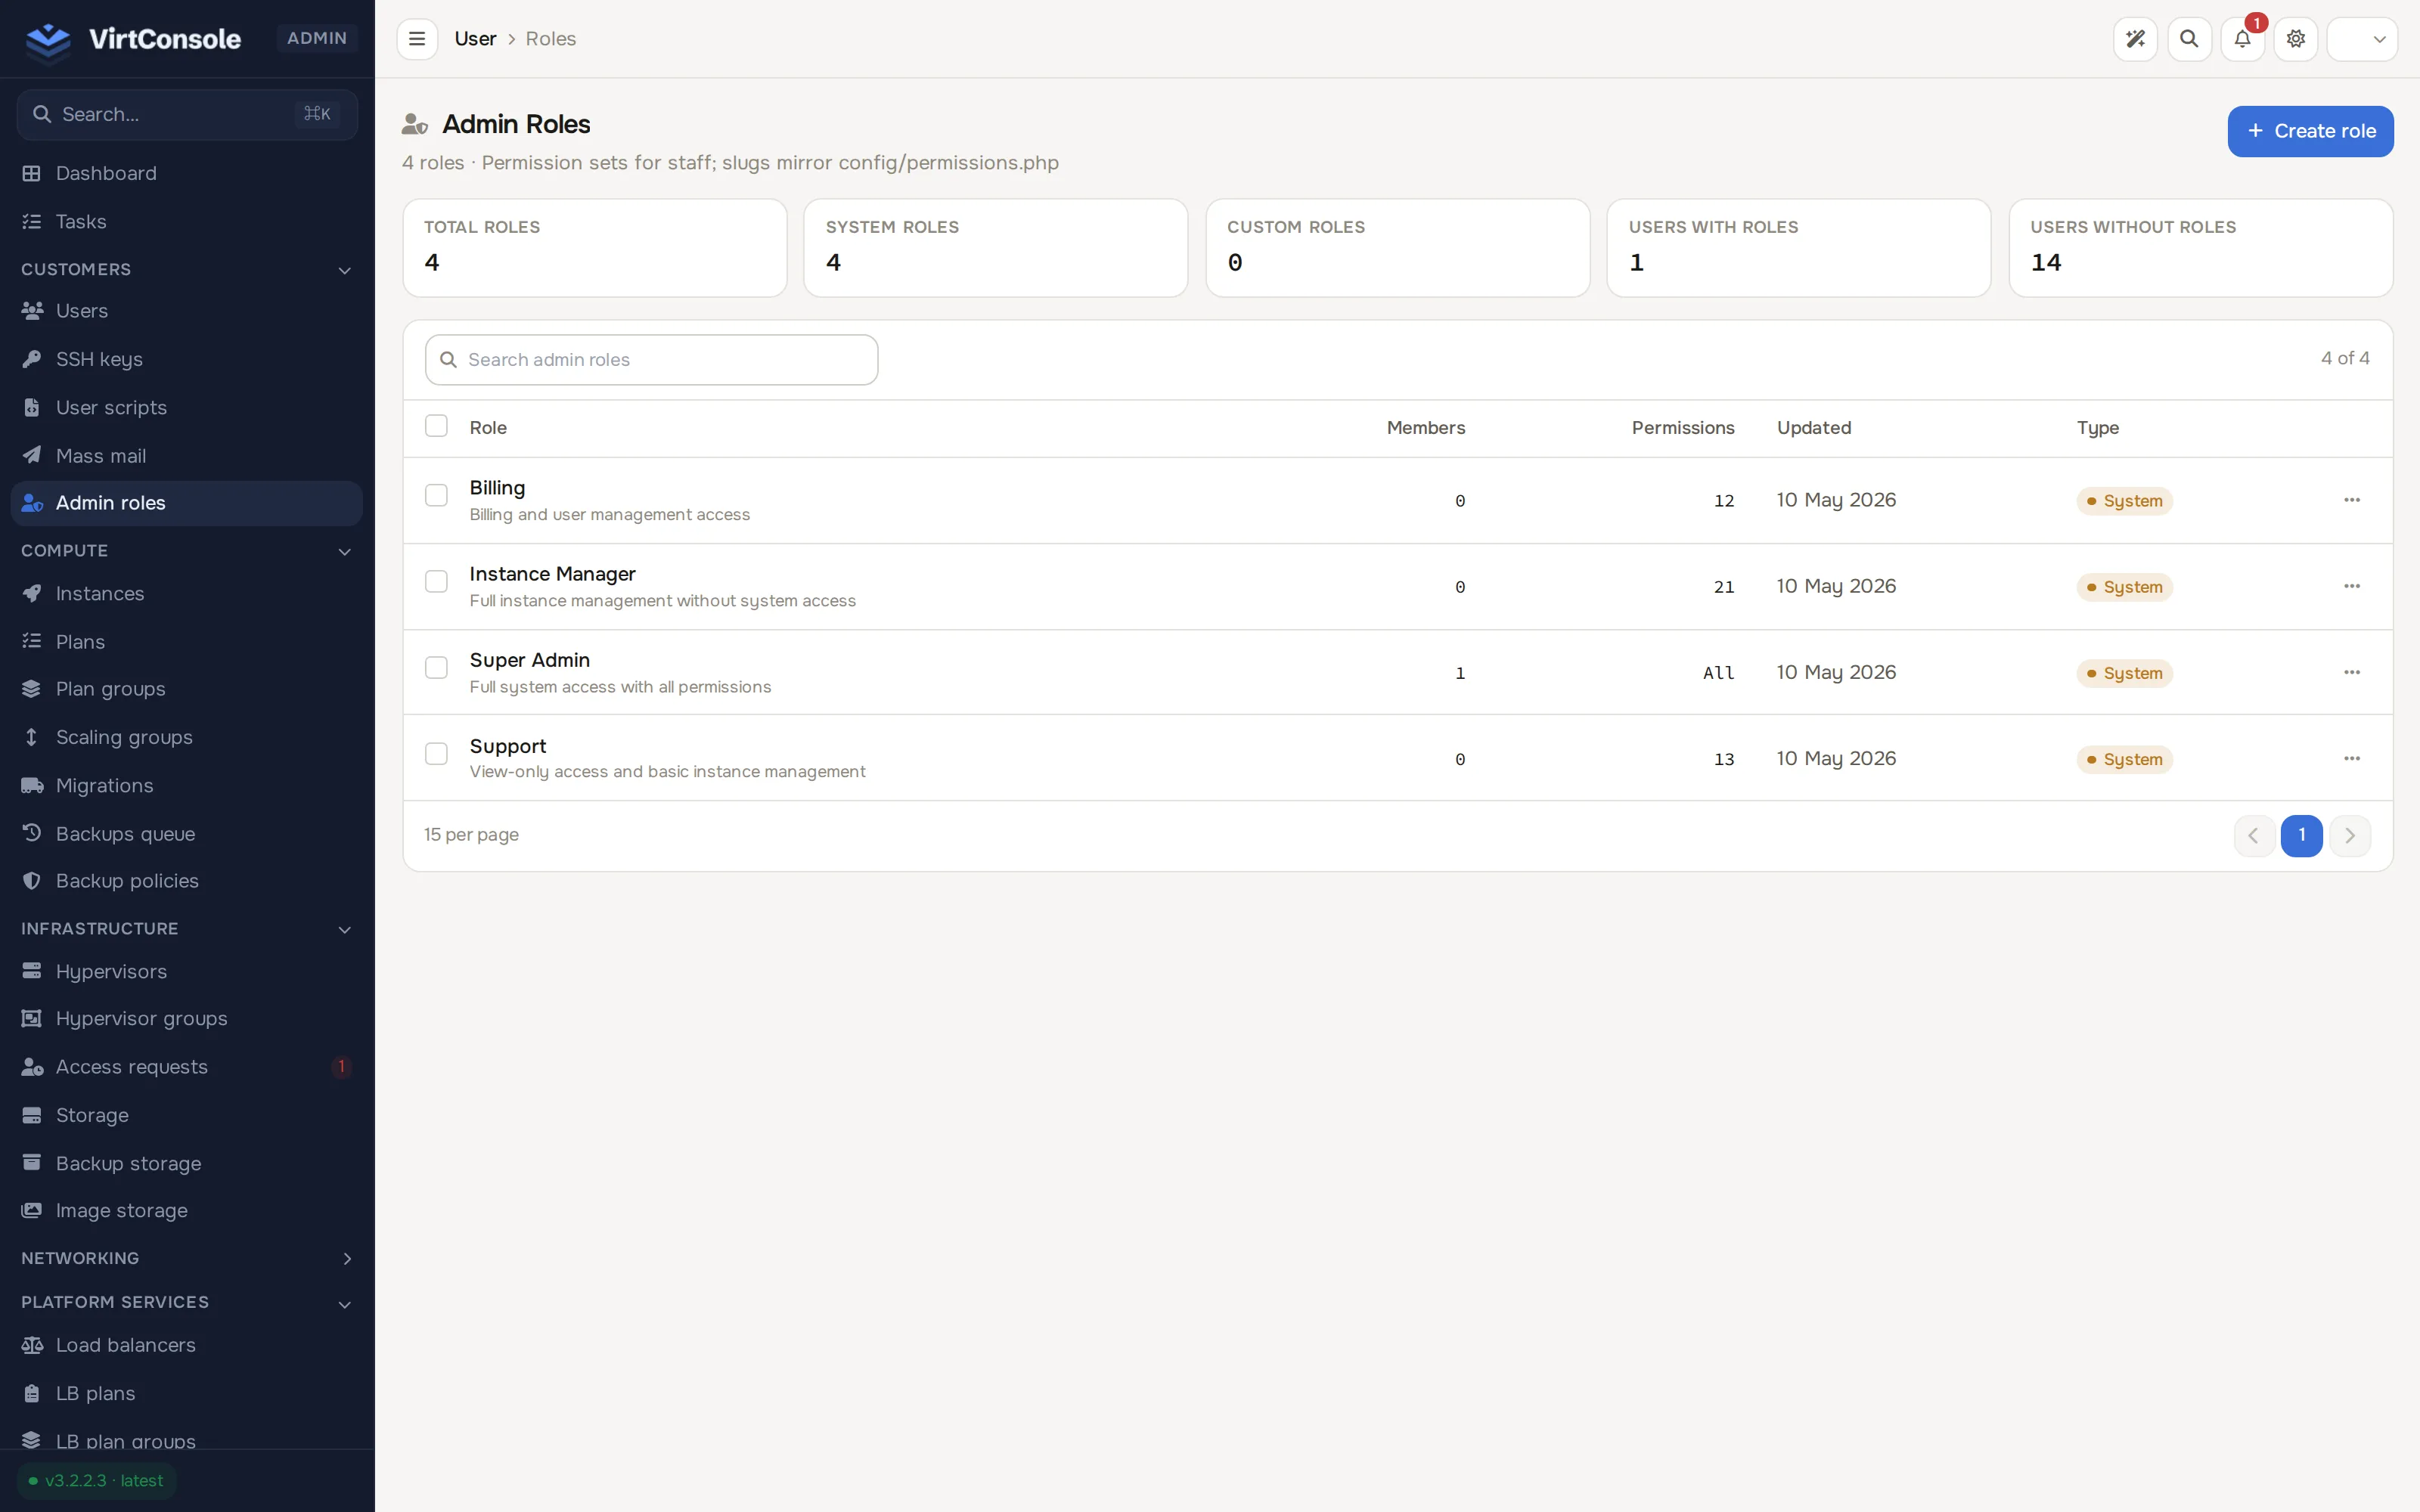
Section titled “Where to find it”In the admin panel go to Customers > Admin roles.
The list shows each role’s Name, Description, permission count (All Permissions for the wildcard), how many users hold it (Members), and whether it is System or Custom. Click a row to open it.
Create a role
Section titled “Create a role”-
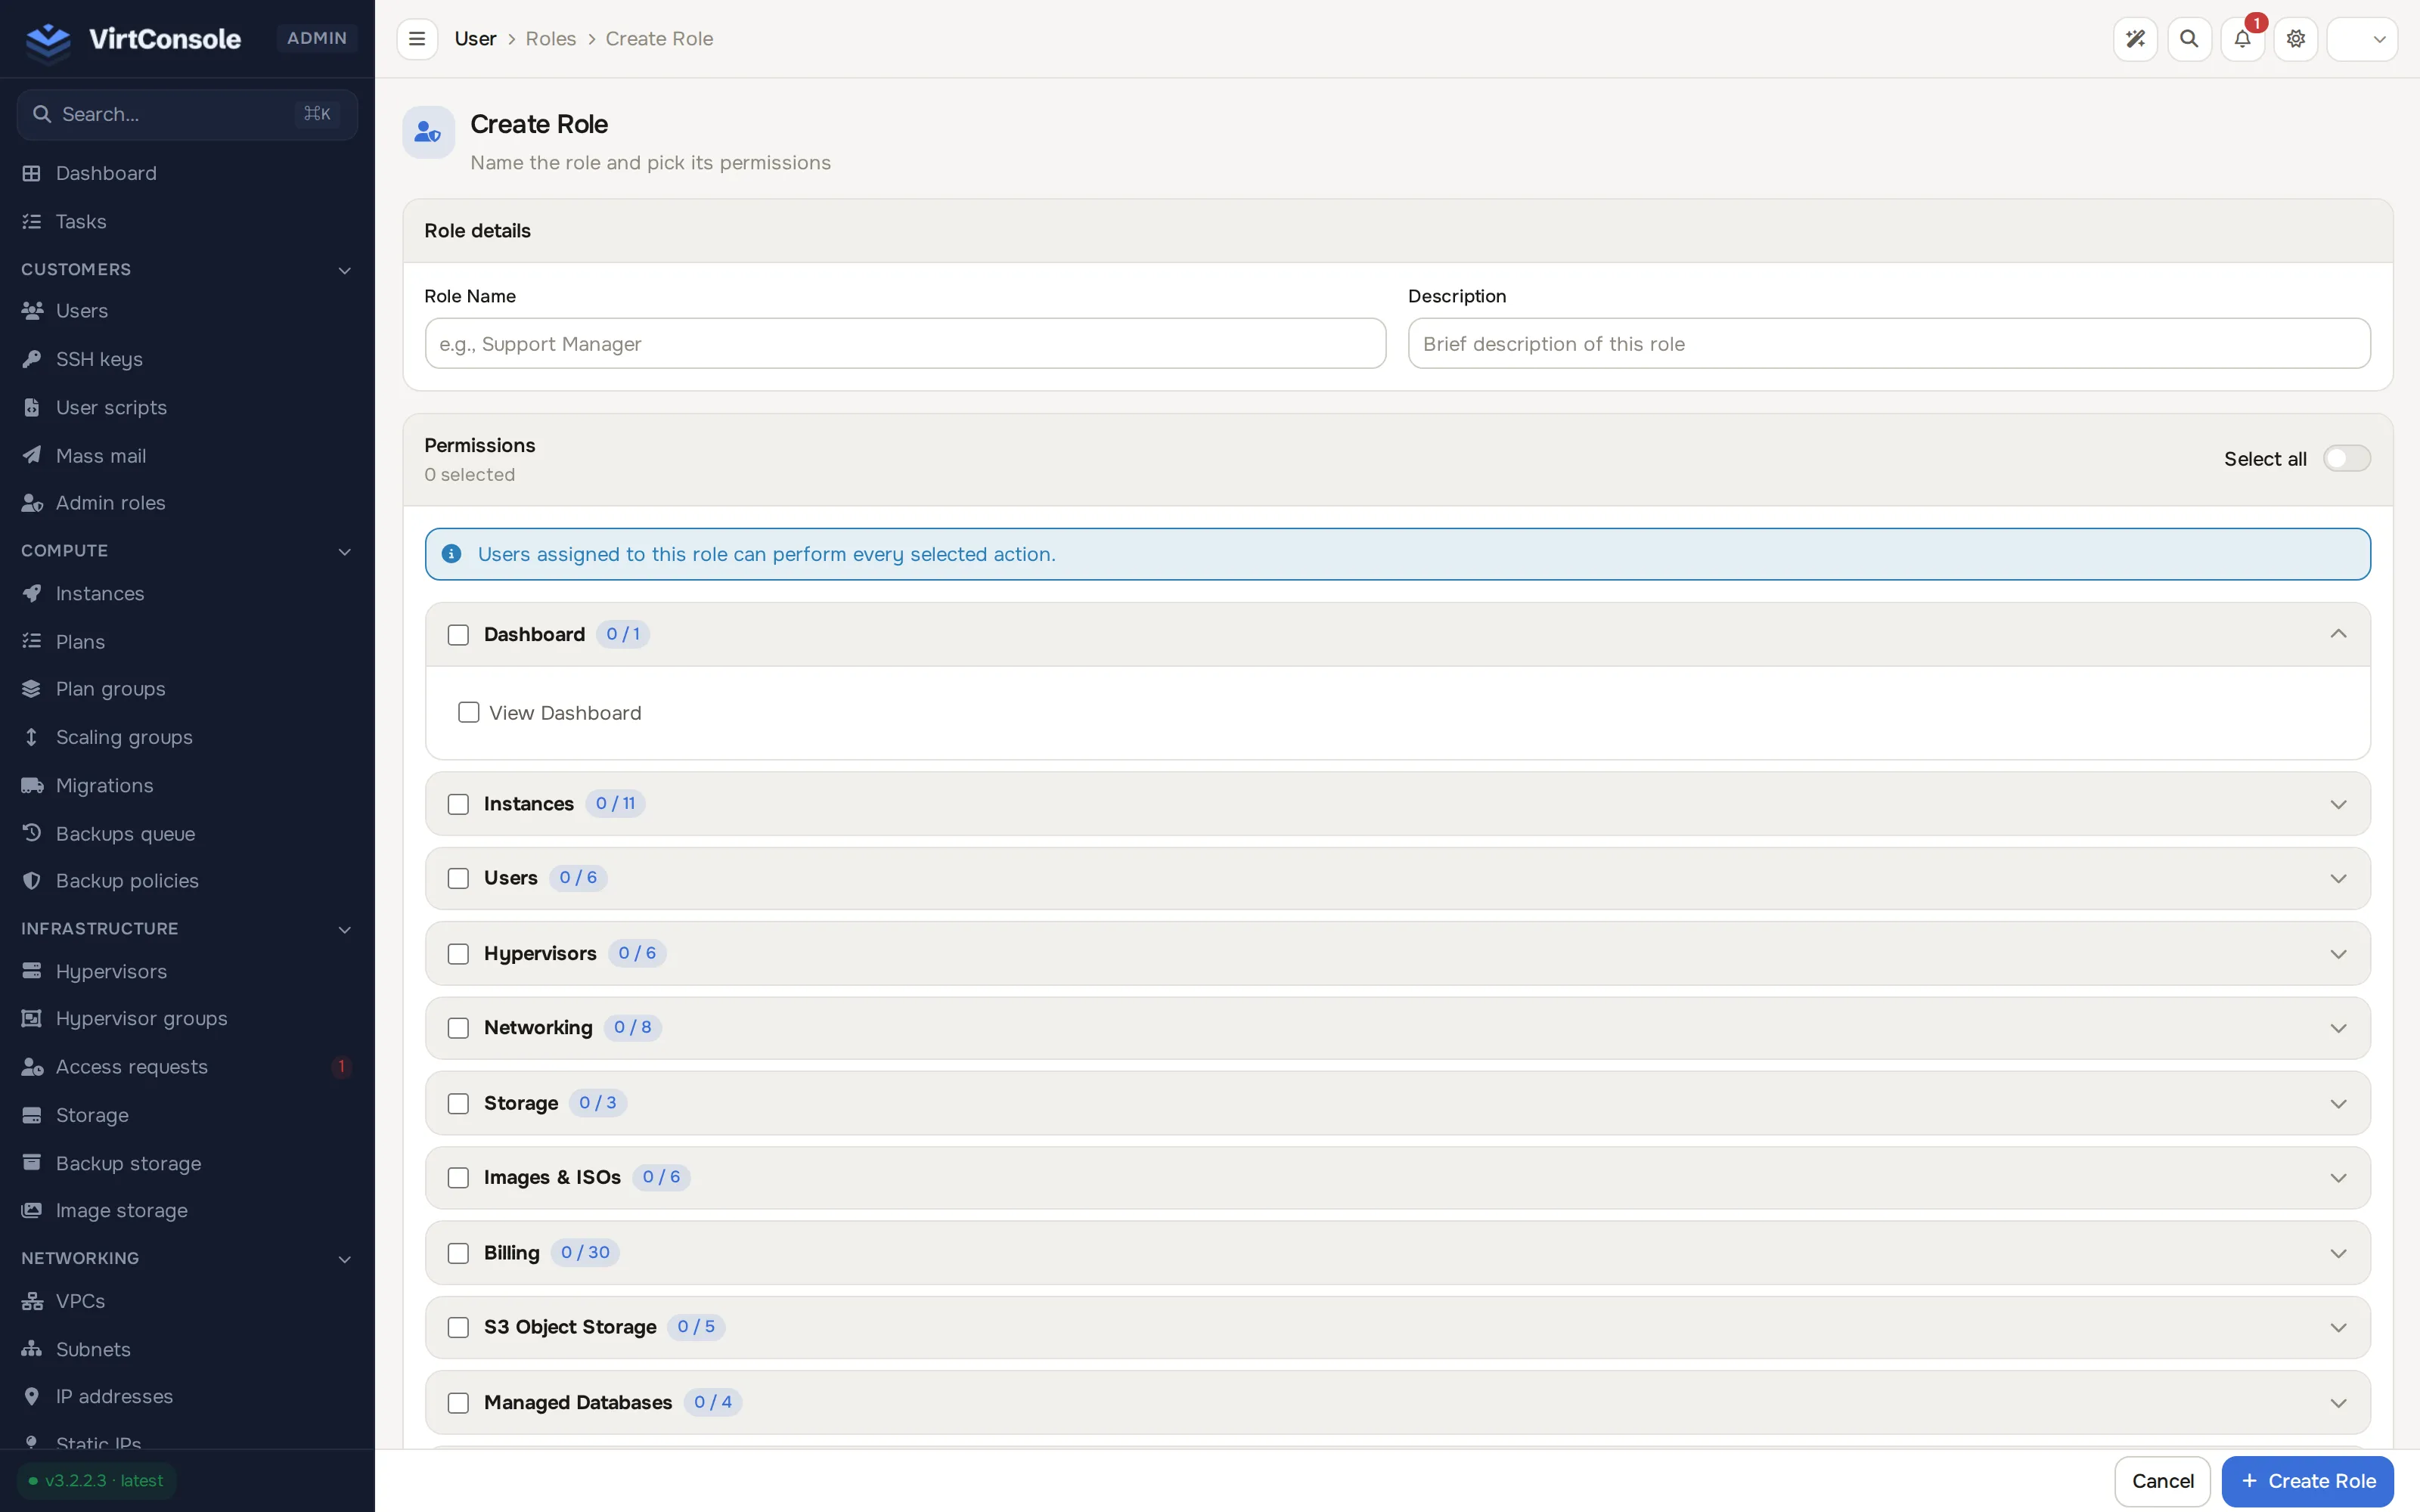
Click Create role. A full Create Role page opens (not a dialog).
-
Enter a Role Name (for example
Support Manager) and an optional Description. -
Tick the permissions the role grants. Permissions are grouped in an accordion by area: Dashboard, Instances, Users, Hypervisors, Networking, Storage, Images & ISOs, Billing, S3 Object Storage, Managed Databases, Managed Kubernetes, Block Storage, Image Storages, Autoscaling, Monitoring, System, Support, MicroVM, and Roles & Permissions. Use a group’s own checkbox to toggle that whole area, or Select all in the Permissions card header for everything.
-
Click Create Role in the footer. The role appears in the list and can be assigned immediately.
To change an existing role’s name, description or permissions, click its row to open the same Role & Permissions page and click Update Role.
Assign a role to an administrator
Section titled “Assign a role to an administrator”- Go to Customers > Users and click the staff member’s row (or create the account with User Type set to Administrator).
- On the Profile tab, set User Type to Administrator.
- Pick the role in the Admin Role field. Leave it empty only for full access.
- Click Save changes in the footer.
The new permissions apply on the administrator’s next page load.
Common problems
Section titled “Common problems”- An administrator logs in but every page is empty. Their role grants no
*.viewpermissions. Edit the role and add at least the view permission for each area they need. - There is no Delete button on a role. System roles cannot be deleted. Custom roles can; users holding a deleted role lose its permissions and keep only what other roles grant.
- Someone has full access who should not. Their Admin Role field is empty. An administrator with no role bypasses all permission checks, so assign a role.