

Self-Provisioning packs
Self-Provisioning lets you hand a customer a fixed pool of resources (CPU cores, RAM, storage, bandwidth, IP addresses) and let them spend it however they like, by creating and destroying their own instances inside that pool. The pool is defined by a Self-Provisioning pack. This is the right model when you sell a bucket of capacity, for example “16 vCPU, 32 GB RAM, 500 GB storage”, instead of fixed-shape virtual machines.
How packs work
Section titled “How packs work”Each pack defines two layers of limits:
- Total values: the pool size across all of the customer’s instances from this pack combined. For example Total CPU
16means the sum of vCPU across every instance they own from this pack cannot exceed 16. - Max values: the largest any single instance may be. For example Max CPU
4means no individual instance gets more than 4 vCPU, even if the pool still has 12 available.
The pack also carries the hardware profile every instance from it gets (CPU mode, I/O limits, network driver) and restricts where it deploys and which OS images it may use.
Before you begin
Section titled “Before you begin”- The hypervisor groups you want to offer as deploy targets exist. See Hypervisor groups.
- The media groups holding the OS images you want to allow exist. See Media groups.
Where to find it
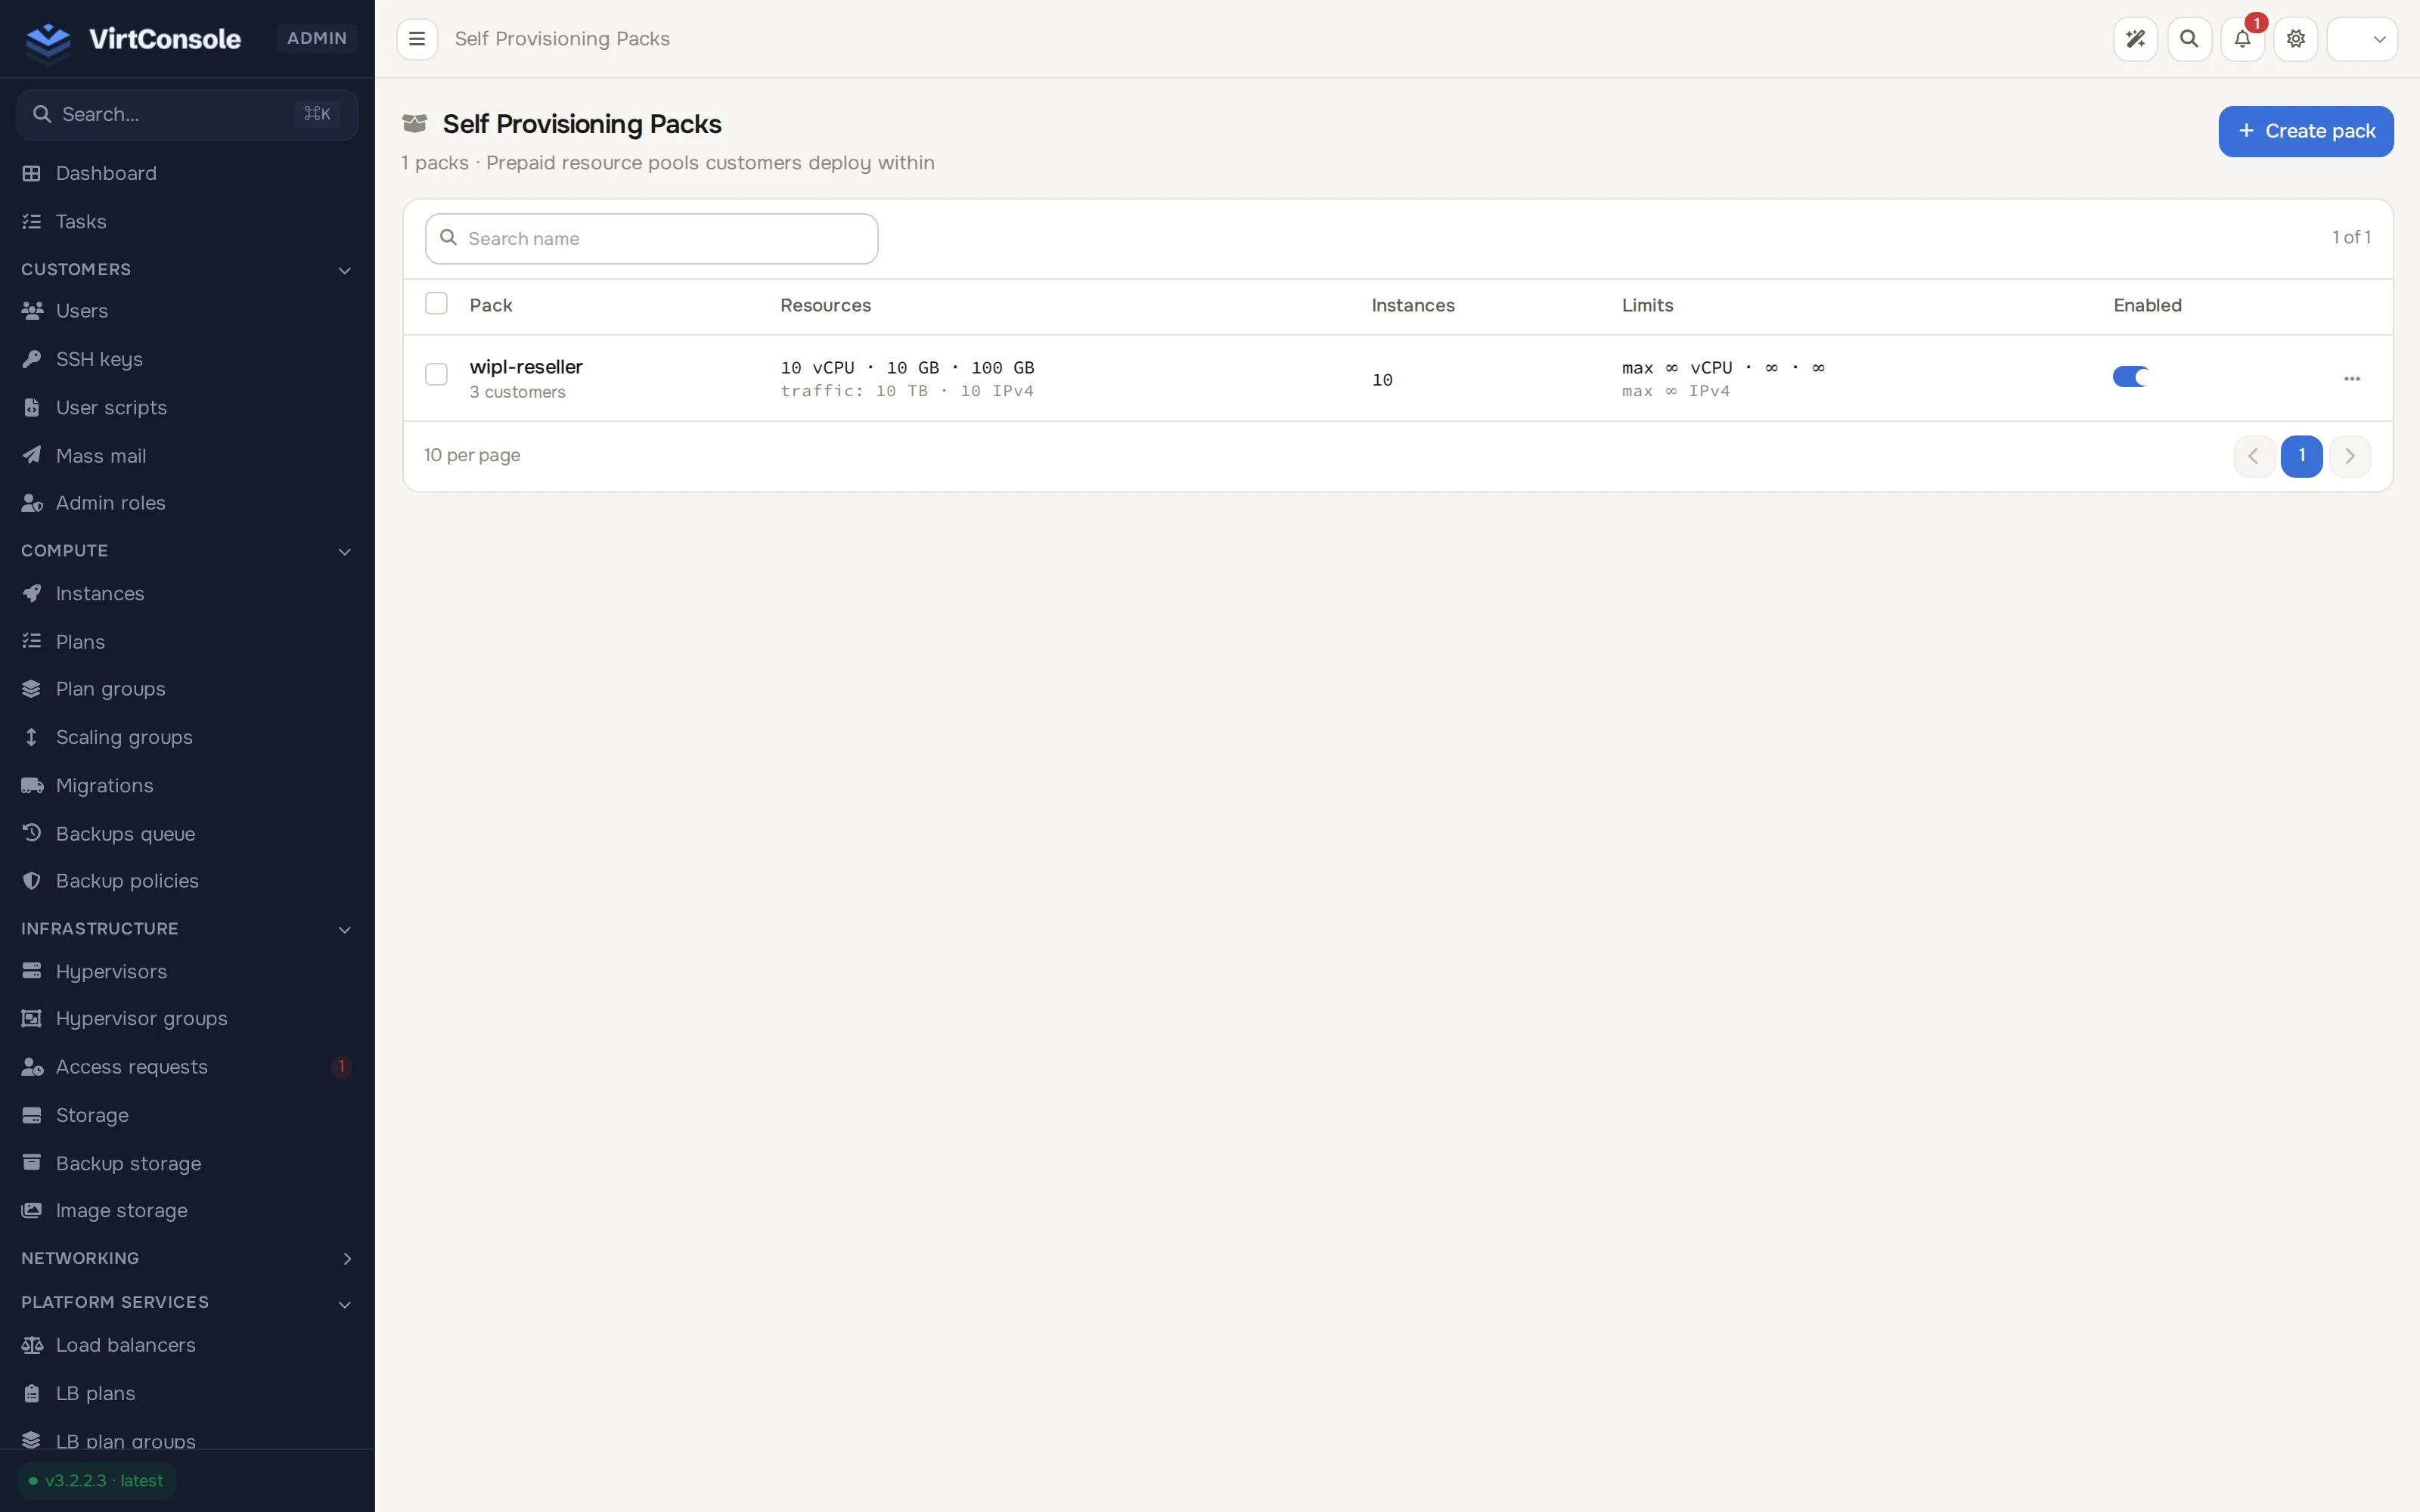
Section titled “Where to find it”In the admin panel go to Storage > Self-provisioning packs. The list shows each pack with its Name, Limits, Per Instance Limits and Enable state.
Create a pack
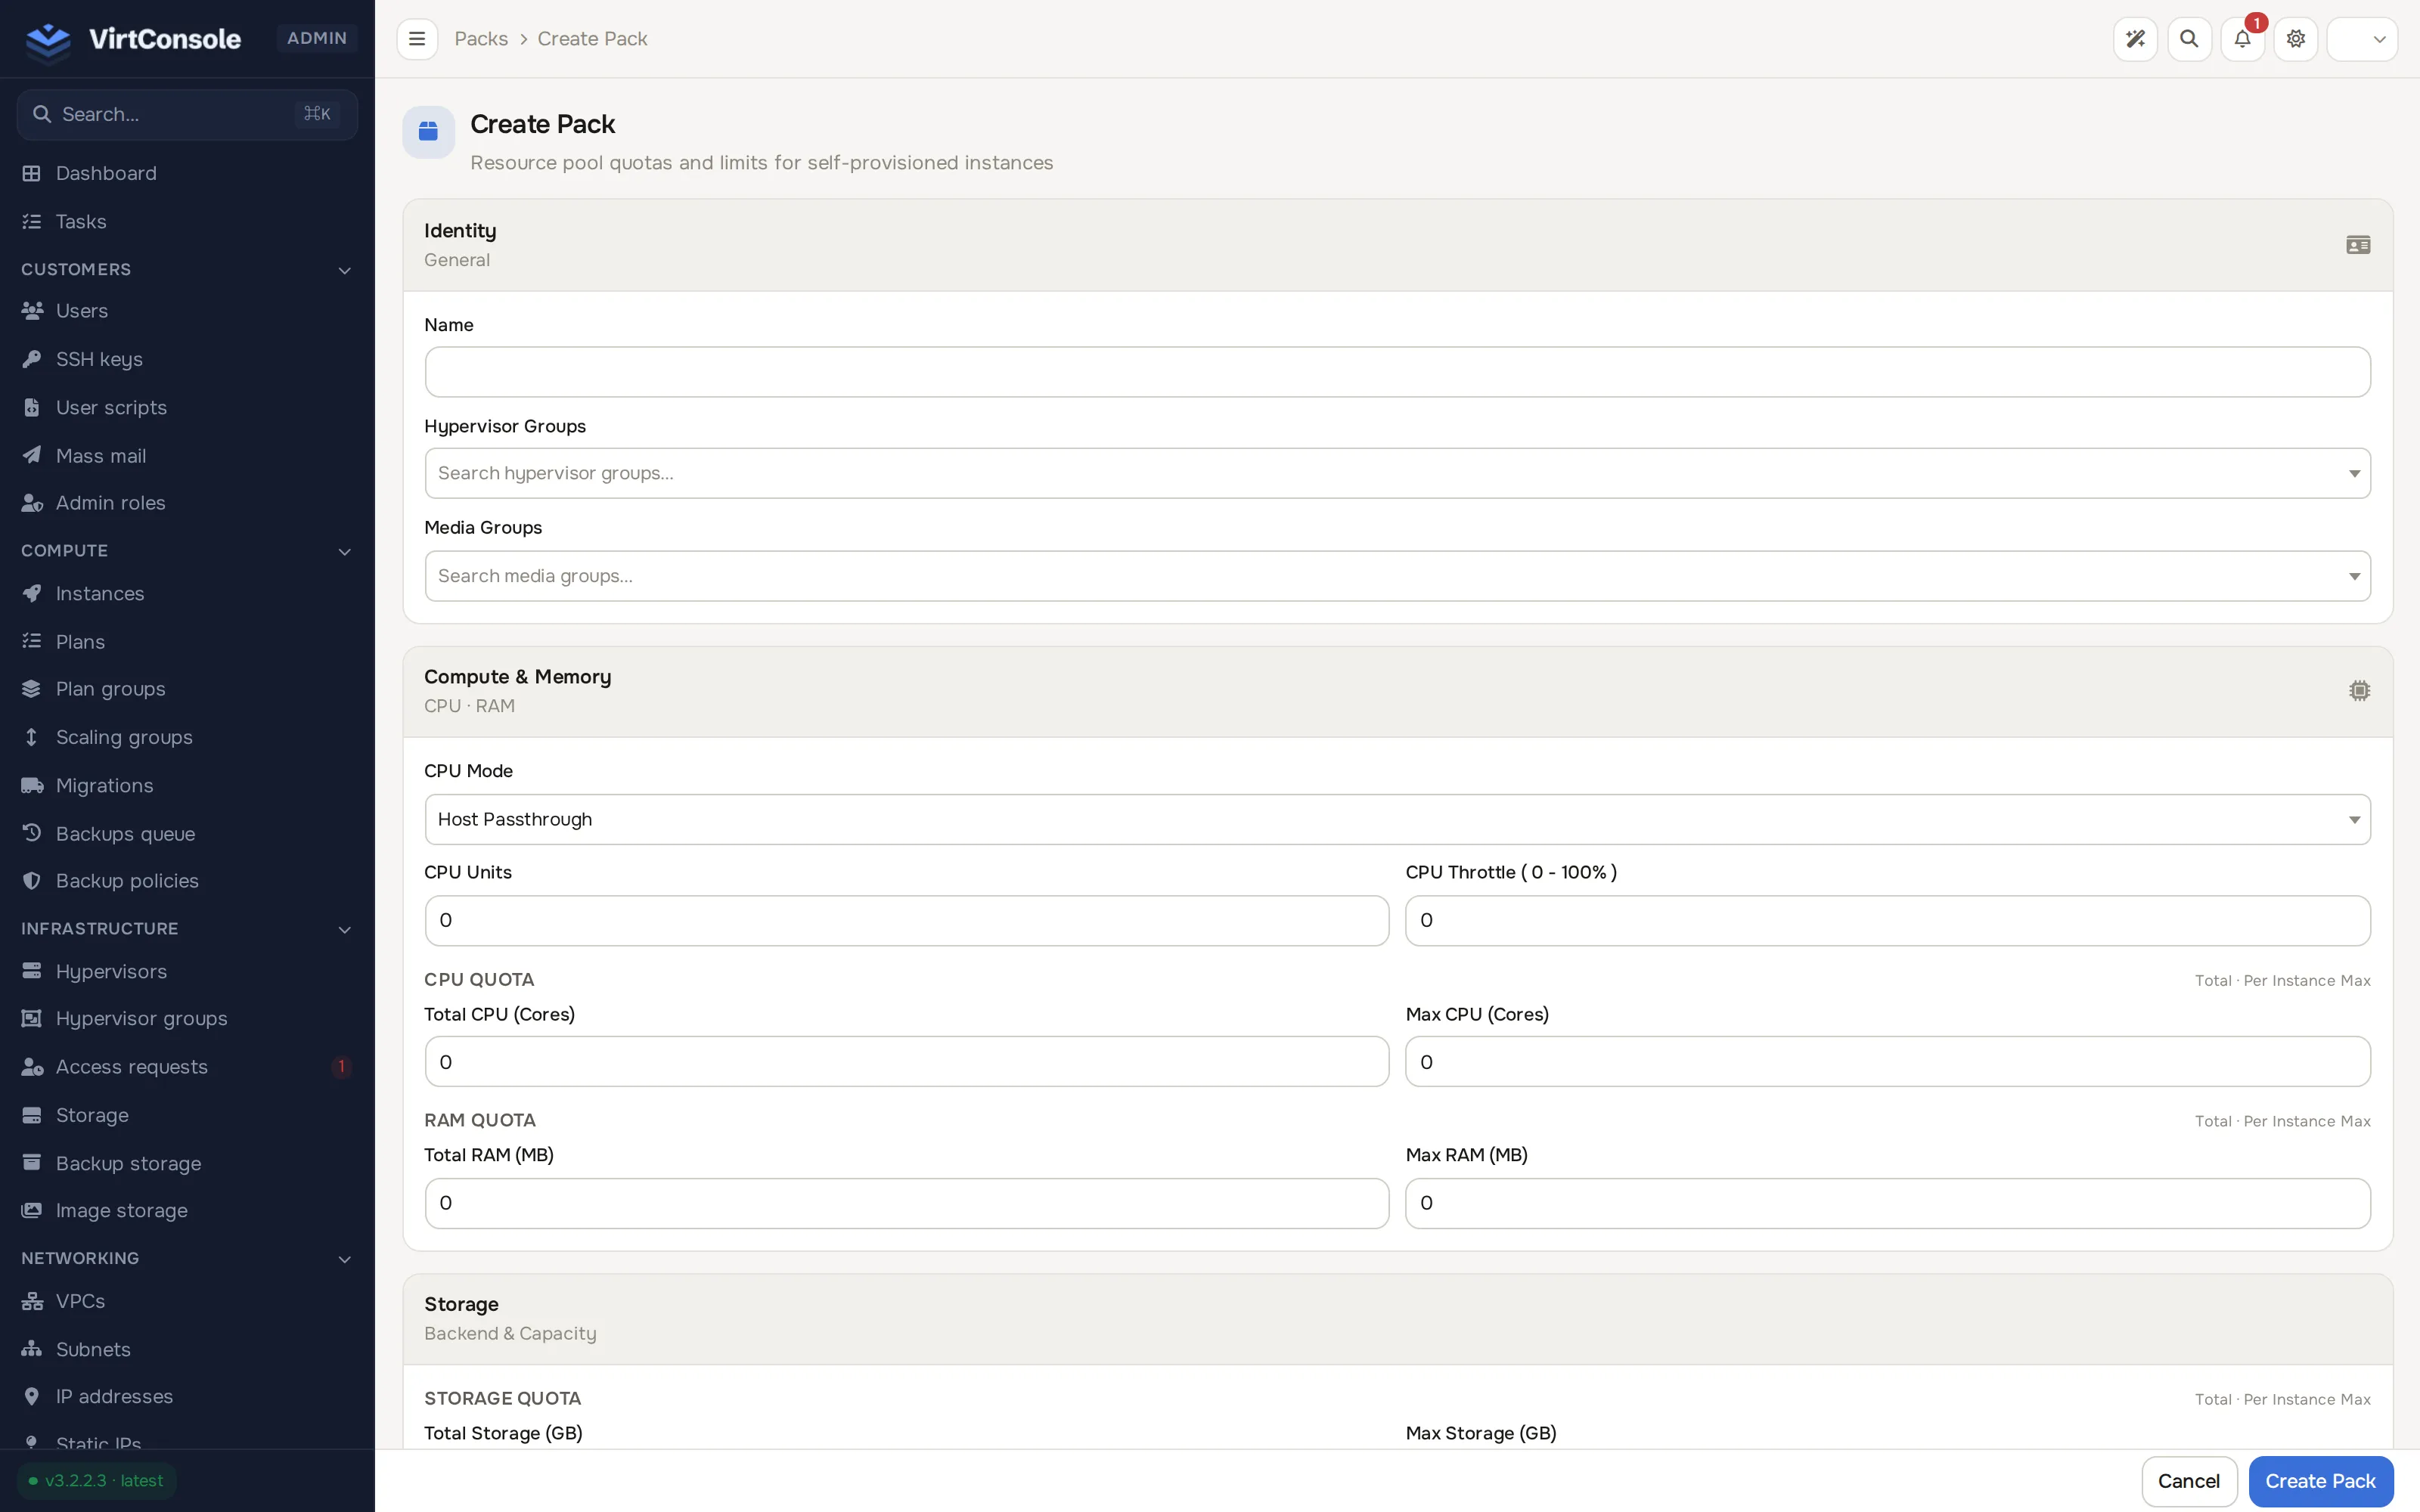
Section titled “Create a pack”- Click Create pack.
- Fill in the sections:
Sections
| Section | Key fields |
|---|---|
| Identity | Name, plus Hypervisor Groups (the groups the customer can deploy to) and Media Groups (the OS image groups the customer can install) — search and add one or more of each. |
| Compute & Memory | CPU Mode, CPU Units, CPU Throttle (0 - 100%), then Total CPU / Max CPU (cores) and Total RAM / Max RAM (MB). |
| Storage | Total Storage / Max Storage (GB), I/O Mode, and optional read/write throughput and IOPS caps. |
| Network | Network Driver, Total Bandwidth / Max Bandwidth (GB), upload and download speed caps, Bandwidth Accounting and Bandwidth Overage behaviour. |
| IP Allocation | Total / Max for IPv4, IPv6 and IPv6 subnets, plus the IPv6 Subnet Size. |
| Self-Provisioning Quotas | Total Instances: how many instances the customer may run from this pack at once. |
- Click Create Pack. The new pack appears in the list.
A 0 in a limit field means the customer gets none of that resource from this pack. Set the values you actually intend to sell.
Assign a pack to a customer
Section titled “Assign a pack to a customer”- Go to Customers > Users and click the customer’s row.
- Open the Self-provisioning tab and turn on Enable Self Provisioning.
- Pick one or more packs in Assigned Packs.
- Click Save changes in the footer.
A customer can hold more than one pack; they pick which pack to spend from when they create each instance. See Manage users for the full user page.
Update or delete a pack
Section titled “Update or delete a pack”Open a pack from the list to edit its limits. Editing changes the limits for every customer the pack is assigned to, from the next instance they create onward. Existing instances keep the resources they already have.
To delete a pack, use the delete action on its row.
What happens next
Section titled “What happens next”The customer’s instances page gets a Create Instance flow that spends the pack instead of fixed plans. Each field is capped at the pack’s Max value and validated against what is left of the pool, and the customer sees how much of the pool they have used. Destroying an instance returns its resources to the pool immediately, so the customer can spend them on a new instance straight away.
Common problems
Section titled “Common problems”- The customer’s create form shows nothing available even though they have no instances. Confirm the pack is still enabled and still assigned on their user page. An instance that failed to destroy completely can also hold pool resources; check Compute > Instances for leftovers and destroy them.
- The customer cannot pick a location they used to pick. The pack’s Hypervisor Groups list changed, or the group has no hypervisors left. Edit the pack and confirm the groups are still listed.
- The customer cannot pick a specific OS image. The image belongs to a media group that is not on the pack’s Media Groups list. Add the media group to the pack, or move the image into an allowed group.