Self Provisioning

Overview

Self Provisioning lets you hand a customer a fixed pool of resources (CPU cores, RAM, storage, bandwidth, IP addresses) and then let them spend it however they like, by creating and destroying their own instances inside that pool.

The pool is called a Self Provisioning Pack, usually shortened to SP Pack. From the customer's point of view, they get a "create instance" button instead of a list of fixed plans, and they can dial each new instance's size up or down within the limits you set.

This is the right model when you want to sell a bucket of capacity (for example "16 vCPU, 32 GB RAM, 500 GB storage") instead of fixed-shape virtual machines.

Concepts

SP Pack: a template of resource limits you create once and then assign to one or more users.

Each pack defines three layers of limits:

  • Max values: the largest any single instance the user creates can be. For example, Max CPU = 4 means no individual instance may have more than 4 vCPUs, even if the pool still has 12 available.
  • Total values: the total pool size the user has across all their instances combined. For example, Total CPU = 16 means the sum of vCPU across every instance they own from this pack cannot go above 16.
  • Default values: the values pre-filled in the create-instance form, so the customer does not start from zero. They can change them, within the Max and Total limits.

Hypervisor Group: a named group of hypervisors. In this context it is the location the customer can deploy to (for example "London", "New York"). A pack can be restricted to specific groups.

Media Group: a named set of OS images (Ubuntu, Debian, Windows, etc). Limiting a pack to certain media groups lets you control which operating systems the customer can install.

vCPU: a virtual CPU core presented to the guest virtual machine.

RAM: memory in megabytes or gigabytes.

Bandwidth: monthly outbound traffic allowance in GB. Once exceeded, the platform can throttle or suspend the instance depending on your network settings.

Admin steps

Creating a Self Provisioning Pack

  1. Open Self Provisioning -> Packs in the admin sidebar.

    Admin Self Provisioning Packs list

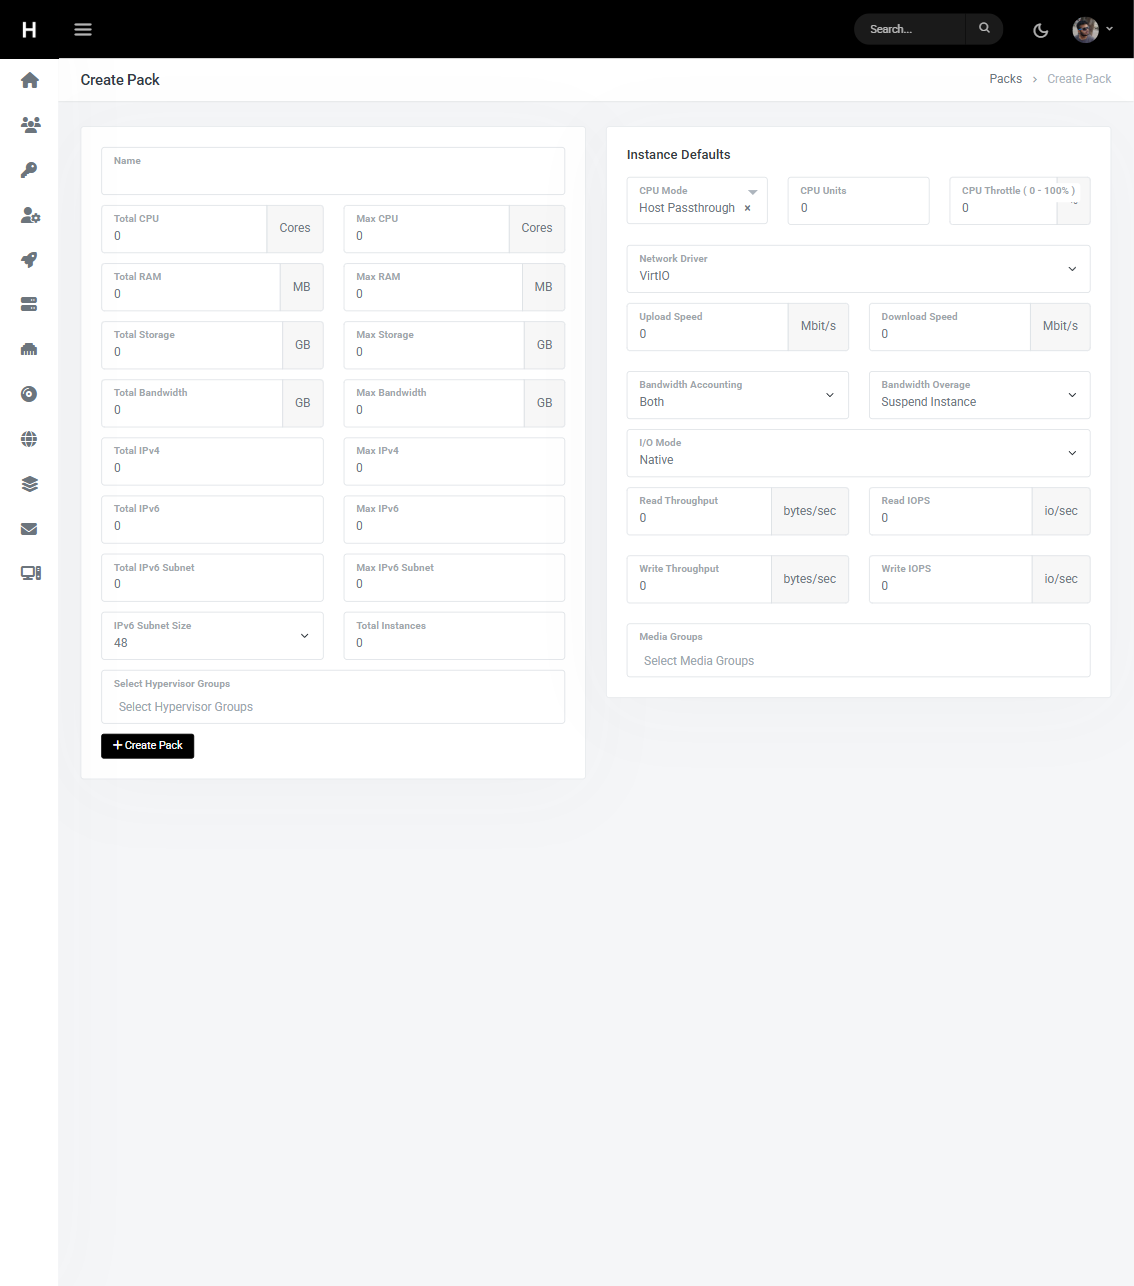
  2. Click Create Pack and fill in the form.

    Pack create form

    • Max values: the upper bound on a single instance.
    • Total values: the upper bound on the sum across all of this user's instances from this pack.
    • Defaults: the values that auto-fill the customer's create-instance form.
    • Hypervisor Groups: the locations the customer can pick when creating an instance from this pack.
    • Media Groups: the OS images the customer can install on instances from this pack.
  3. Save the pack.

Assigning a pack to a user

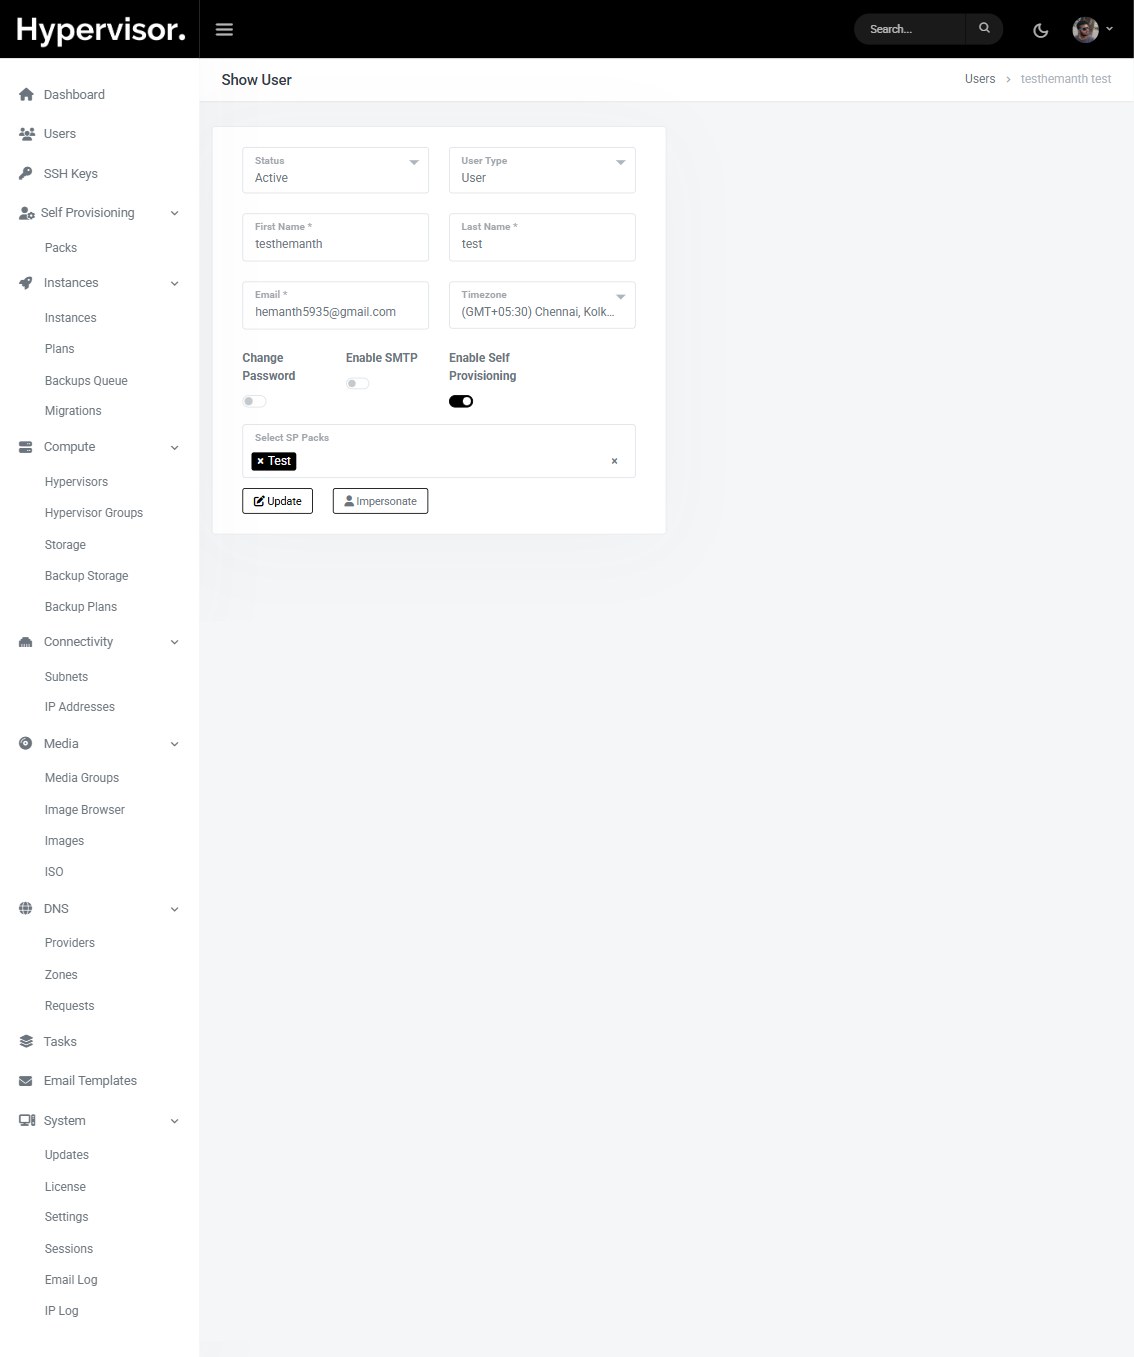
  1. Open Users in the admin sidebar and edit the user.

  2. In the user form, toggle Enable Self Provisioning and pick the pack to assign.

    Enable Self Provisioning on a user

  3. Save.

The user can be assigned more than one pack over time; the customer picks which pack to spend from when they create each instance.

Updating a pack

Editing a pack changes the limits for every user it is assigned to from the next instance they create onward. Existing instances keep the resources they already have.

What end users see

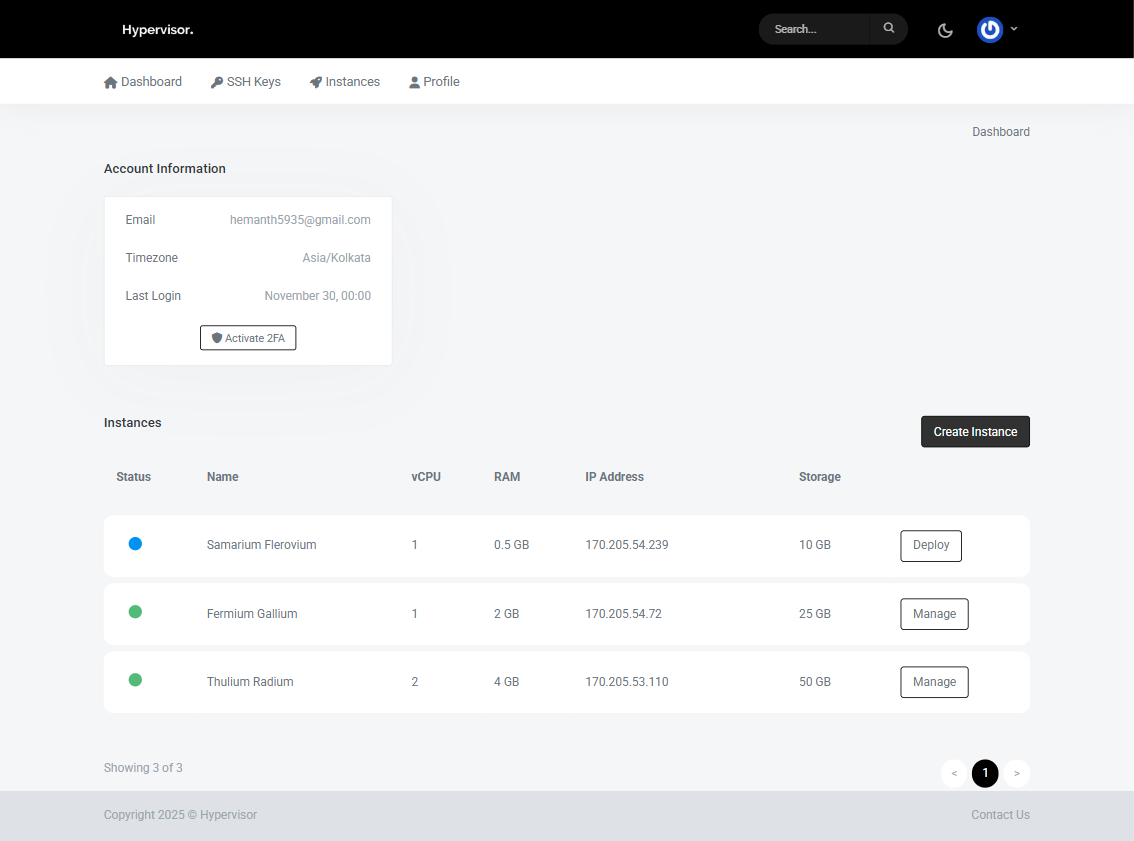
Once a pack is enabled on their account, the customer's instances page gets a Create Instance button that uses the pack rather than the fixed-plan flow.

Self Provisioning create button on the user panel

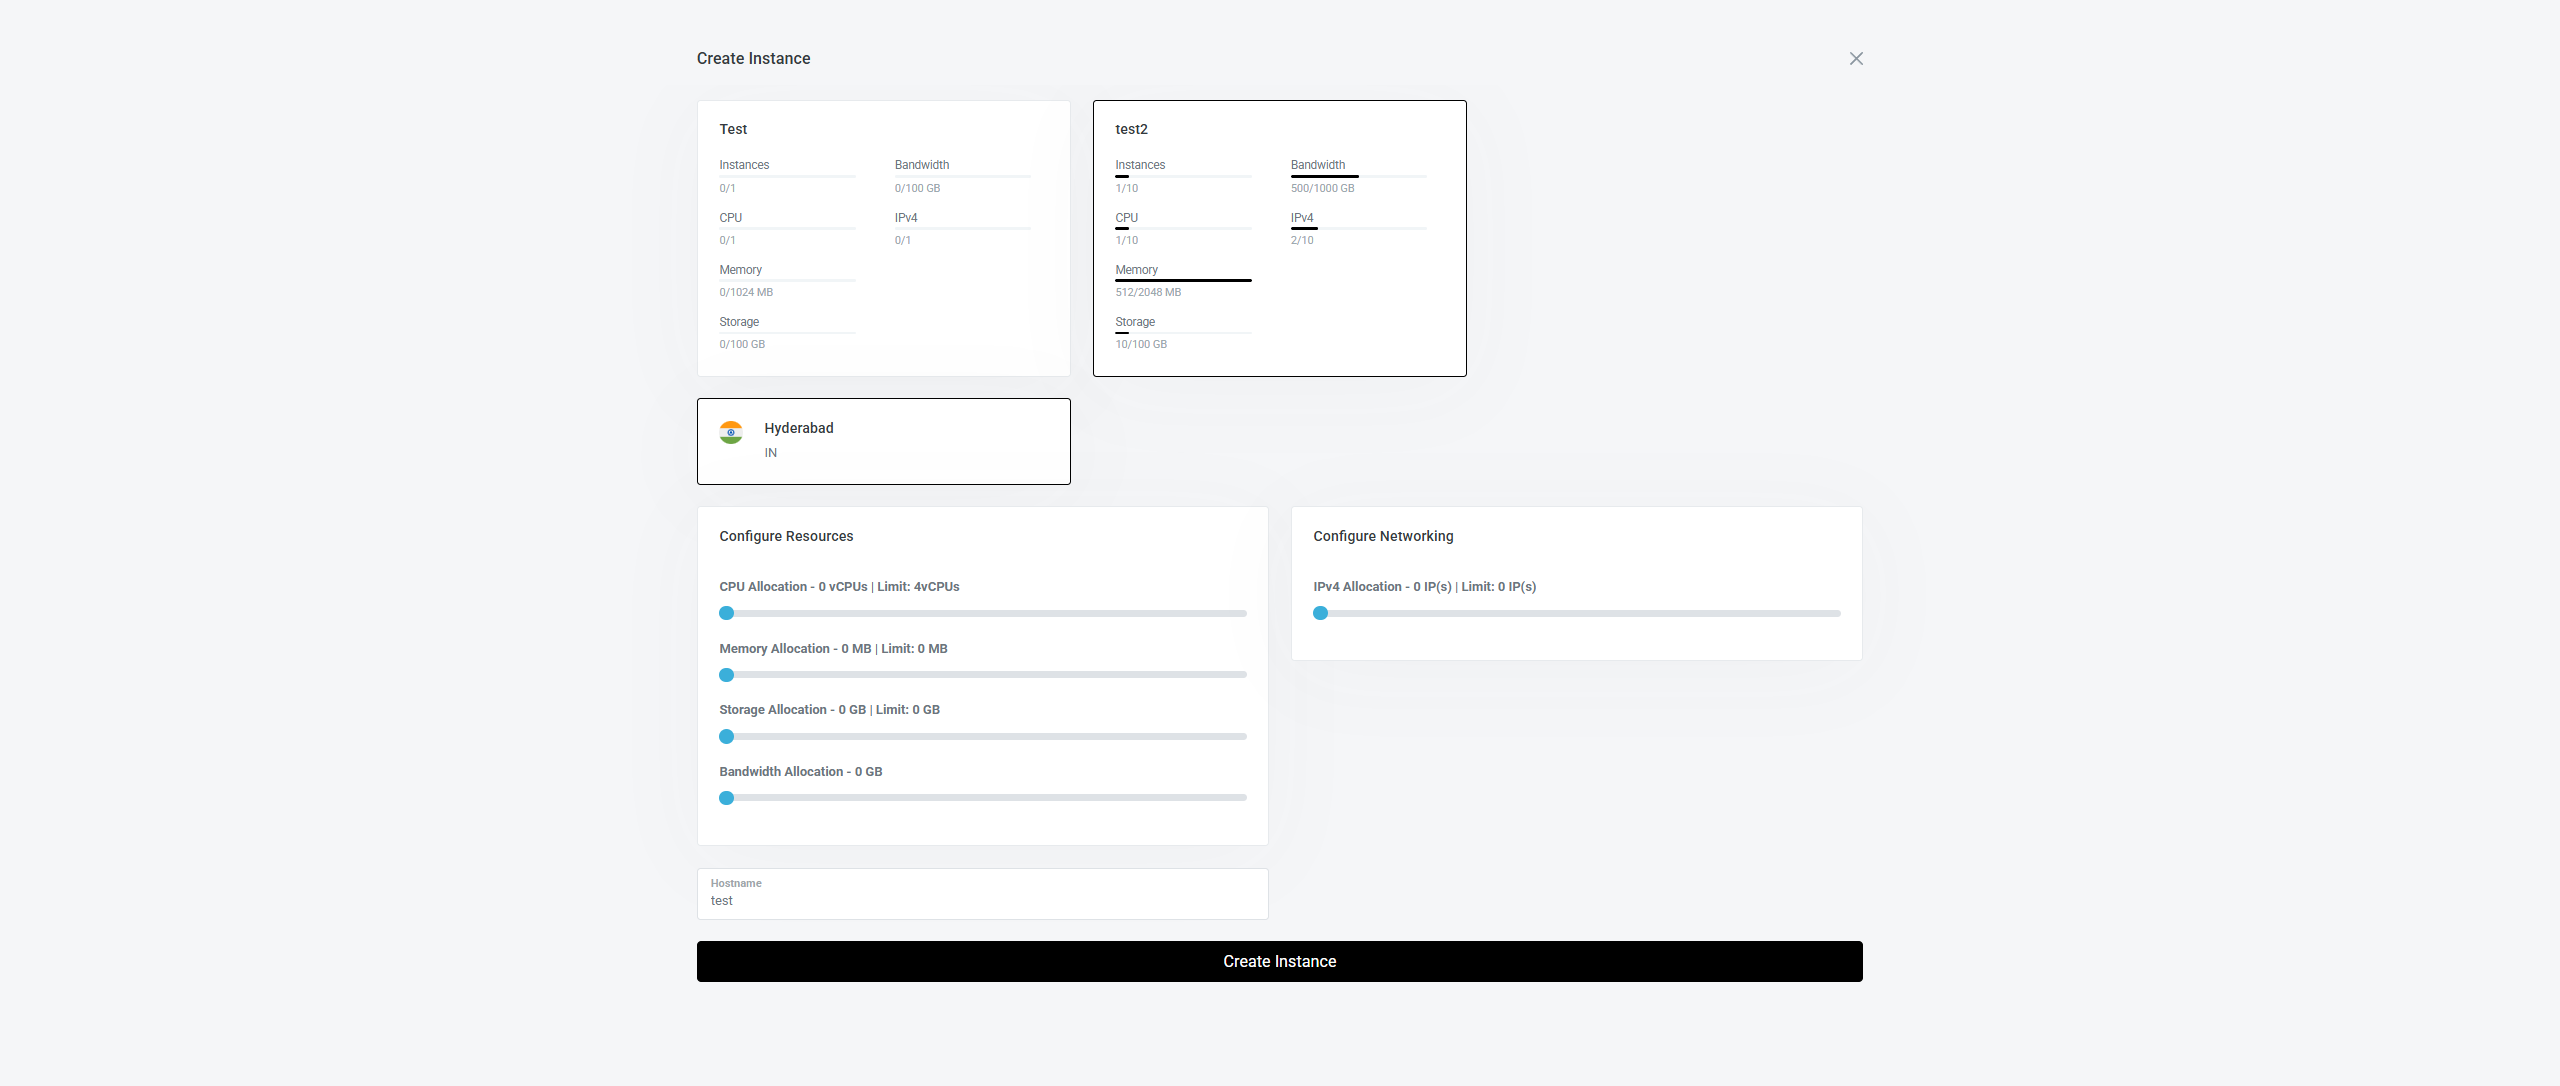
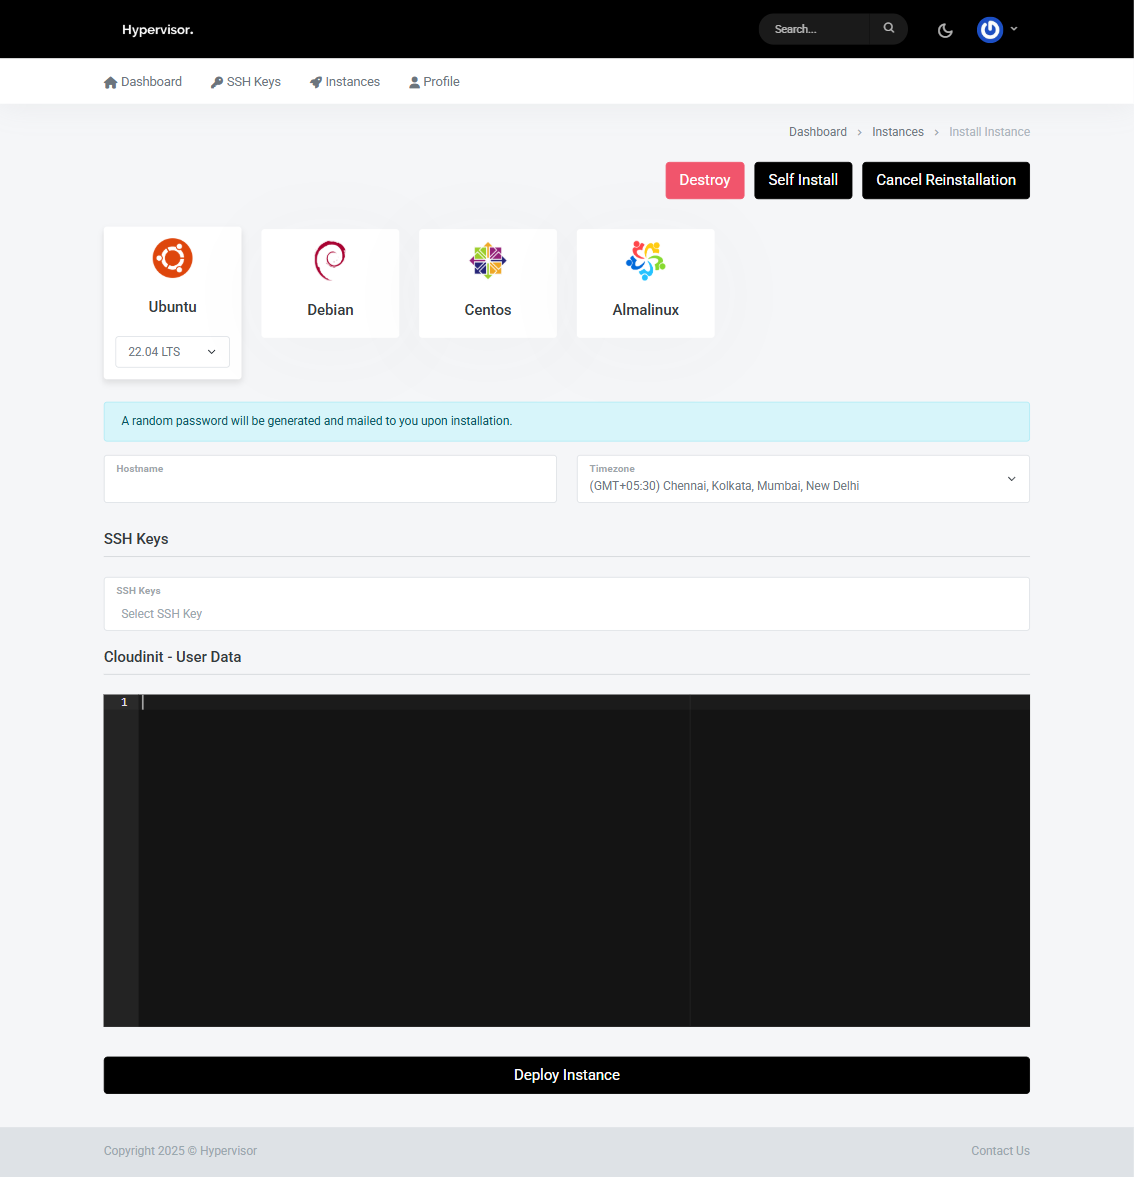
The create form is dialled in from the pack defaults. Each field has a slider or numeric input, capped at the Max value for a single instance, and live-validated against the remaining Total in the pool. The customer sees how much of the pool they have used and how much is left.

Create instance form for an SP customer

When they confirm, the platform queues the deploy as a background task and shows a live progress bar.

Instance deployment in progress

Destroying an instance returns its resources to the pool immediately, so the customer can spend them on a new instance straight away.

Troubleshooting

The customer's create-instance form shows "0 remaining" even though they have no instances

  • Open their user record and confirm the pack is still enabled. A disabled pack zeroes the available pool.
  • If the customer also has fixed-plan instances, those are not counted against the pool, but a previous SP instance that failed to fully destroy can still hold resources. Open Self Provisioning -> Usage and reconcile.

The customer cannot pick a location they used to be able to pick

  • The pack's Hypervisor Groups list has changed, or the hypervisor group has been emptied. Edit the pack and confirm the locations are still listed.

The customer cannot pick a specific OS image

  • The image is in a media group that is not on the pack's Media Groups list. Either add the media group to the pack or move the image into an allowed group.
  • Team Management & IAM for letting team members on the customer's account use the pack on the owner's behalf.
  • Projects for grouping the instances the customer creates from a pack.