Private Networking
Overview
Private networking lets your virtual machines (VMs) talk to each other over private IP addresses instead of going through the public internet. This is useful for things like a web VM talking to a database VM, or VMs joining a cluster.
This page covers the lightweight private-networking model, where you define a private subnet (a block of internal IPs such as 10.0.0.0/24) and attach a secondary network card on each VM. For a more isolated, software-defined network with subnets, NAT, DNS, and VPN, see VPC Networking.
Concepts
| Term | Plain English |
|---|---|
| Hypervisor | A physical server that runs VMs. |
| Network bridge | A virtual switch on the hypervisor that VM network cards plug into. The platform uses br0 for the secondary private bridge by default. |
| VLAN (Virtual LAN) | A way to logically split one physical switch/cable into multiple isolated networks, identified by a VLAN ID. |
| Subnet | A block of IP addresses, e.g. 10.0.0.0/24. CIDR notation means "the network plus how many bits are fixed". |
| CIDR | Classless Inter-Domain Routing. The /24 part of 10.0.0.0/24 is the CIDR prefix length. |
| Private (RFC1918) IPs | IP ranges reserved for internal use: 10.0.0.0/8, 172.16.0.0/12, 192.168.0.0/16. Not routable on the public internet. |
| Secondary interface | A second virtual network card on the VM, in addition to the primary public NIC. |
Prerequisites
This guide assumes the hypervisor already has a secondary bridge called br0 set up by the operator, connected to a secondary physical network card. That secondary card can be:
- A plain VLAN to other hypervisors (so VMs on different hypervisors can also talk privately), or
- A simple uplink to a switch where only that hypervisor's VMs need to talk to each other.
It also assumes the VM already has its primary public NIC and is deployed.
Admin: how to configure
Add a private subnet
- Open Networking > Subnets in the admin panel and click Create Subnet.
- Choose Type: Private and provide the CIDR you want to use, e.g.
10.0.0.0/24. - Select which hypervisors this subnet applies to:
- If the operator has set up a VLAN between hypervisors for private traffic, select multiple hypervisors. All VMs on any of those hypervisors will share this private network.
- If there is no inter-hypervisor VLAN and you only need VMs on the same hypervisor to talk, select only one hypervisor.
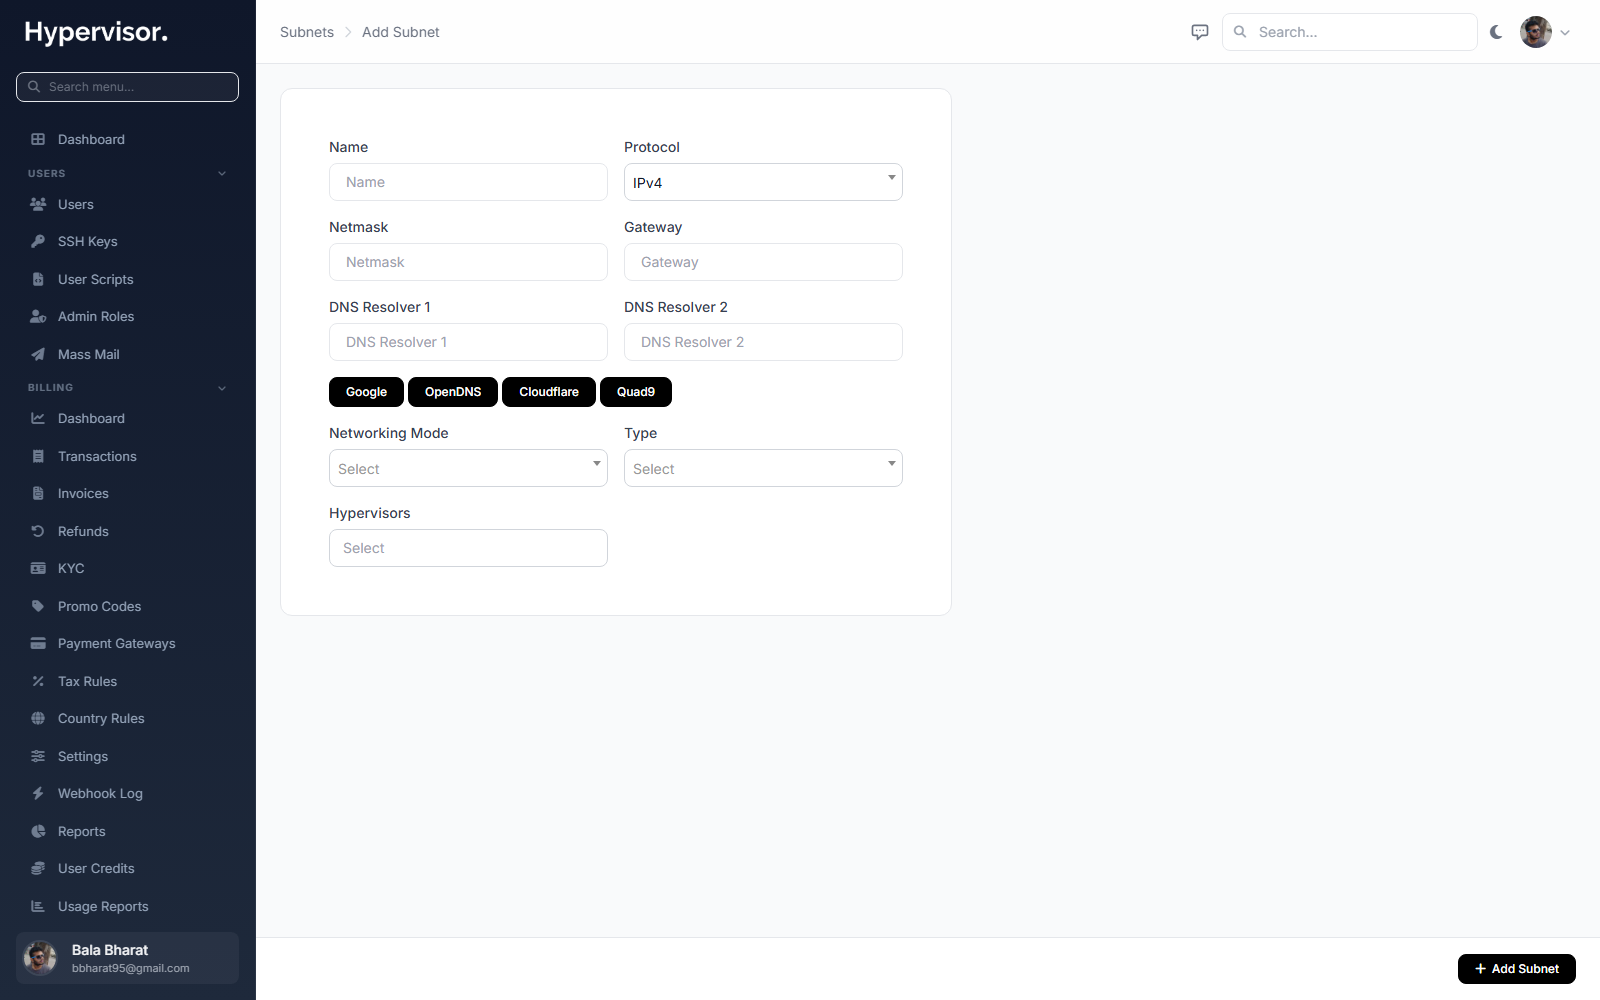
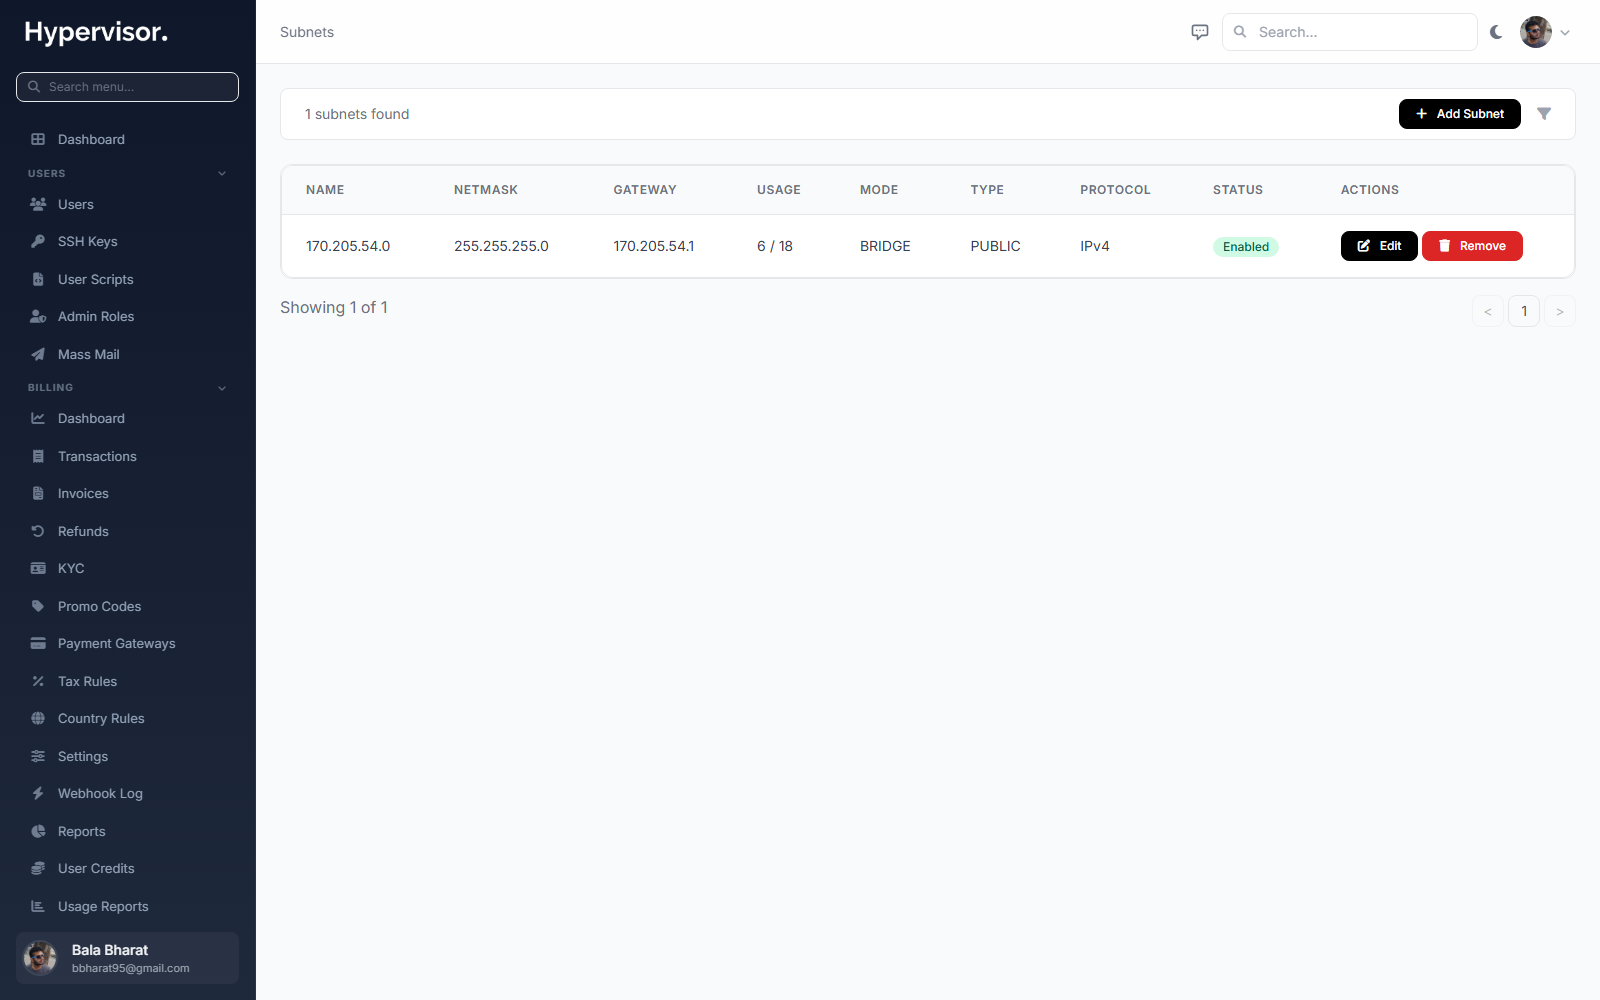
The admin Subnets list shows every subnet and which hypervisors it is attached to.
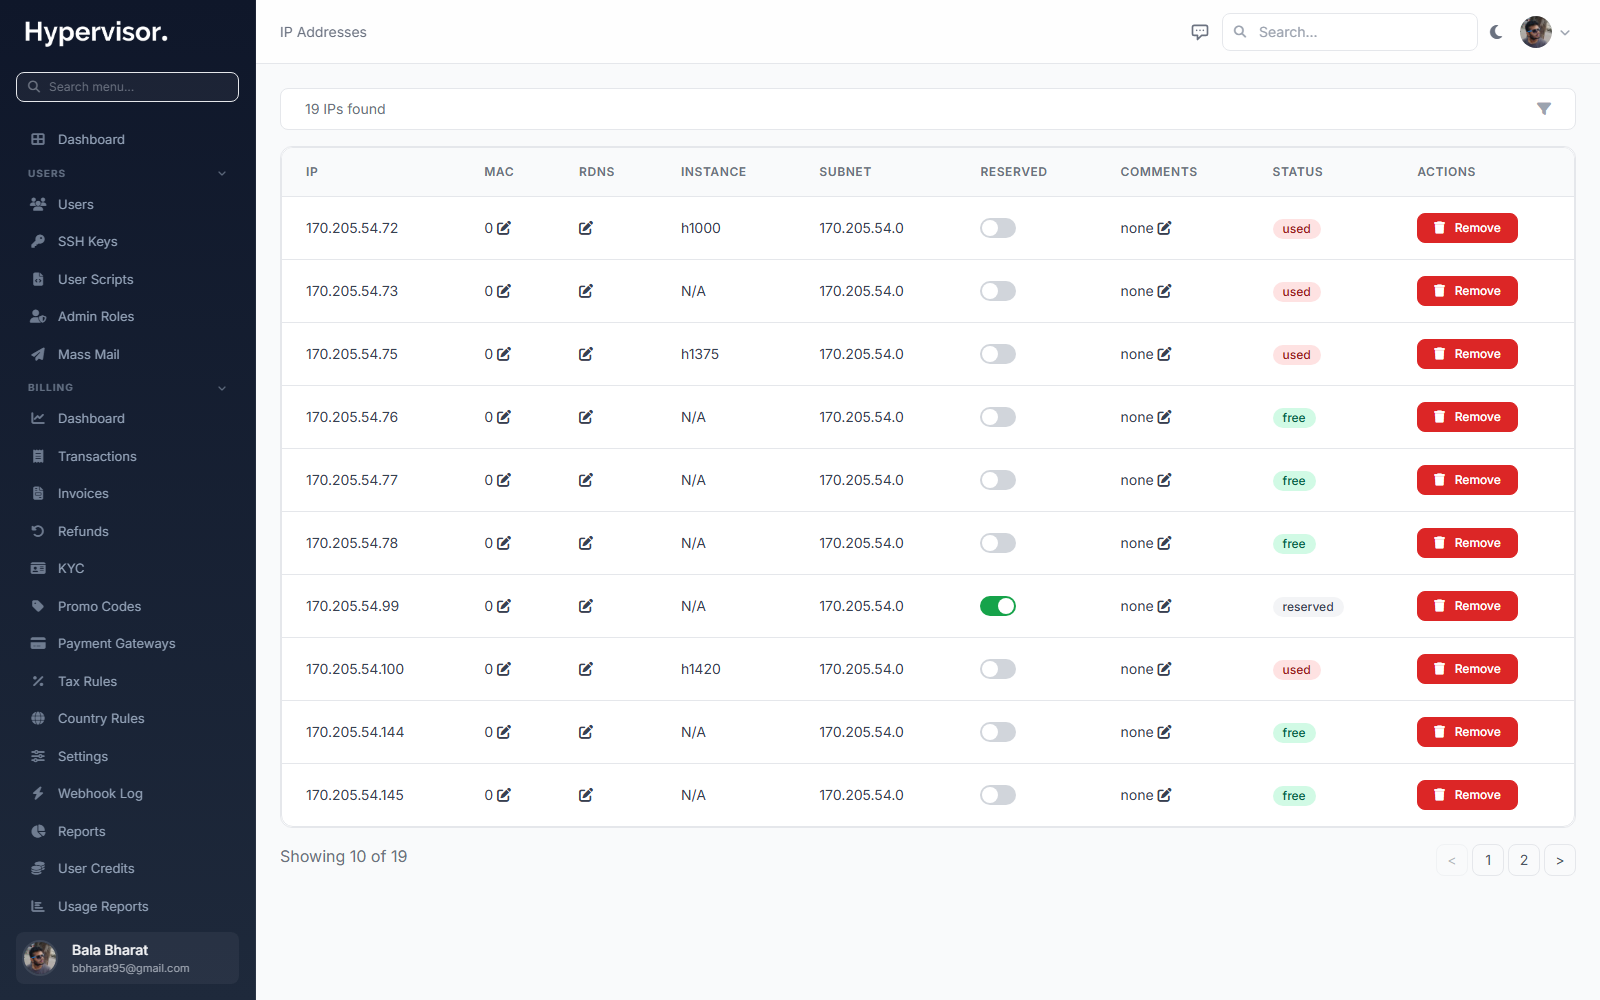
Generate IPs in the subnet
After creating the subnet, populate it with usable IP addresses. On the subnet detail page there is a generator that creates a consecutive range from a starting IP to an ending IP.
In the example below the range 10.0.0.2 to 10.0.0.253 is generated.

You can review the generated IPs in Networking > IP Addresses.
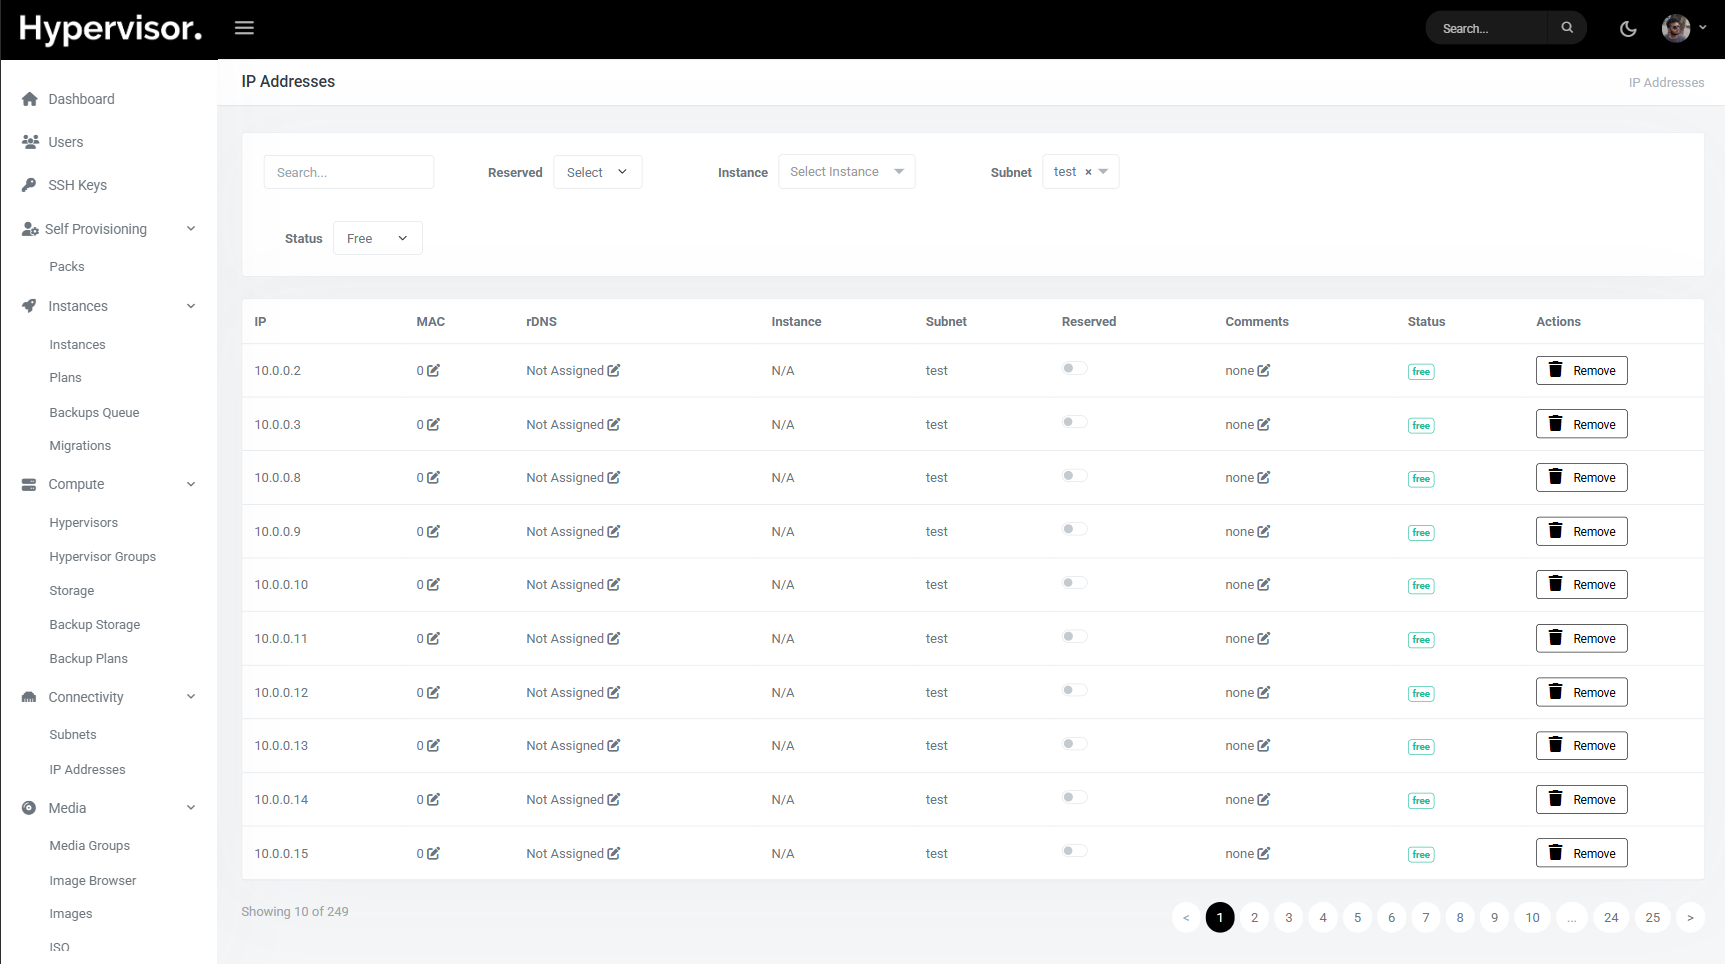
Older IP list view
The legacy per-subnet IP list looks like this:
What end users see
Add a secondary interface to a VM
- Open the VM's manage page.
- Click Create Interface.
- The VM gets a secondary virtual network card attached to the private subnet, and an IP from the generated pool is auto-assigned.
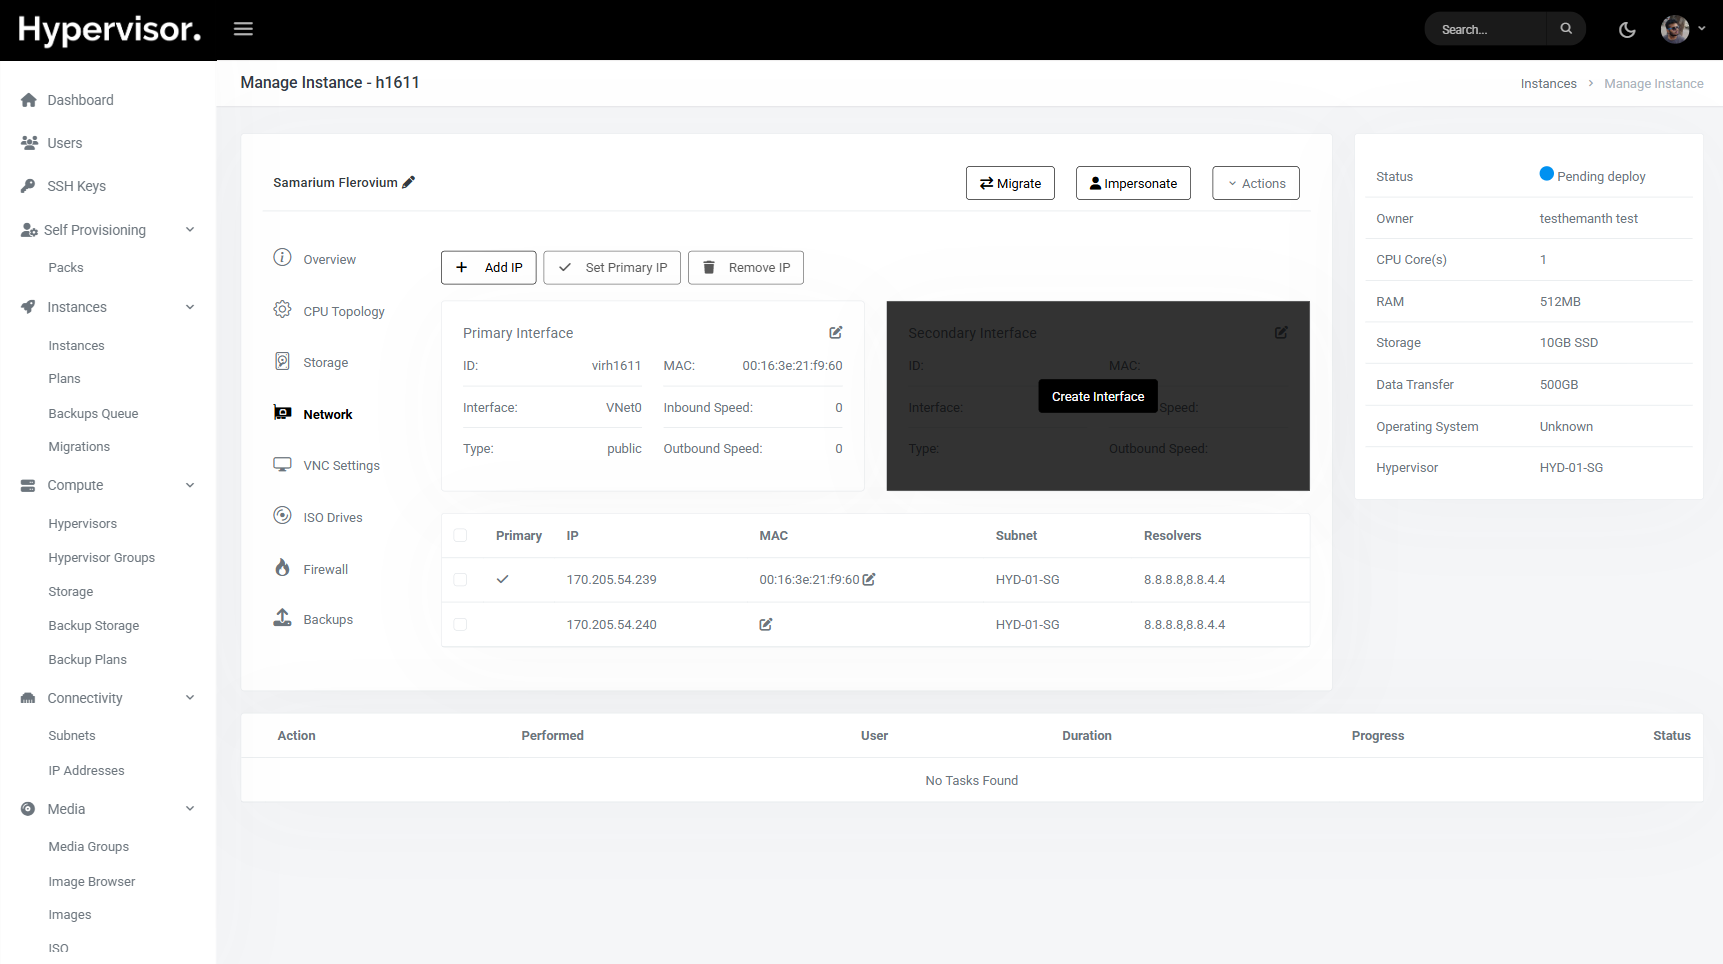
After the interface is created, the secondary NIC appears in the network section with its assigned IP (for example 10.0.0.2).

The VM can now reach other VMs that share the same private subnet:
- On the same hypervisor: always.
- On other hypervisors: only if the operator has connected those hypervisors with a VLAN on the private network.
Troubleshooting
Two VMs on different hypervisors cannot talk
The private subnet must be attached to both hypervisors, and the operator must have set up a VLAN between them on the secondary physical NIC. If only one hypervisor is attached to the subnet, only VMs on that hypervisor can use it.
Secondary interface has no IP
Check that the subnet still has free IPs in the generated range. If the pool is exhausted, generate more IPs from the admin subnet page.
VMs can ping each other but real traffic fails
Check the VM's Security Group rules. If a security group is attached with ingress rules, anything not explicitly allowed is dropped.
Related pages
- VPC Networking for fully isolated software-defined networks with NAT, DNS, and VPN.
- Security Groups
- Static IPs