Load Balancers
Overview
A Load Balancer takes incoming network traffic and spreads it across several backend virtual machines (VMs). This keeps an application online if one VM fails and lets you serve more users by adding more VMs.
Each load balancer on this platform is its own dedicated VM running HAProxy, a widely used open-source load balancing program. You configure it through the panel.
A load balancer can be deployed in one of two modes:
- VPC mode. The load balancer sits inside a VPC (Virtual Private Cloud, a private virtual network you define). It distributes traffic to backend VMs that are also inside that VPC, over private IP addresses.
- Public mode. The load balancer has a public IP and receives traffic from the internet. Backends are reached through their public IPs.
Concepts
| Term | Plain English |
|---|---|
| HAProxy | Open-source software the load balancer VM runs to forward traffic. |
| Frontend / Configuration Block | One listening port on the load balancer (for example port 443) and all its settings. |
| Backend | A target VM that receives traffic forwarded by the load balancer. |
| L4 (Layer 4) | Forwarding raw TCP or UDP packets without inspecting their contents. |
| L7 (Layer 7) | HTTP-aware forwarding. The load balancer can read the URL path, host header, etc. |
| SSL termination | The load balancer decrypts HTTPS, then talks to backends in plain HTTP. |
| Let's Encrypt | A free certificate authority. The load balancer can obtain and renew certificates from it automatically. |
| Health check | A periodic test to see if a backend is alive. Failed backends are removed from rotation. |
| Session stickiness | Sends repeat requests from the same client to the same backend, so logged-in sessions keep working. |
| Hypervisor group | A location (data center) made up of one or more hypervisors (physical servers). |
| LB Plan | A sizing tier (CPU, RAM, storage, bandwidth) for a load balancer VM. |
Admin: how to configure
Enable load balancers on a location
Before users can deploy load balancers, an admin must enable the feature on the hypervisor group (location) where it should be available.
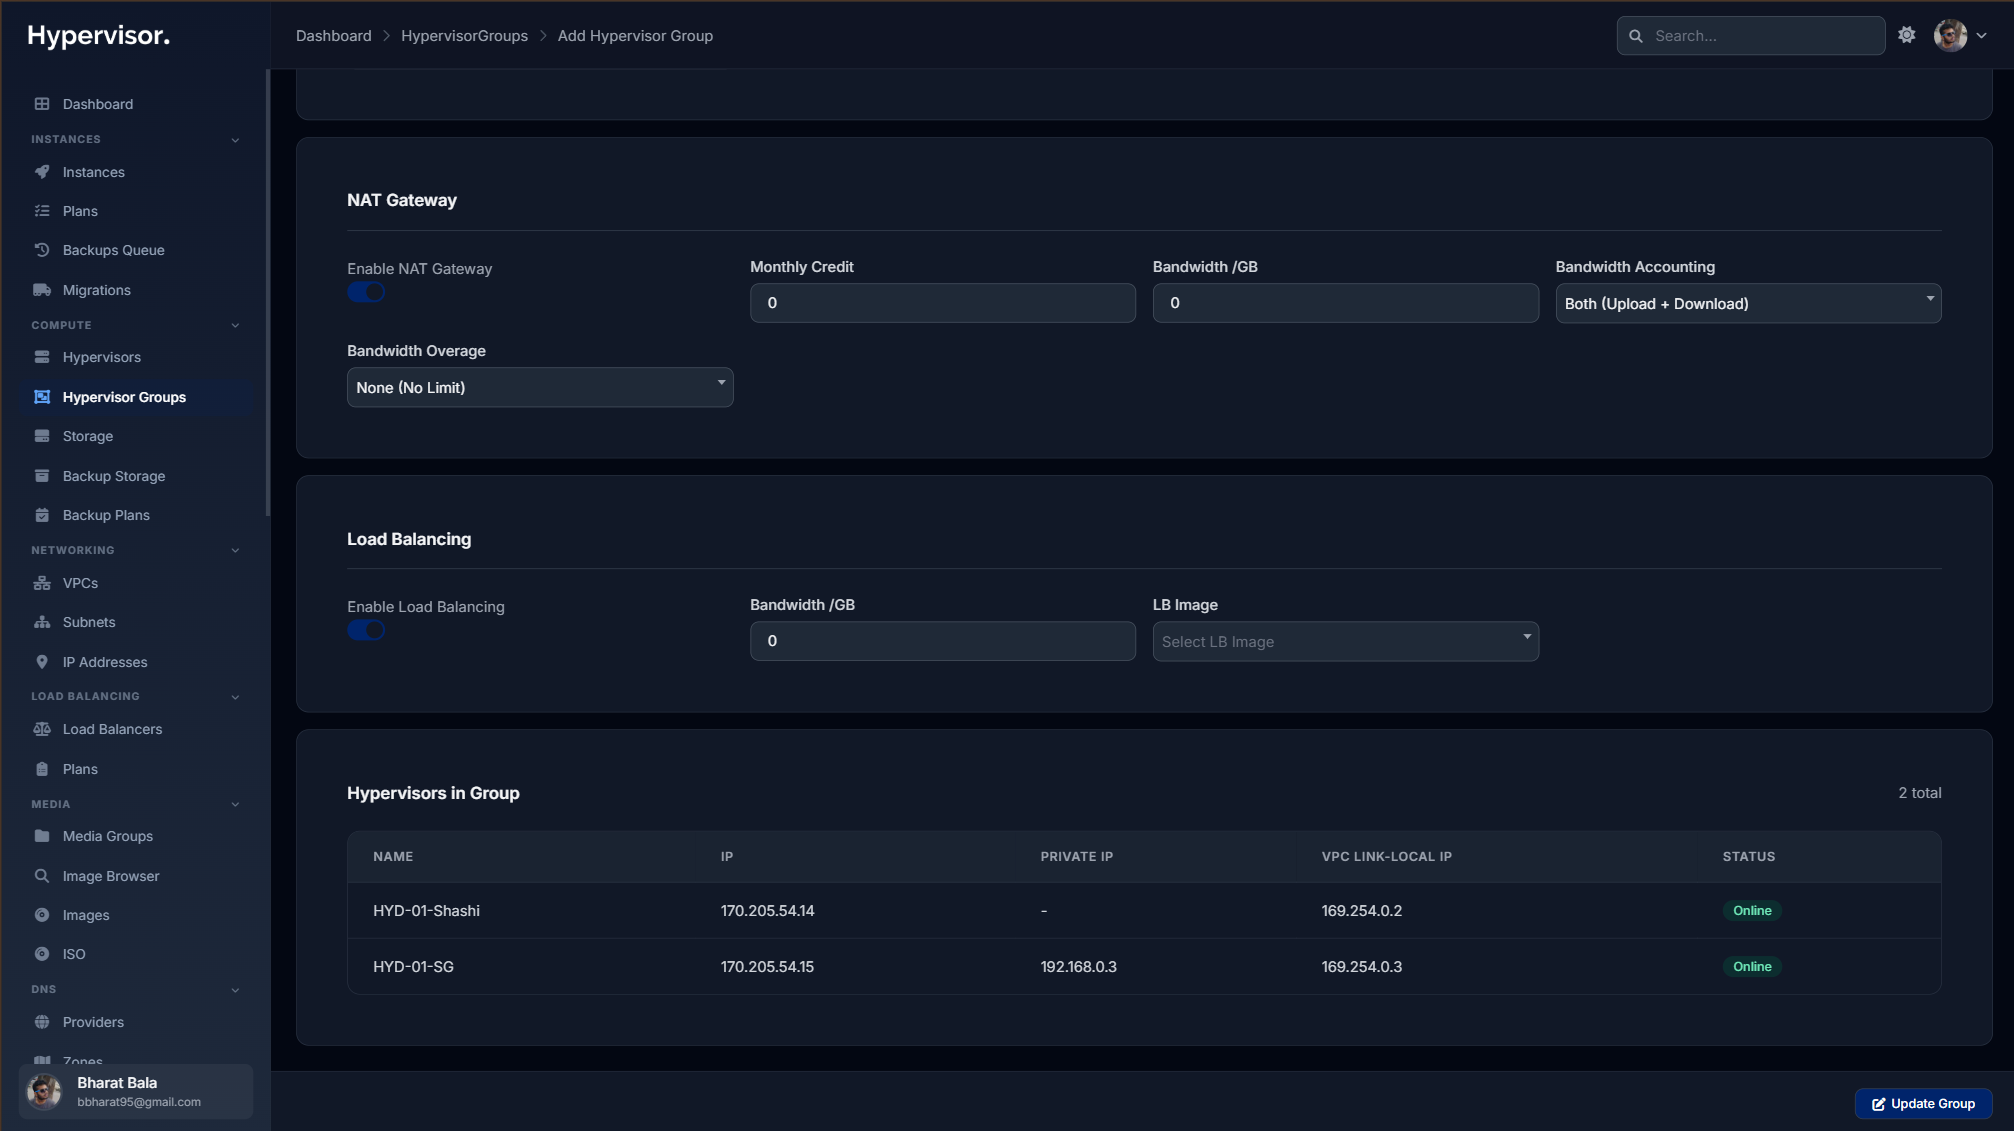
- Go to Compute > Hypervisor Groups and open the group you want to enable.
- In the Load Balancer section, configure:
- LB Enabled. Toggle on.
- LB Image. Pick the base OS image used to build new load balancers. Only images whose
purposeis set toload_balancerappear here. You can set this purpose under Media > Images.
LB images must be marked with the load_balancer purpose under Media > Images, or they will not appear in the dropdown.
Create LB plans
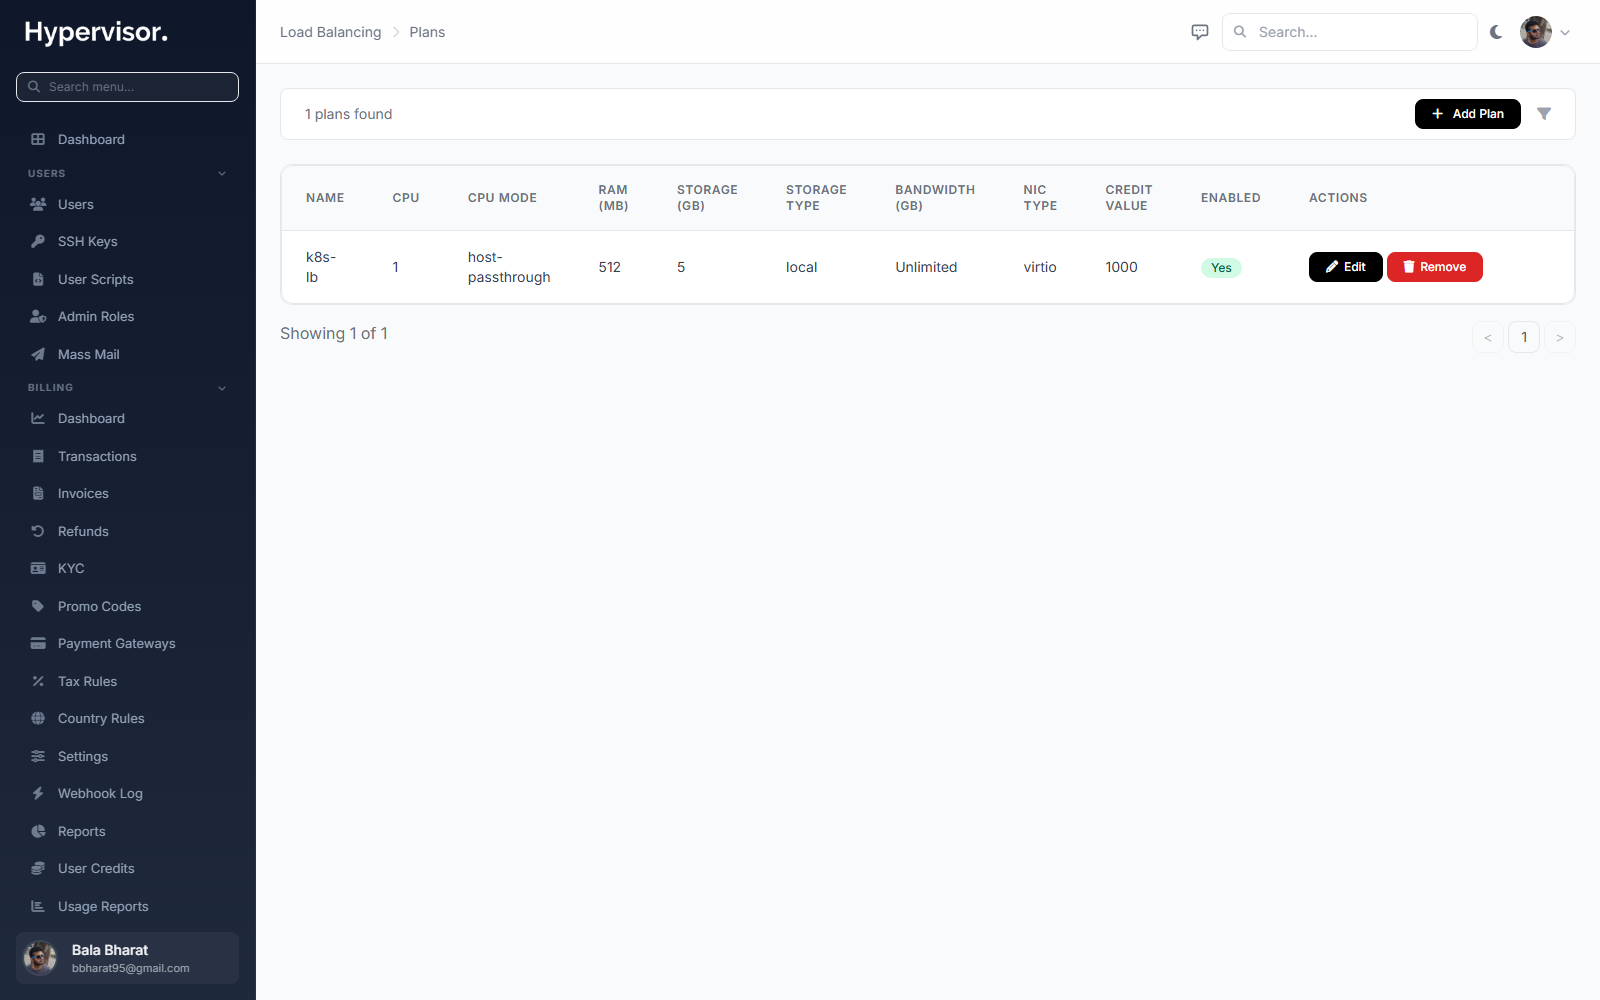
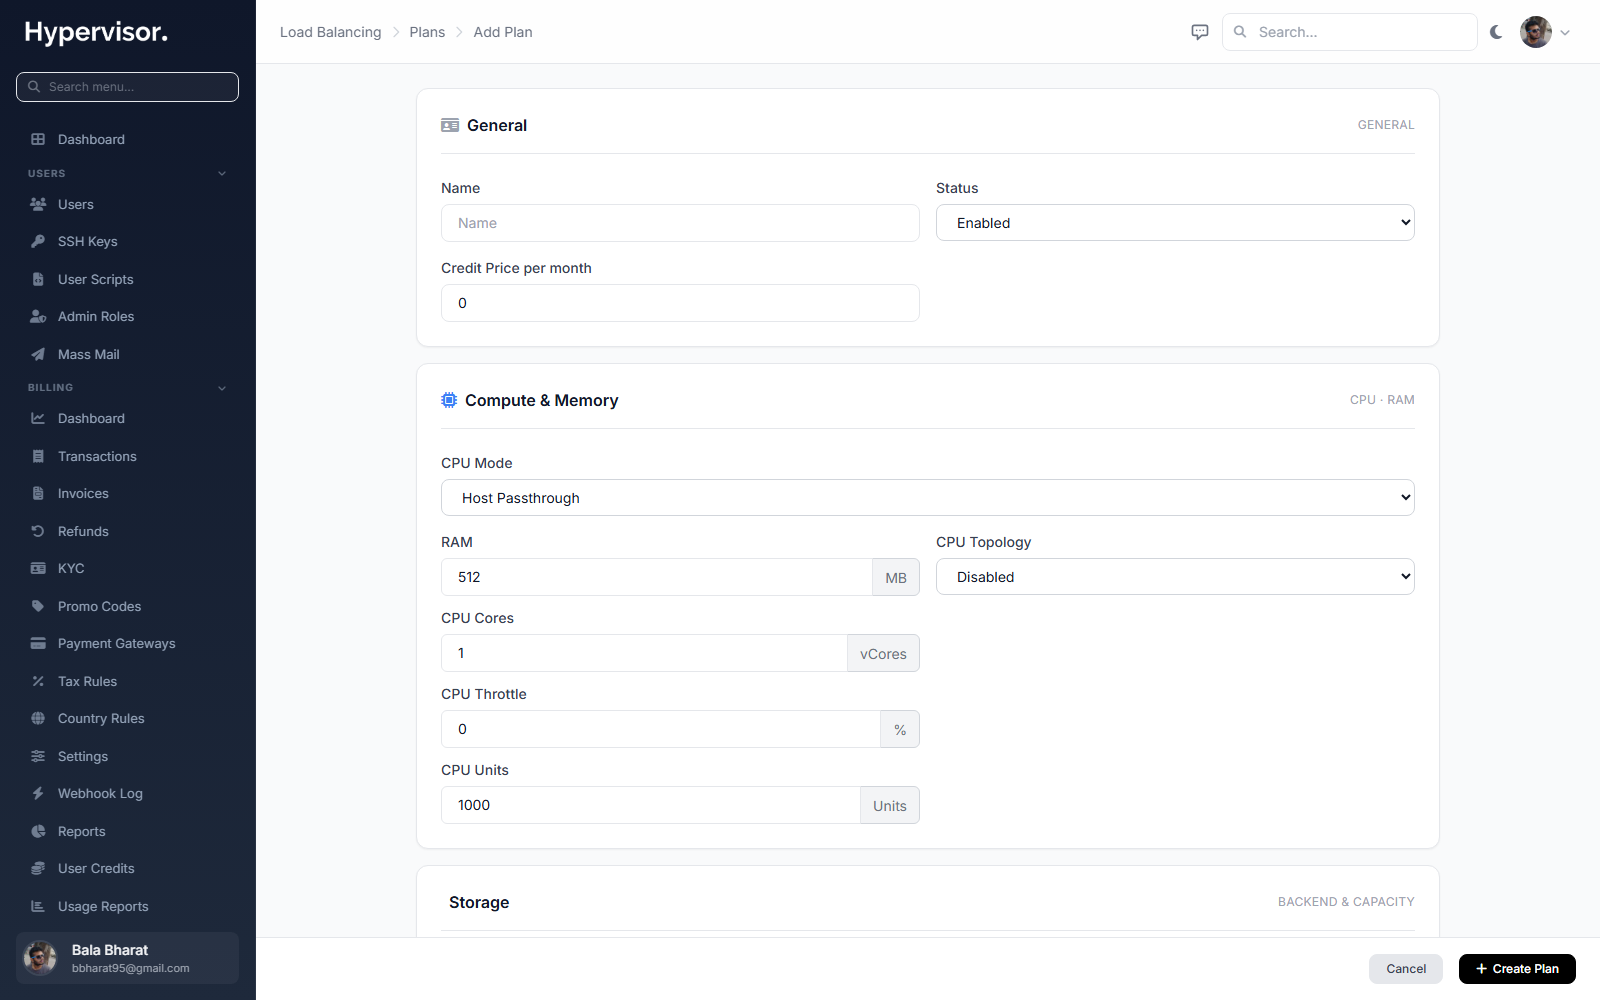
An LB Plan defines how much hardware a load balancer VM gets.
- Go to Load Balancers > Plans in the admin sidebar.
- Click Create Plan.
- Fill in:
- Name. For example "LB Small".
- CPU / RAM / Storage. Resources for the LB VM.
- Network Settings. NIC type, bandwidth limits, inbound/outbound caps.
- Storage Settings. Storage type, I/O mode, read/write limits.
- CPU Topology. Sockets, cores, threads, CPU model.
Click Add LB Plan to open the create form.
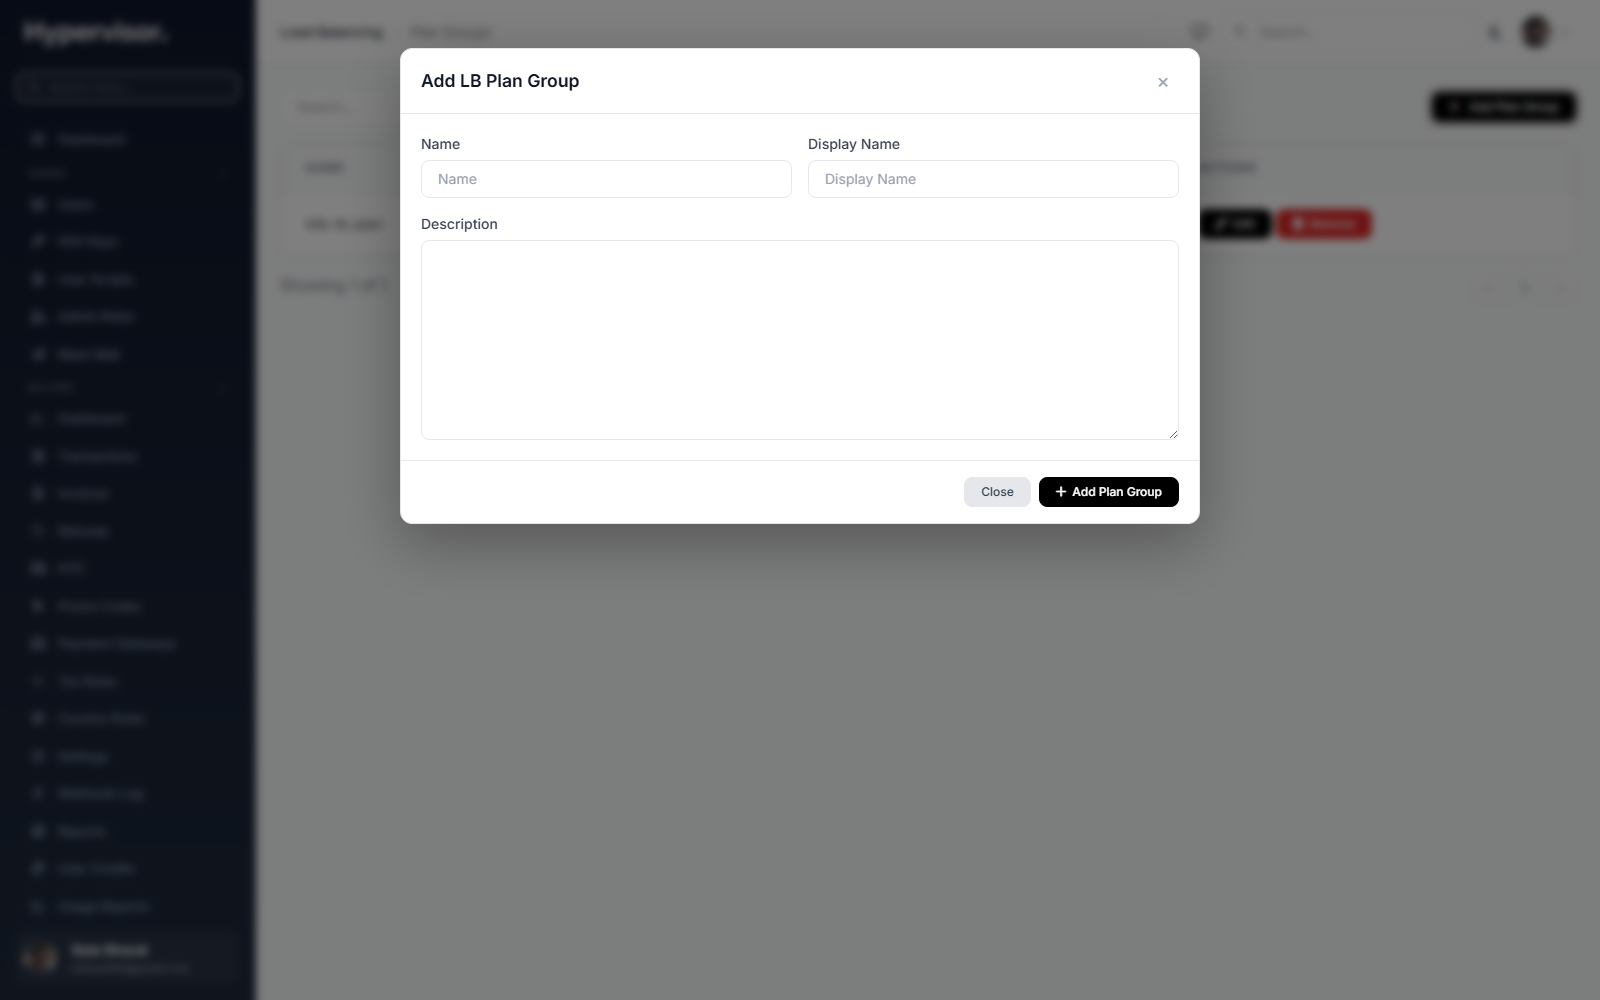
Plan groups
Plans are bundled into Plan Groups. The Plan Group is what customers actually pick from. This lets you offer different sets of plans in different locations or to different users.
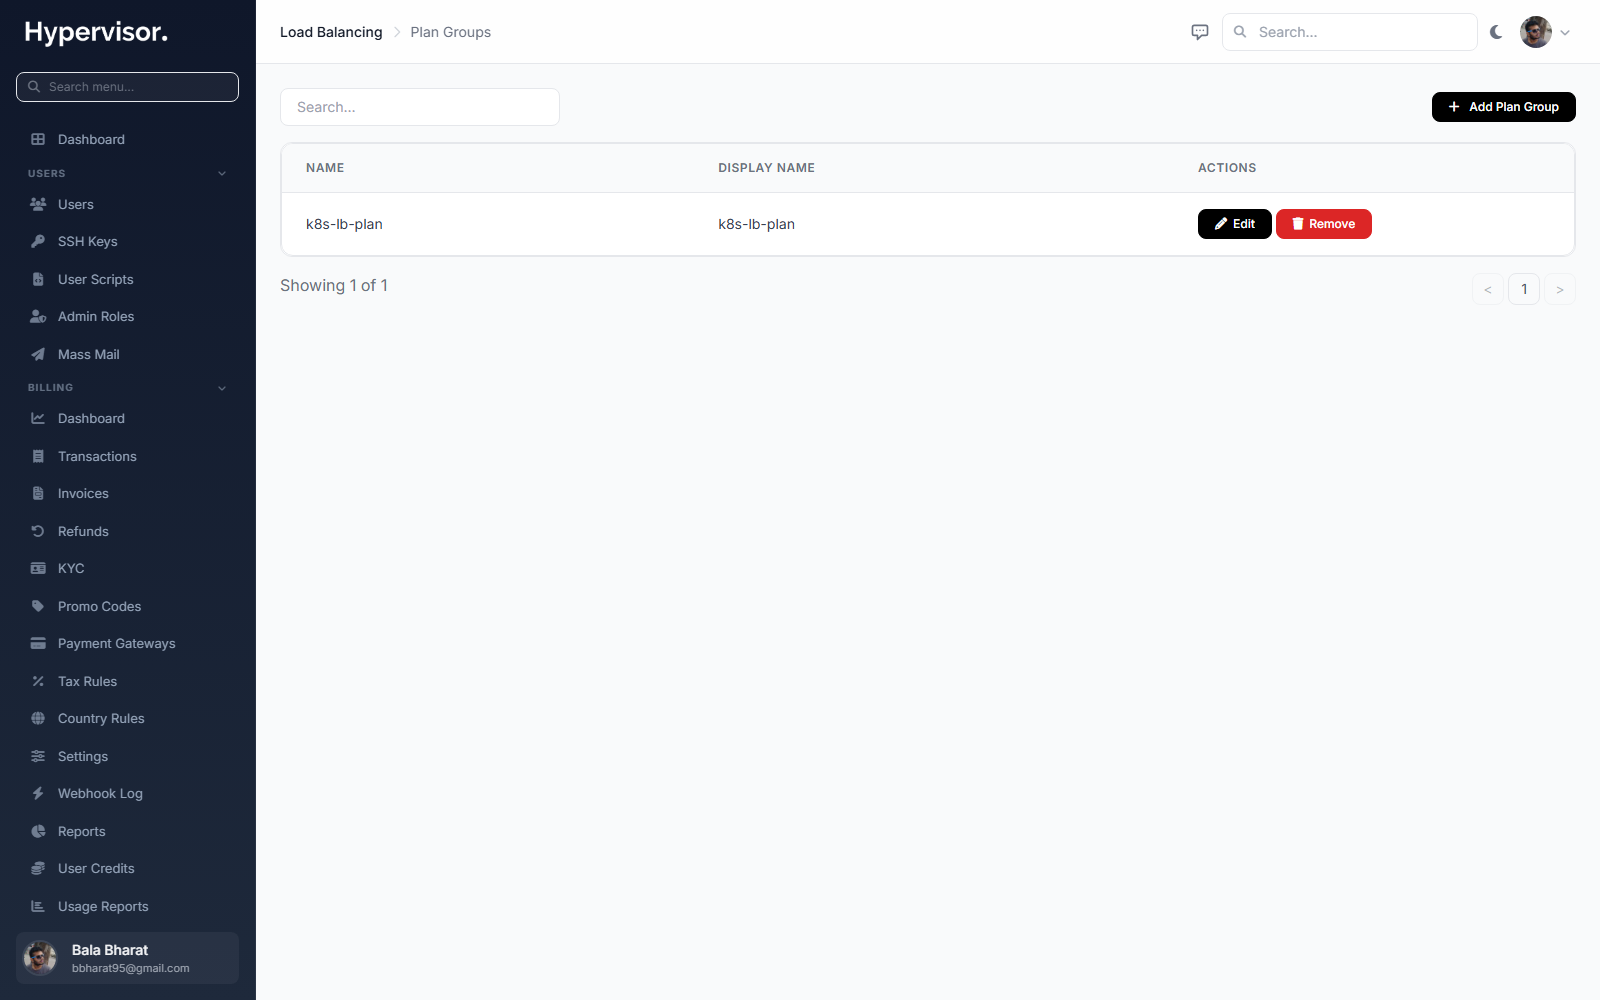
Click Add Plan Group to open the create form.
Deploy a load balancer for a user
You can deploy a load balancer on behalf of a user from the admin panel.
- Go to Load Balancers > Load Balancers in the admin sidebar.
- Click Create Load Balancer.
- Select the User who will own it.
- Choose Deploy Mode:
- VPC. Pick a VPC and subnet. The LB gets a private VPC IP.
- Public. Pick a location. The LB gets a public IP.
- Select an LB Plan.
- Give it a Name and click Create.
Provisioning usually takes 1 to 2 minutes.
What end users see
Create a load balancer
- Go to Load Balancers in the user sidebar.
- Click Create Load Balancer.
- Pick a Location (a hypervisor group that has LB enabled).
- Pick a Deploy Mode:
- VPC. Requires the user to already have a VPC in that location. They pick the VPC and a subnet.
- Public. No VPC needed. The LB gets a public IP directly.
- Pick a Plan, give it a Name, click Create.
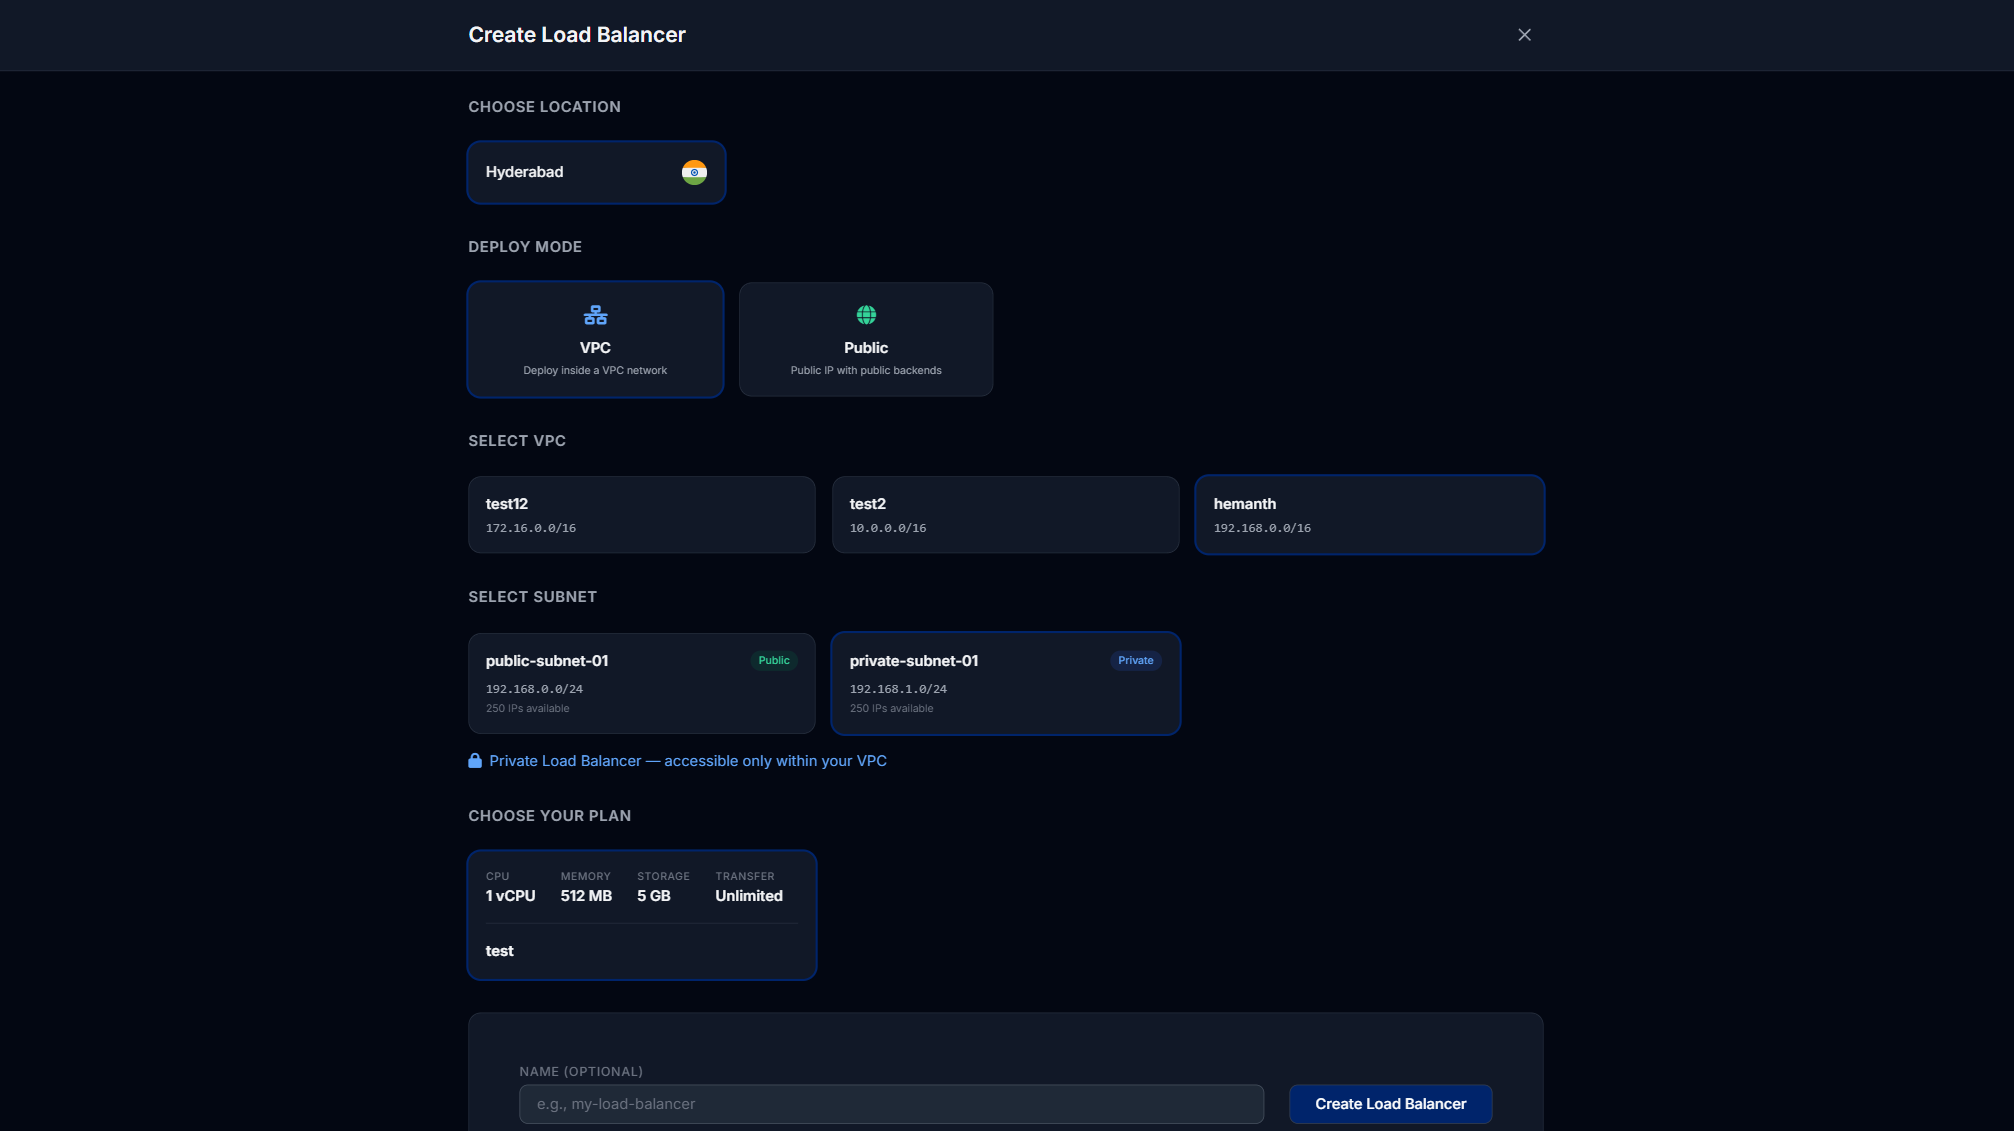
VPC mode is the right choice when all the backend VMs already live in the same VPC and you want load balancing over private addresses. Public mode is the right choice for a simple internet-facing LB.
Manage a load balancer
After deployment, clicking the LB opens its management page.
Configuration blocks
A configuration block is one listening port on the LB with all the settings for that port in one place: protocol, algorithm, health checks, backends.
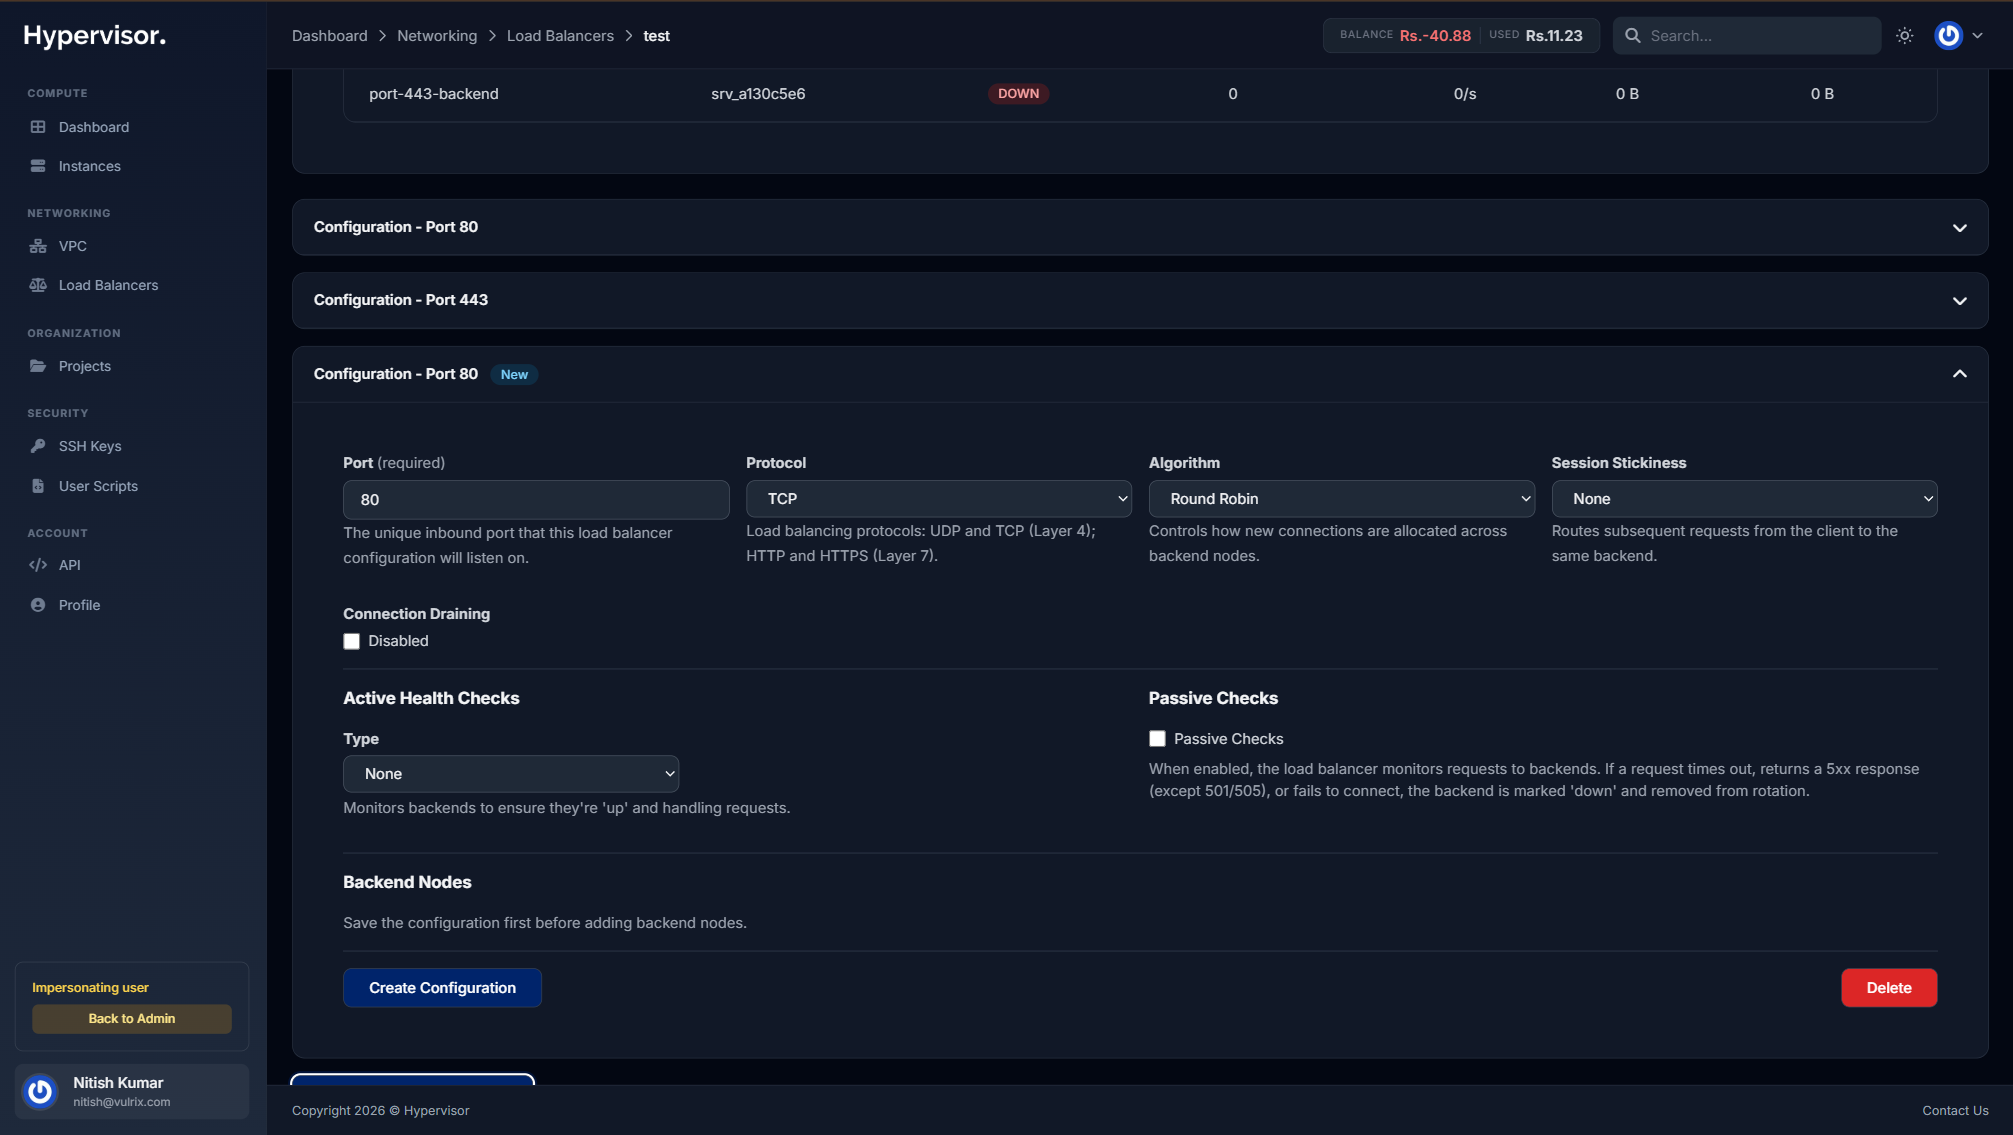
Each block has:
- Port. The inbound port to listen on, e.g. 80, 443, 8080. A port can only be used by one block.
- Protocol.
TCP: raw L4 forwarding.UDP: raw L4 UDP forwarding.HTTP: L7 HTTP-aware.HTTPS: L7 with SSL termination.
- Algorithm. How traffic is spread across backends.
Round Robin: rotate through backends evenly.Least Connections: send the next request to whichever backend has the fewest active connections.Source IP: hash the client IP, so the same client always lands on the same backend.
- Session Stickiness.
None: no stickiness.Cookie: HAProxy sets a cookie so the same client keeps hitting the same backend.Source IP: stickiness based on client IP.
When the protocol is HTTPS, a certificate dropdown appears. Pick from the certificates you have uploaded in the Certificates section below.
Connection draining
When you remove or replace a backend, you usually want existing connections to finish first instead of being cut off. Enable Connection Draining and set a Drain Timeout in seconds.
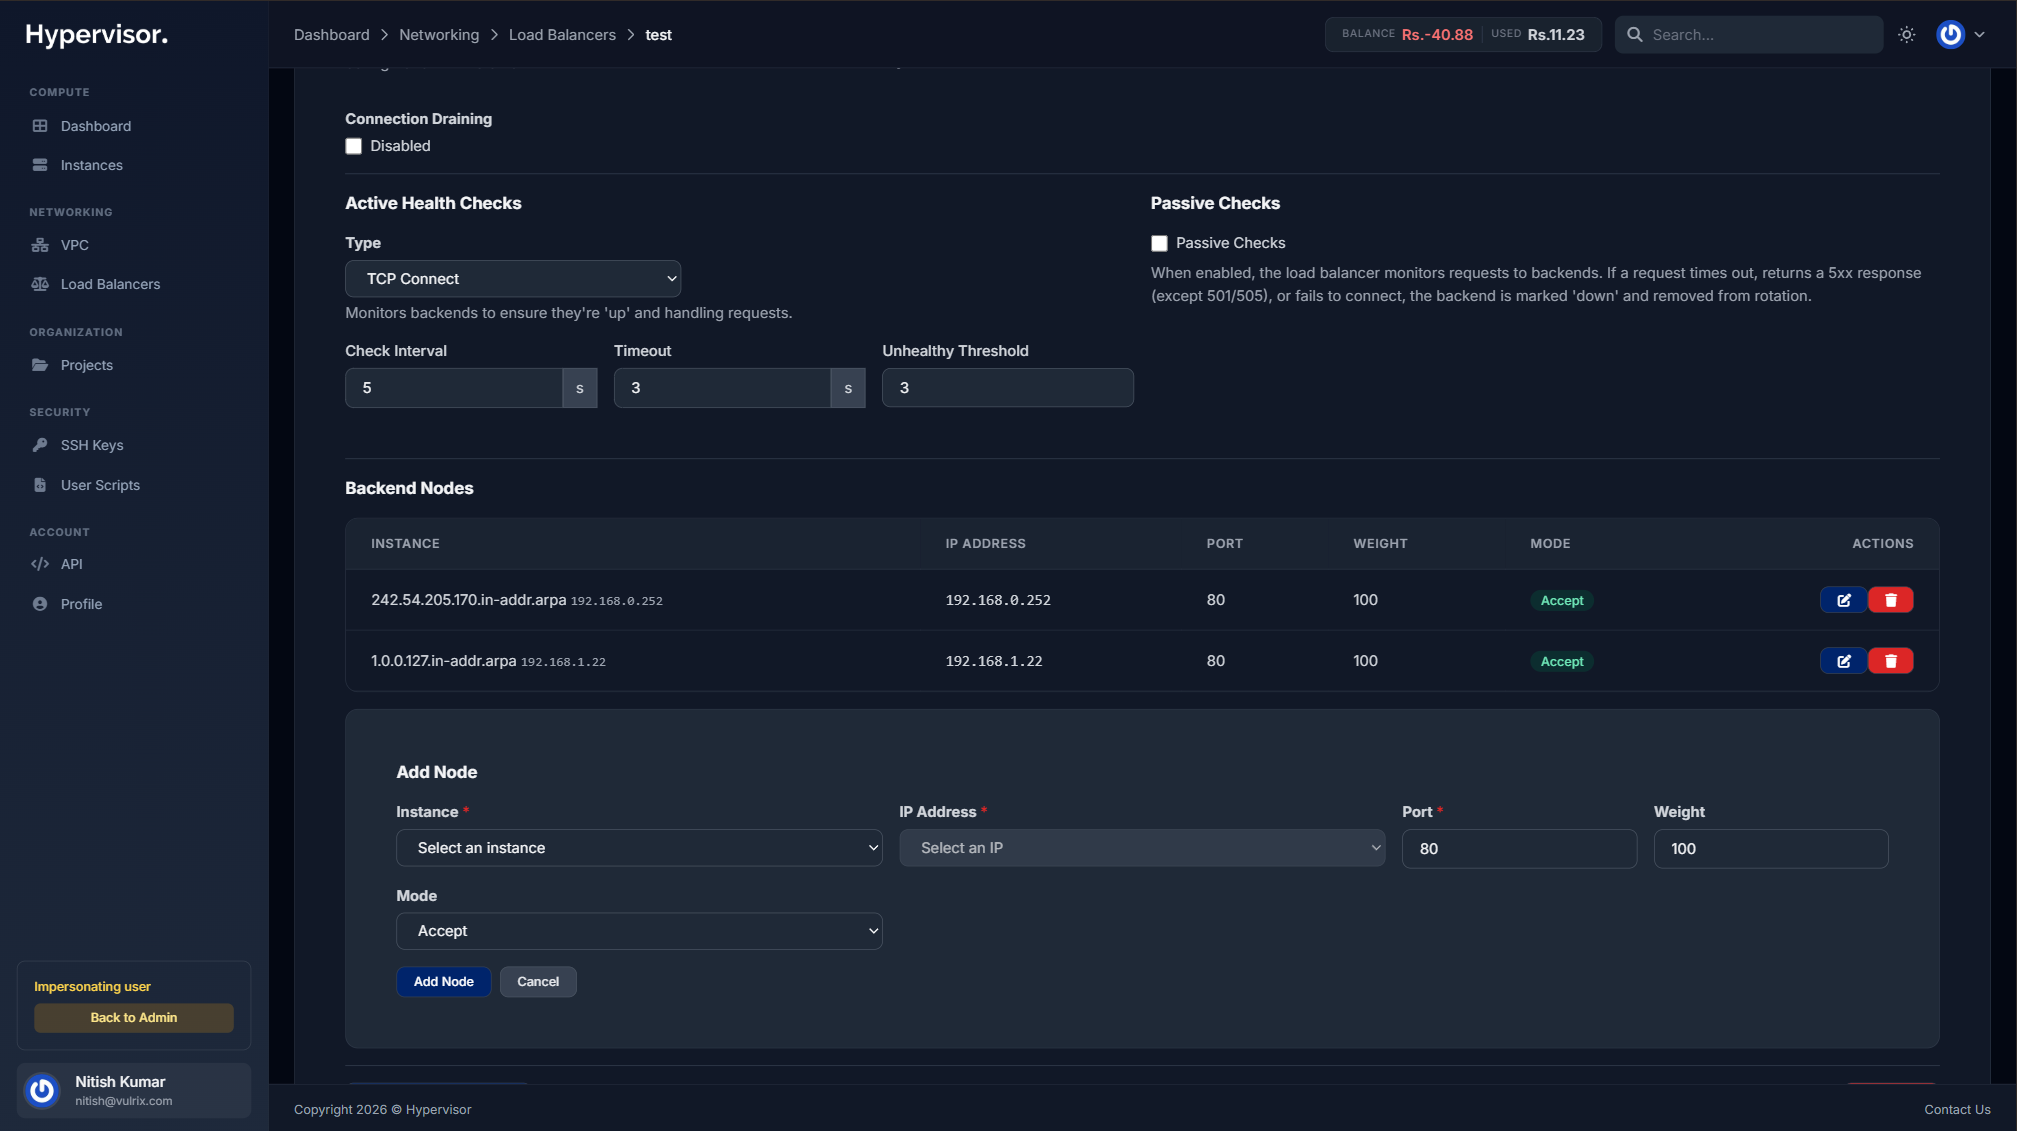
Health checks
Each block supports active and passive health checks.
Active health checks:
- Type.
None,TCP Connect, orHTTP Status. - Check Interval. How often (seconds).
- Timeout. Max wait for a response (seconds).
- Unhealthy Threshold. Consecutive failures before marking the backend as down.
- Check Path. (HTTP only) e.g.
/health. - Check Port. (HTTP only, optional) defaults to the target port.
Passive checks watch real traffic. If a backend times out, returns a 5xx, or refuses a connection, it is automatically marked down.
Backend nodes
A backend node is a target VM that receives traffic for this block.
- Inside the block, click Add Node.
- Fill in:
- Instance. Pick a VM. In VPC mode you can pick VPC VMs; in Public mode you can pick VMs with public IPs.
- IP Address. Auto-filled from the chosen VM, or enter a custom IP.
- Port. The port on the target VM, e.g. 8080.
- Weight. Higher weight means a bigger share of traffic.
- Mode.
Active,Backup, orDrain.
After editing a block, click Save. The load balancer validates the new settings and reloads HAProxy automatically.
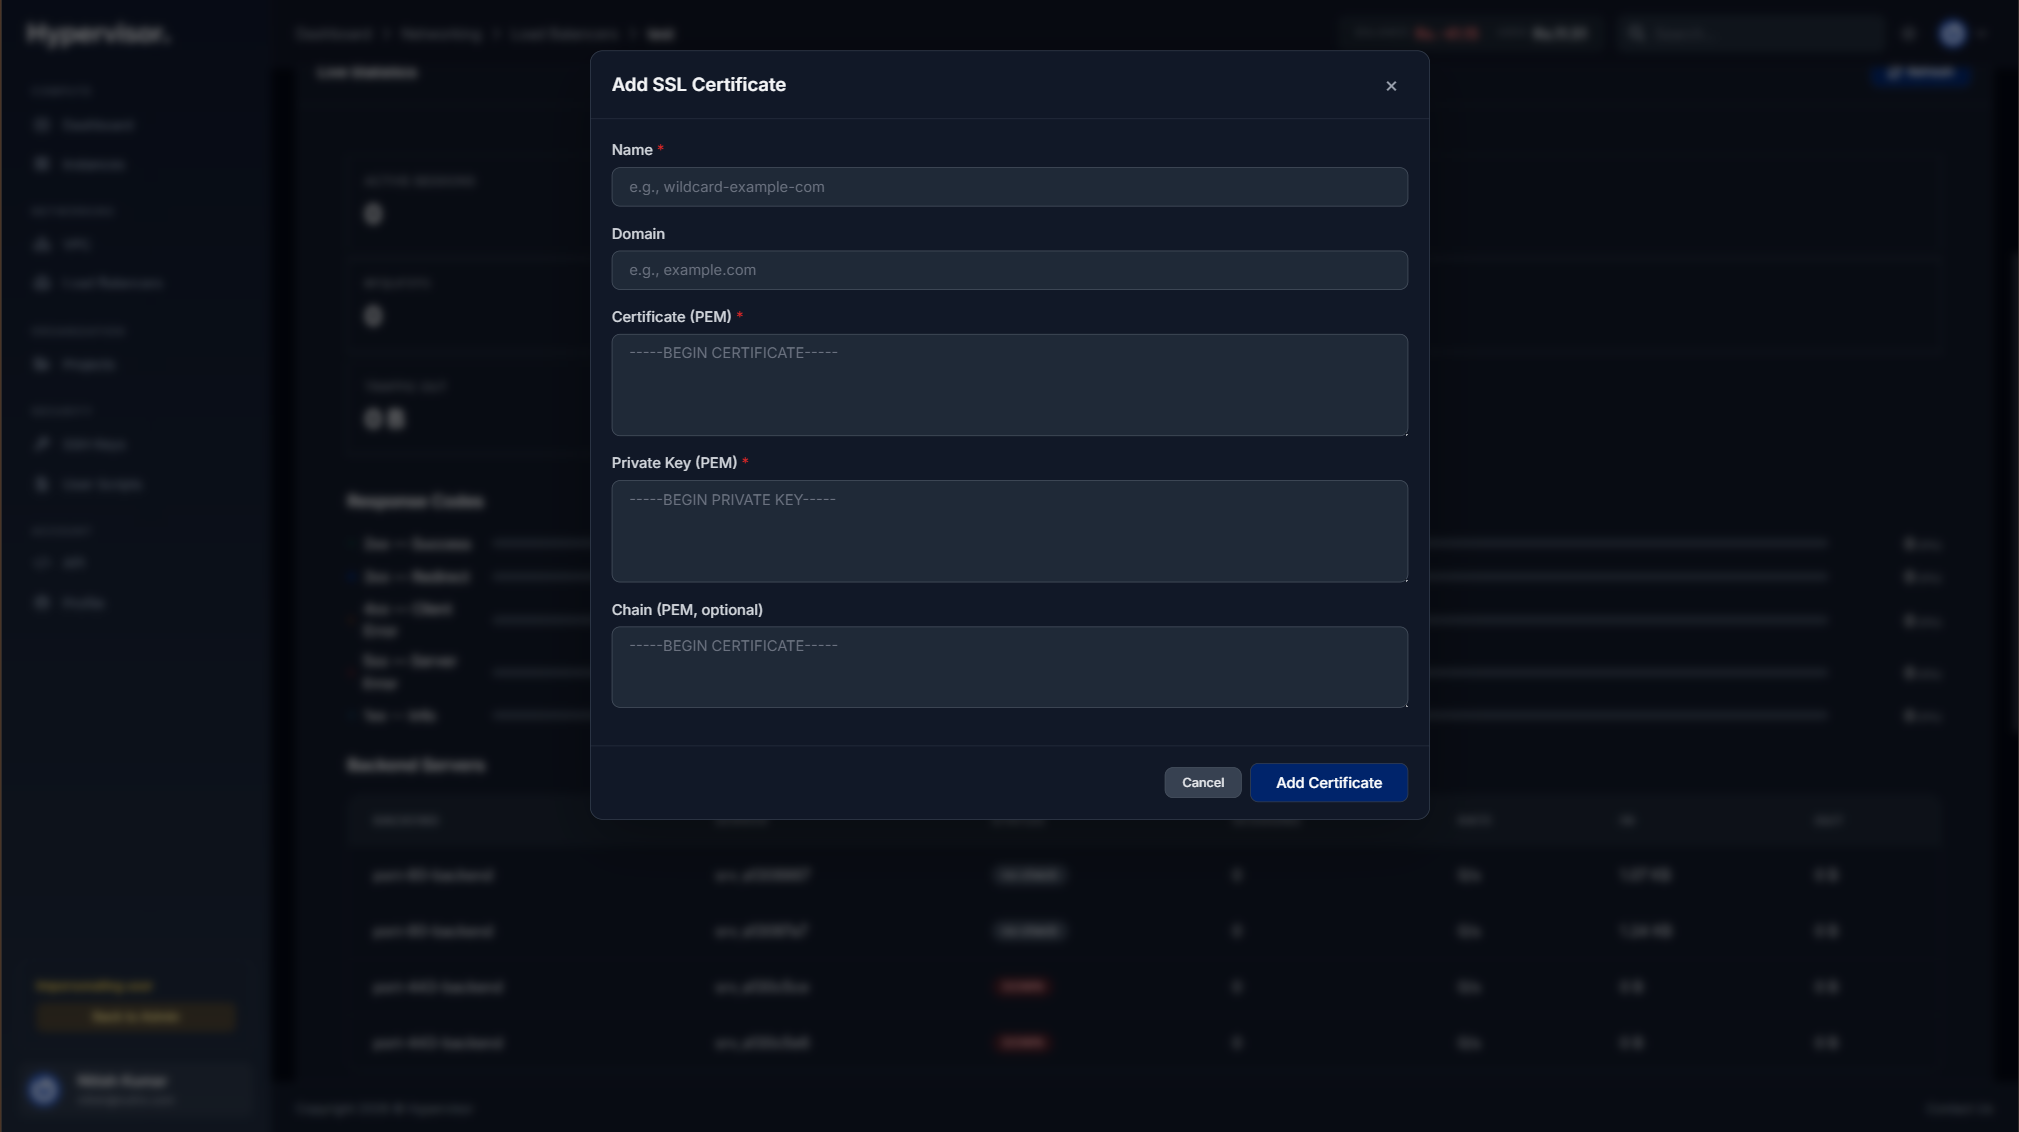
SSL certificates
There are two ways to attach a TLS certificate.
Upload a certificate.
- Open the Certificates section.
- Click Add Certificate and choose Upload Certificate.
- Provide:
- Name. A label for this cert.
- Certificate. The full PEM chain, including intermediates.
- Private Key. The matching private key.
Let's Encrypt auto-SSL.
Let's Encrypt is a free certificate authority. The load balancer can obtain and automatically renew a certificate for your domain. Requirements:
- The LB must have a public IP.
- The domain must resolve to that public IP (an A record, or a CNAME that eventually resolves to it).
Steps:
- Open the Certificates section and click Add Certificate.
- Pick Let's Encrypt.
- Enter one or more domain names, comma-separated, e.g.
example.com, www.example.com. - Click Create.
If DNS already points at the LB, issuance starts immediately. If not, the certificate goes into Pending DNS and the system retries every 5 minutes for up to 24 hours.
Create the A record (or CNAME) before requesting the certificate. The periodic recheck means it will pick up once propagation finishes.
Status badges:
| Status | Meaning |
|---|---|
| Pending DNS (yellow) | Waiting for DNS to point at the LB. Rechecked every 5 minutes. |
| Issuing (blue) | DNS verified, certificate is being issued. |
| Active (green) | Certificate is live and in use. |
| Failed (red) | Issuance failed. Fix DNS and retry. |
| Renewal Pending (orange) | Automatic renewal in progress. |
Let's Encrypt certificates are valid for 90 days. The system renews them within 30 days of expiry and emails on success or failure.
System-managed port 80 frontend.
When you create the first Let's Encrypt certificate, the system creates a port 80 configuration block automatically. It handles two things:
- ACME challenge verification (how Let's Encrypt proves you own the domain).
- Redirecting all other HTTP traffic to HTTPS.
This block shows up with a System Managed badge. It cannot be edited or deleted while any Let's Encrypt certificate is active.
Do not create your own port 80 block while using Let's Encrypt. If you need custom port 80 behaviour, upload a manual certificate instead.
Path-based routing
A configuration block can route requests to different backends based on the hostname and URL path. This is useful for microservice routing, canary releases, and blue/green deployments.
In the Routing Rules section, click Add Routing Rule. Each rule can match on:
- Host only. e.g.
api.example.com. - Path only. Match types:
Path Begins With, e.g./api/v2.Path Equals, e.g./health.Path Regex, e.g./api/v[0-9]+.
- Host + Path. Both conditions must match.
Rules are evaluated top to bottom. The first match wins. If nothing matches, traffic goes to the block's default backend.
Weighted backends inside a rule.
A single rule can split traffic across multiple backends with different weights (1 to 100). This is how you do canary and blue/green:
Canary:
| Backend | Weight | Approx share |
|---|---|---|
| Production v1.0 | 90 | 90% |
| Canary v1.1 | 10 | 10% |
Blue/green:
| Backend | Weight | Approx share |
|---|---|---|
| Blue (current) | 0 | 0% |
| Green (new) | 100 | 100% |
Start with a small weight on the new version (e.g. 5), watch error rates and latency, then ramp up. If something breaks, set the new version to 0 to instantly fail back.
For Kubernetes, you do not configure routing rules in the panel. You declare them in the Service manifest with the traffic-split or routing-rules annotation, and the in-cluster controller provisions the LB with weighted backends. See the Service LoadBalancer annotation reference for the full annotation surface.
Common microservice pattern:
| Rule | Host | Path Match | Backend |
|---|---|---|---|
| 1 | app.example.com | Begins with /api | API servers |
| 2 | app.example.com | Begins with /static | CDN / static servers |
| 3 | app.example.com | (none) | Web app servers |
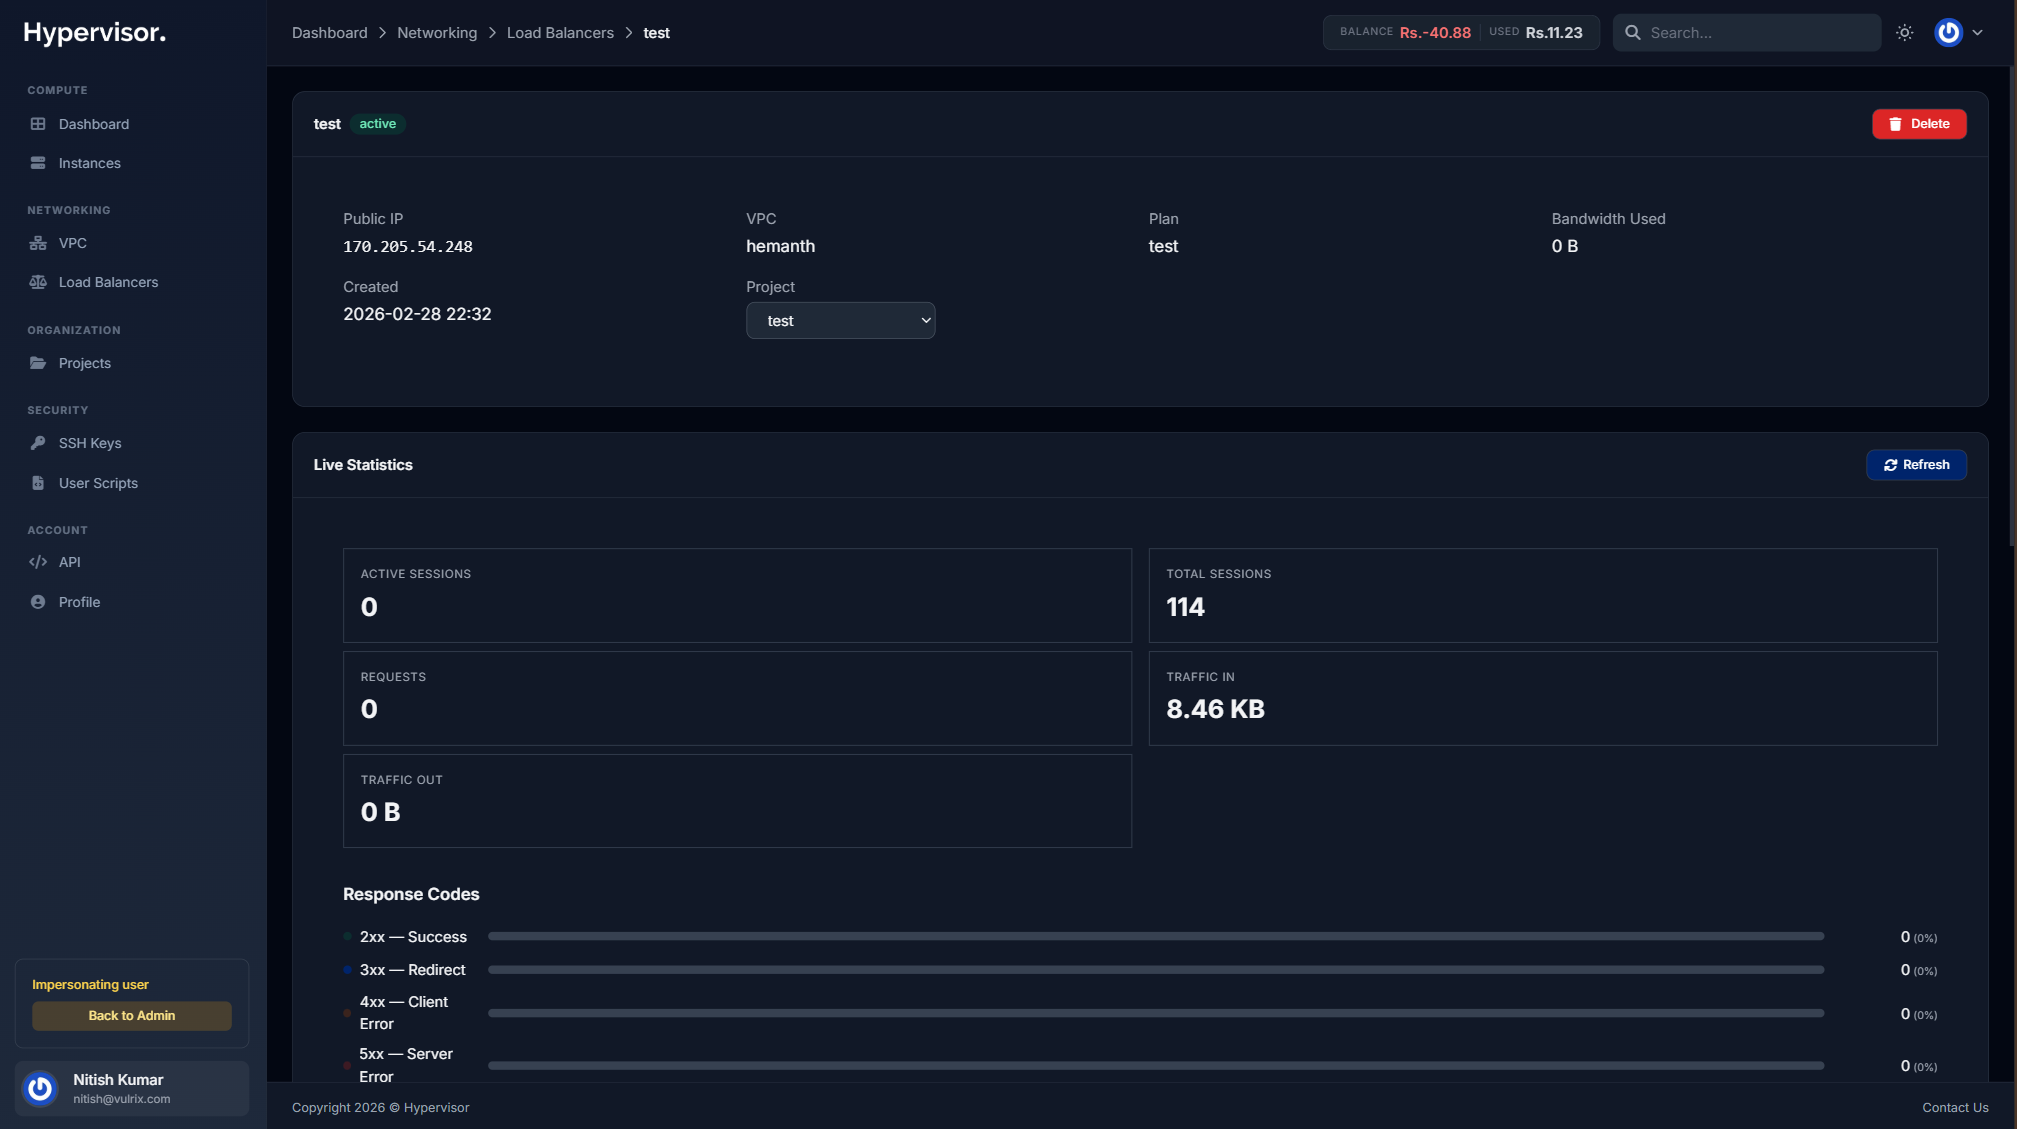
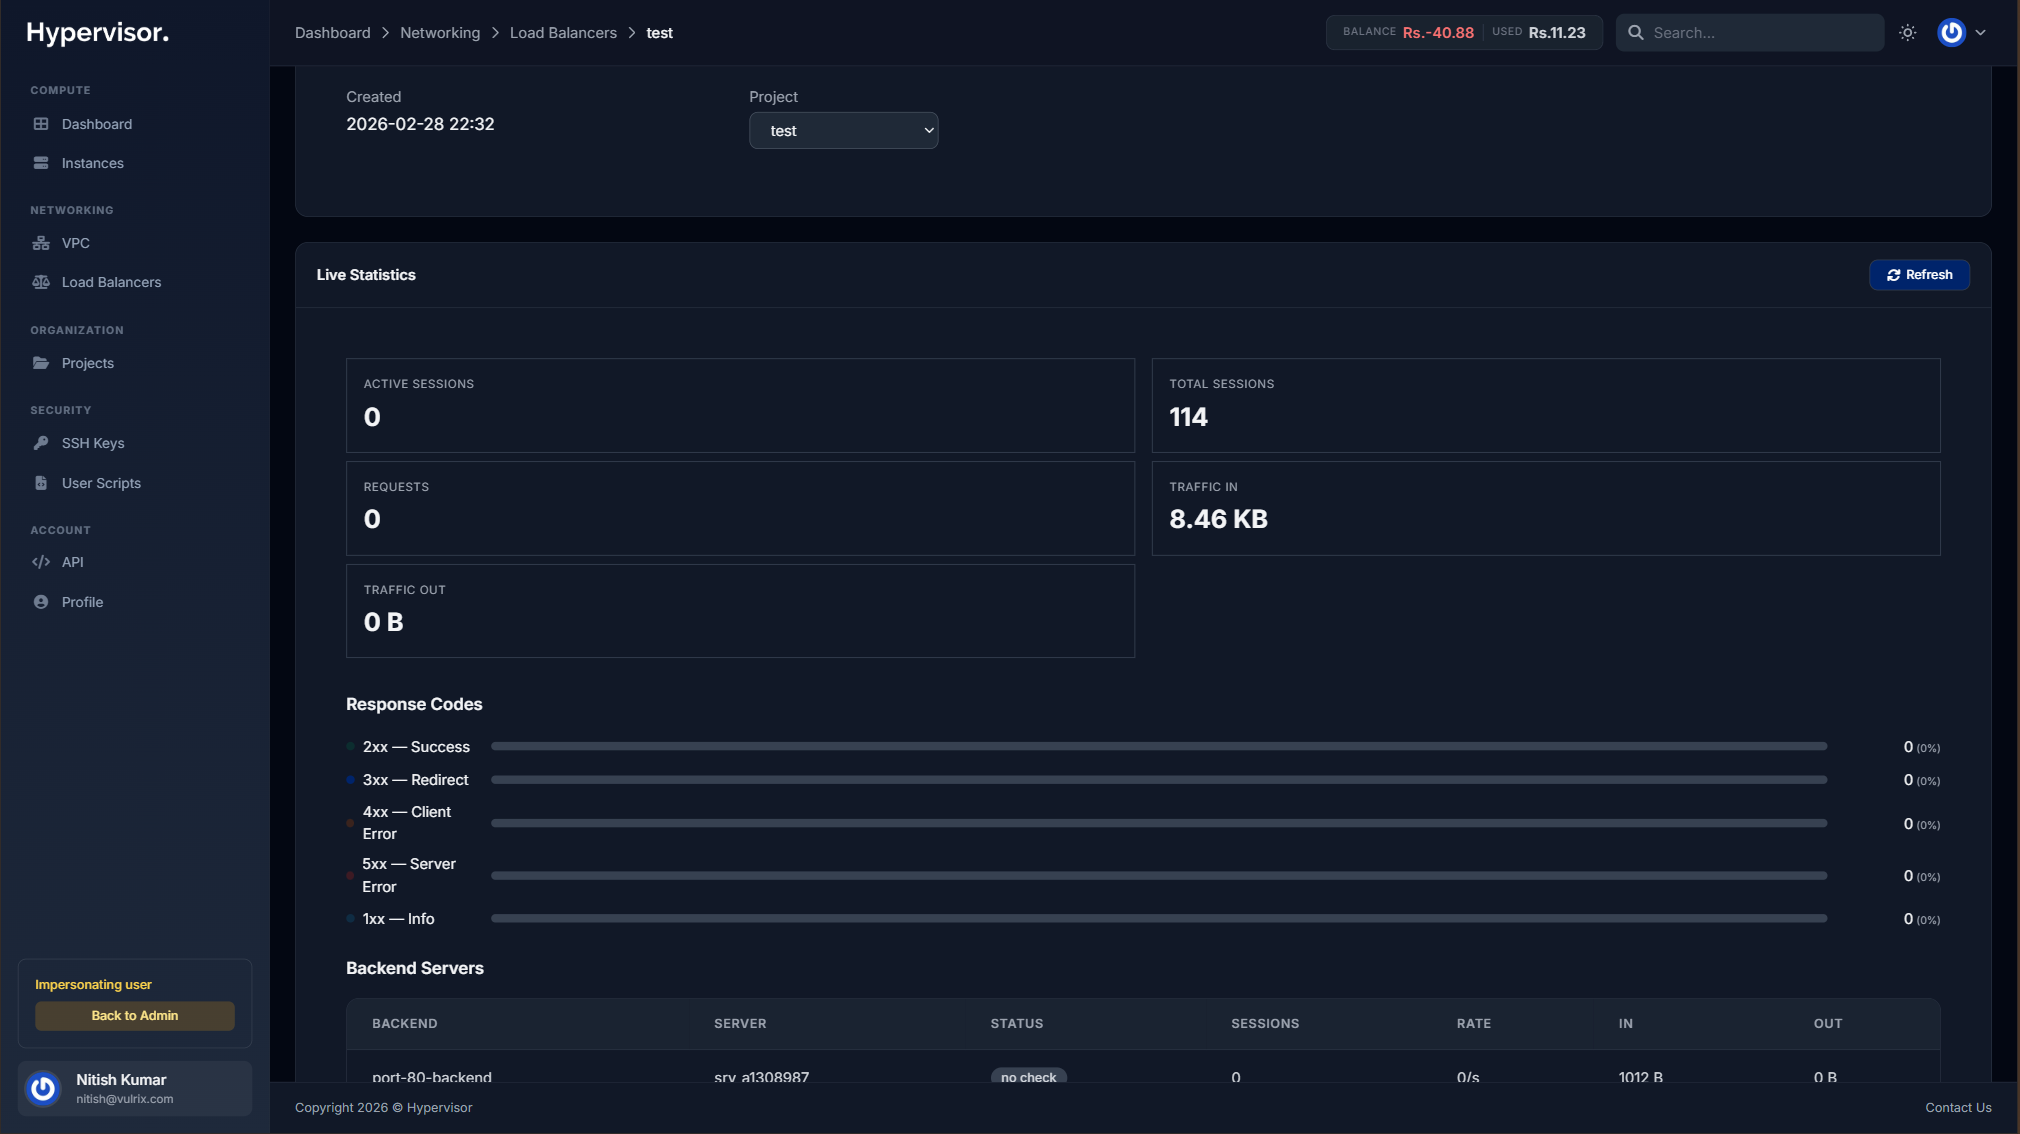
Monitoring
The management page shows real-time stats collected every 30 seconds: session counts per frontend and backend, bytes in and out, backend health, connection rates, error counts.
If the hypervisor group has High Availability enabled, the LB also shows HA heartbeat and HA badge indicators.
When VictoriaMetrics (a time-series metrics database) is configured for the location, additional charts are available: request rate, HTTP response codes (2xx / 4xx / 5xx), throughput, backend response time, healthy backend count, CPU, RAM, disk, and per-interface network. Pick a time window from 1m to 30d.
New load balancers pick up metrics automatically. For LBs created before VictoriaMetrics was enabled in a location, an admin can click Setup Metrics Agent on the LB detail page to install the collector.
Lifecycle actions
From the management page:
- Suspend. Stops the LB. In hourly billing, this stops the meter.
- Resume. Restarts a suspended LB.
- Destroy. Permanently deletes the LB and all its config.
Destroy is permanent. Configuration, certificates, and routing rules are deleted and cannot be recovered.
Troubleshooting
Let's Encrypt cert stuck in "Pending DNS"
DNS is rechecked every 5 minutes.
- Verify the domain has an A record pointing to the LB's public IP.
- Check propagation with
nslookupor an online DNS checker. - Check that no other CNAME records conflict.
- Wait. Propagation can take up to 48 hours with some registrars.
After 24 hours of failure the status changes to Failed. Delete the failed cert and create a new one after fixing DNS.
Let's Encrypt issuance failed
Common causes:
- DNS does not point at the LB.
- Port 80 is blocked, so Let's Encrypt cannot reach the LB for ACME verification.
- You hit a Let's Encrypt rate limit (50 certs per domain per week). Wait and retry.
Let's Encrypt renewal failed
You get an email when renewal fails. The system retries daily. If it keeps failing:
- Confirm DNS still points at the LB.
- Confirm port 80 is reachable.
- Confirm the LB is not suspended.
Renewals start 30 days before expiry, so there is time to fix things before the certificate actually lapses.
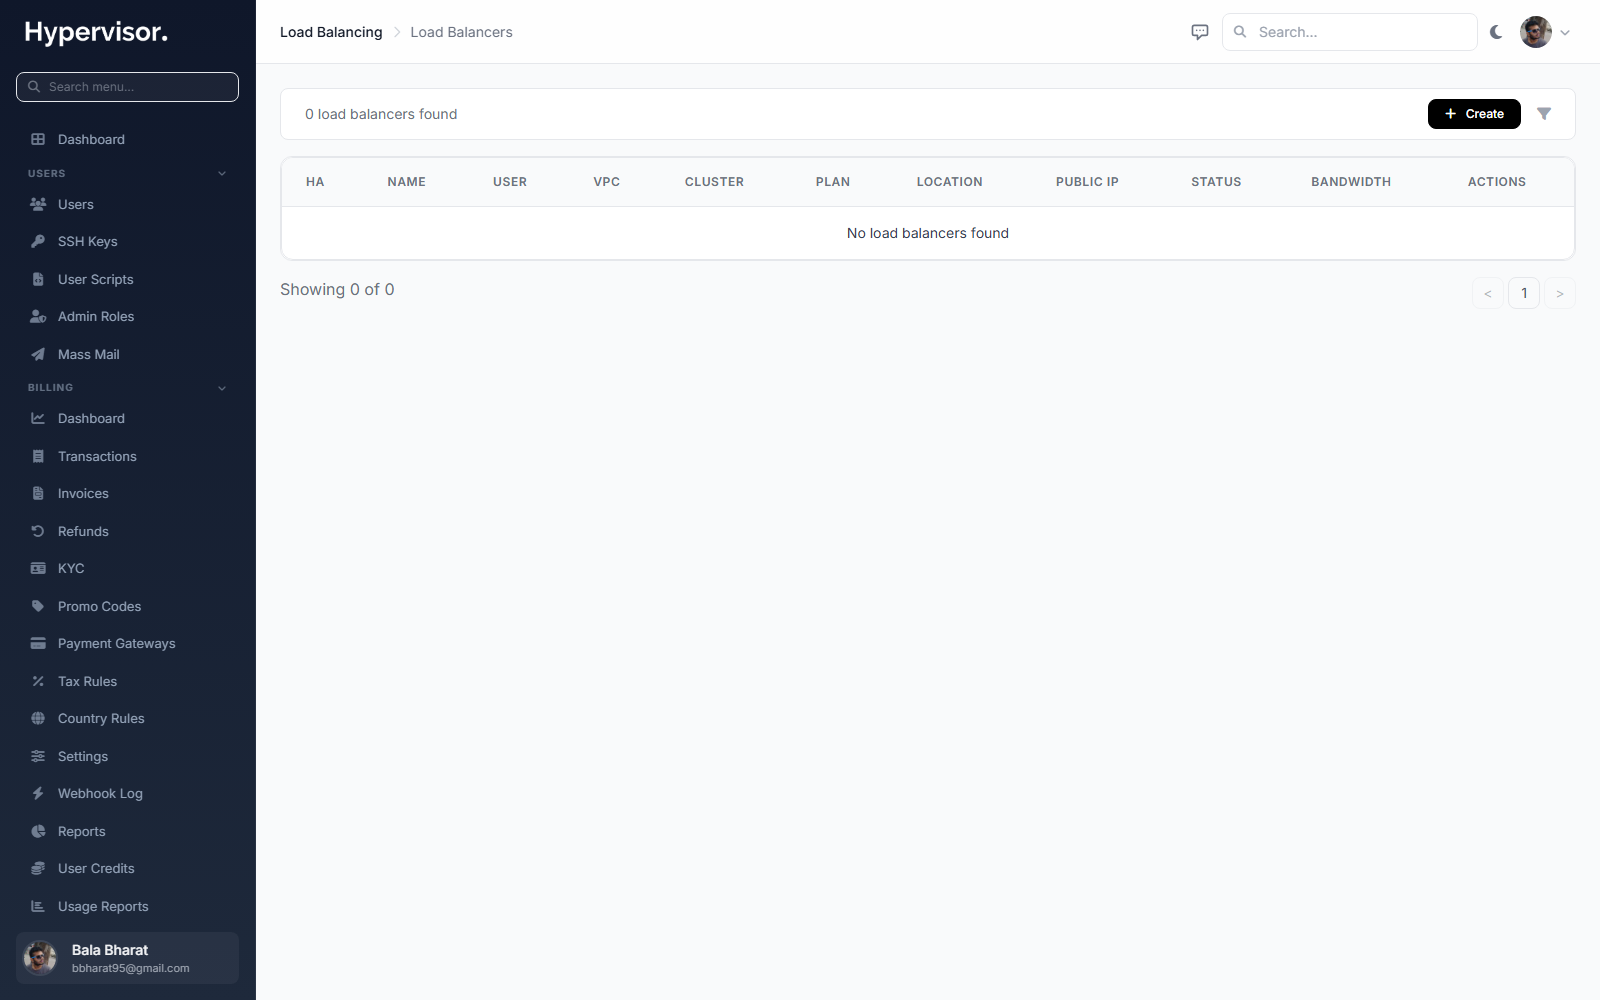
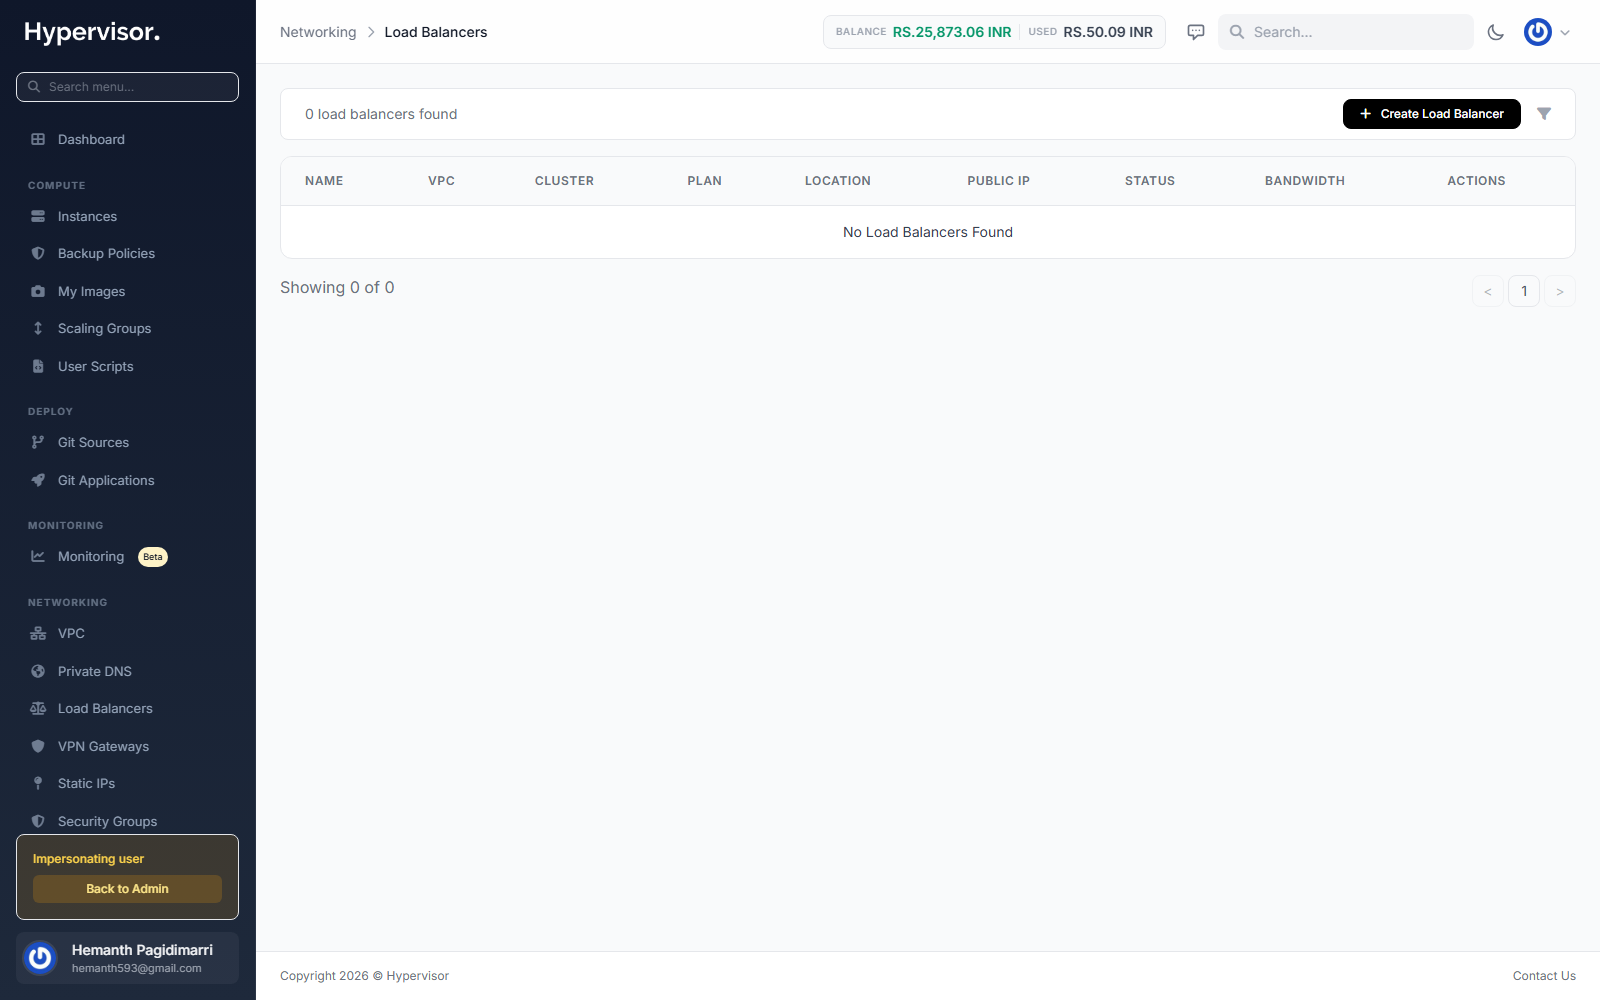
What end users see
Customers manage load balancers from Networking > Load Balancers in the user panel. The list page shows each load balancer with its name, public IP, and status.
The Create flow walks through location and plan, frontends (the listener: protocol, port, optional SSL), backends (which instances receive the traffic), health check, and an optional Let's Encrypt or custom SSL certificate.
Inside a load balancer's detail page the customer can edit frontends and backends, view live health-check status, and renew or replace SSL certificates.